
In my recent article How I Revived A Fifteen-Year-Old Gaming Laptop, I mentioned that my client’s late husband enjoyed buying quality hardware. When I delivered her Sony Vaio back to her, I came away with a couple of tablets to look at. One is an Asus TF700T, which I can’t bring to life because it doesn’t have any USB ports, and the client has lost the charger and cables for its proprietary charging port. The other is a Microsoft Surface Pro 3 with an Intel Atom, 2GB of memory, and 64GB of storage. Again, no cables were available, so I had to improvise.
Charging The Surface Pro 3
Miraculously, the tablet still had a little charge, so I fired it up, and as expected, all passwords had been forgotten, but that wasn’t a problem because I was told that nothing needed backing up. Fortunately, the tablet has a standard USB port and a Micro USB port, so I was able to trickle charge it with a Micro USB cable, of which I have dozens, while I investigated how to reset the tablet. No other cables or chargers were available for the Surface Pro 3.
Resetting Or Recovering The Surface Pro 3
I initially tried to boot the tablet from a pen drive prepared with Windows 10 through Rufus, and I managed to get to the Windows install screen, but with no touch screen drivers installed, this was going nowhere very fast. Duh!! I then did the sensible thing and found the Microsoft page for recovering the device. However, you have to be signed in before going any further.

Once signed in, I then had to input the serial number of the device before proceeding, as if the instructions were top secret!
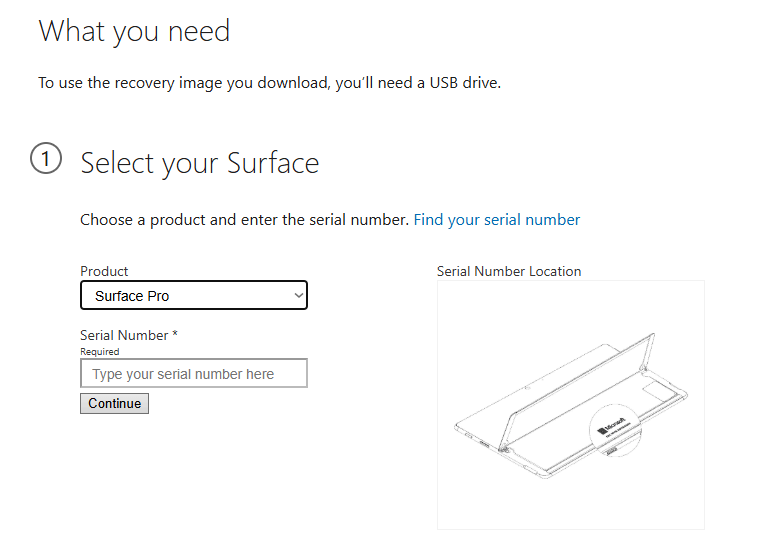
Download Surface Pro 3 Recovery Image
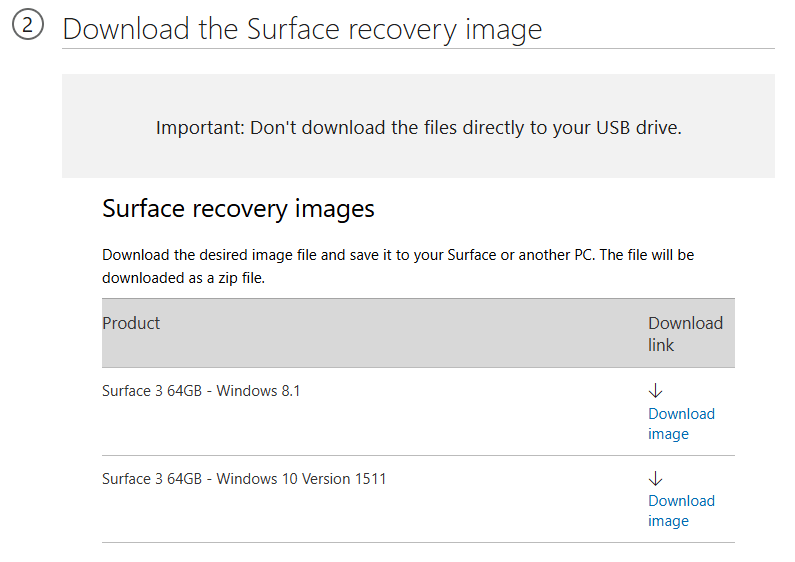
Once I had done this, the download instructions became visible along with the image to download.
What I don’t understand is why the instructions are not visible anyway, so I’ll reproduce them here.
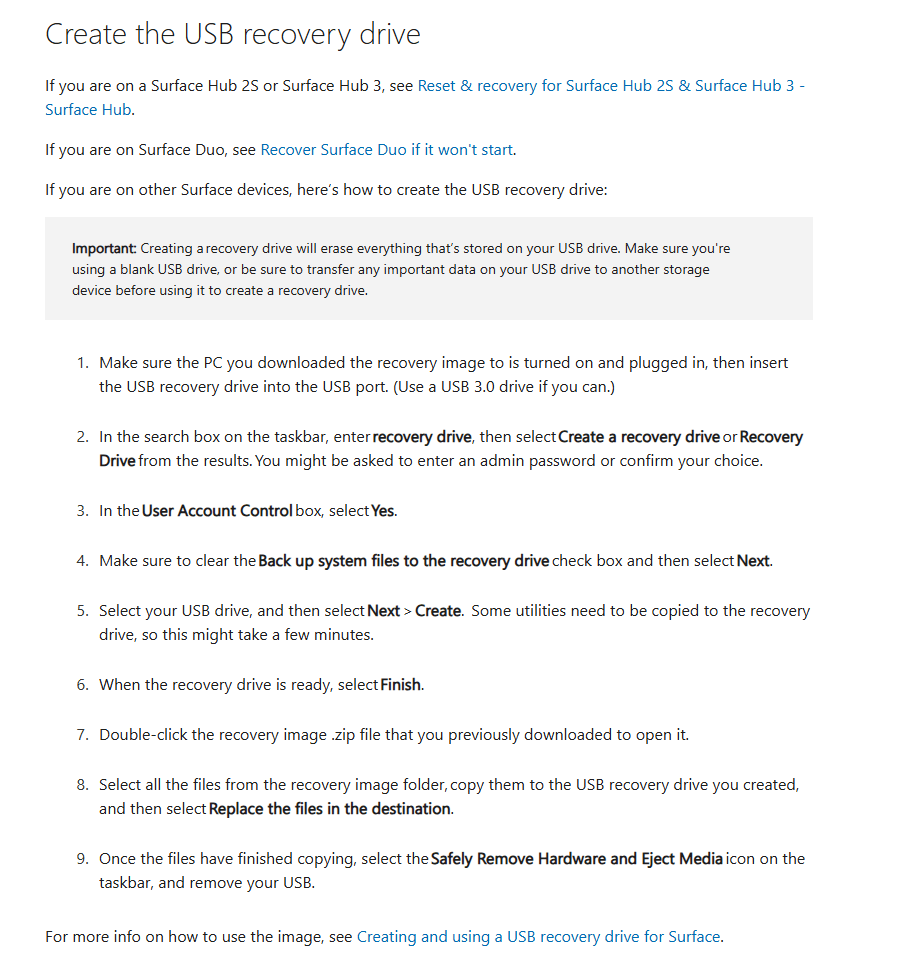
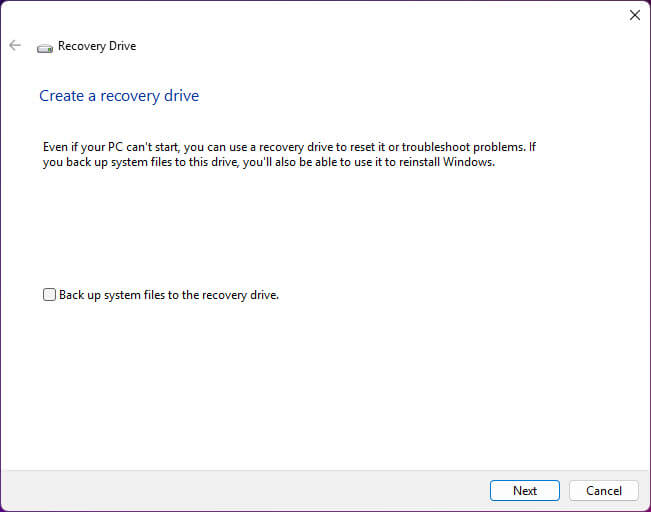
I then followed the instructions to the letter, paying particular attention to Clear Back Up System Files […] on my PC. This is very important!
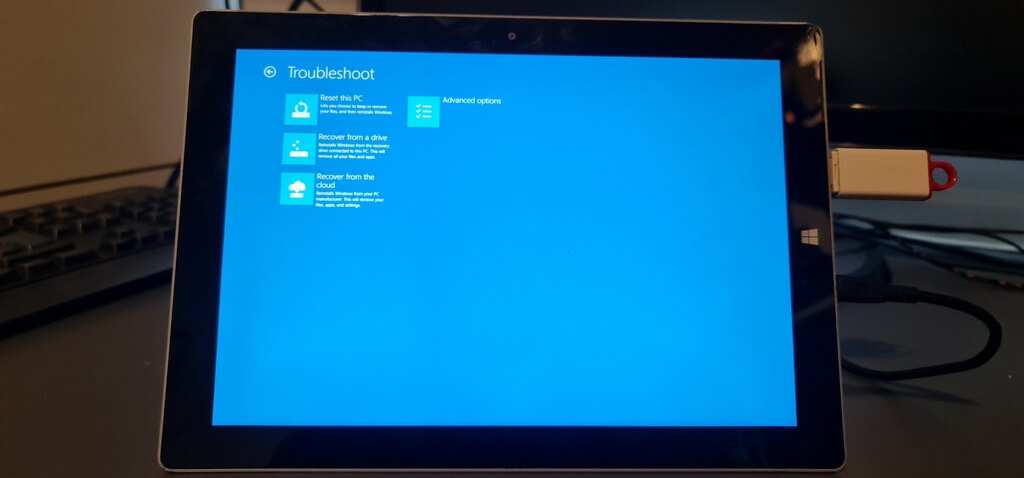
I downloaded the Windows 10 version 1511 image to my PC, copied the files to my Recovery pen drive, and then inserted it into the Surface, ensuring that it was switched off. Then, holding the volume down key, pressing and releasing the power button, I released the volume down key when the Surface logo appeared. I then landed at the recovery screen, which is what you would see in any Windows 10 environment, and with the now functioning touch screen, I hit troubleshooting>recover from a drive.
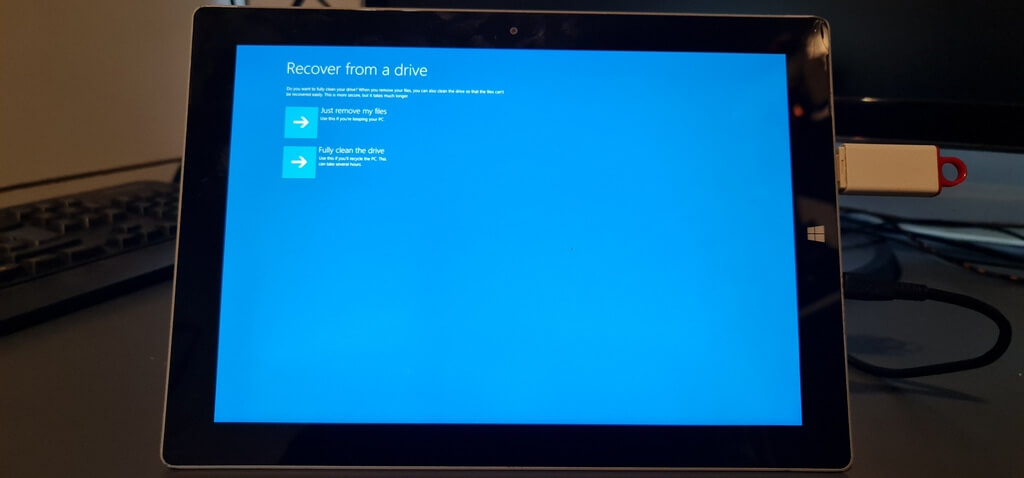
Since the entire process was already taking forever, I then hit just remove my files since cleaning the drive would take several hours.
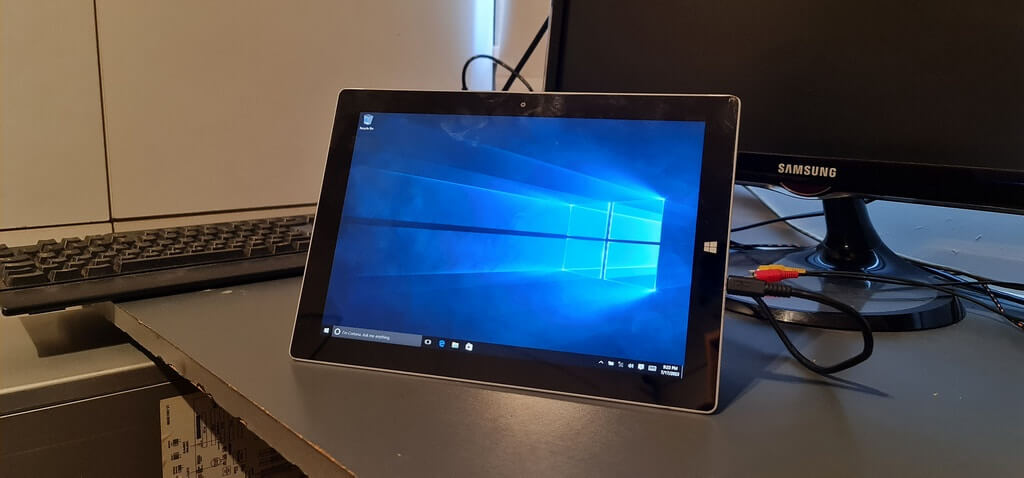
This resets the tablet to a clean Windows 10 installation, so imagine my surprise (not!) when the BSOD arrived shortly after arriving at the desktop, which took over an hour in the first place.
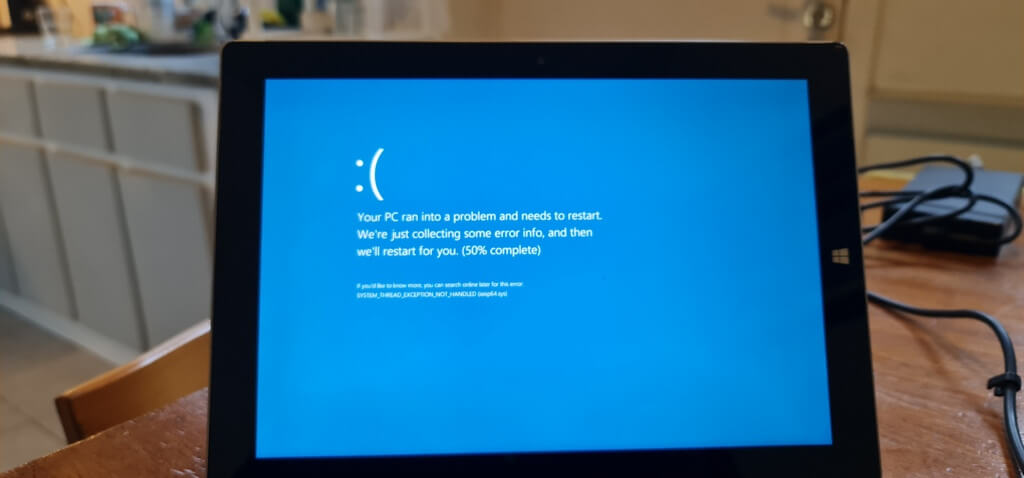
I’m still investigating how to solve the iaisp64.sys BSOD error, which may be Intel related, but frankly, I’ve already spent over five hours on this tablet and will return to it in due course. It’s also worth mentioning that this is yet another example of corporations skimping on hardware specs. This tablet has a mere 2GB of RAM, and even though this is a slimmed-down version of Windows 10 and it was launched over 10 years ago, I’m surprised it runs at all. Heck, my Samsung Galaxy Note 20 Ultra has 8GB of RAM, albeit a much newer piece of kit.
Conclusion
If you’re faced with a similar Microsoft Surface recovery situation, make sure you have plenty of time on your hands and a spare PC!
—