If you are a person who manages a Facebook page then this will be the article for you. As with any page that you manage, you upload many images. Those photos can be managed, from creating Albums to removing them altogether. I admit I do not do a good enough job managing the photos on my own page. That ends today – I want to show you how you can organize and manage these photos/images on your page. This will help me, and hopefully you, to make it more searchable by the fans of your business. As always, before we move forward, make sure to check out my other articles about Facebook:
- How To Follow Sellers On Facebook Marketplace
- How To Leave A Facebook Group
- How To Mute Facebook Stories
- How To Download Your Facebook Video
- How To Turn Off Facebook App Sounds Update
- How To Create Facebook Ad Audience
Now that is out of the way, so let’s start learning how to get organized. I will give you the highlights of this section since there is a lot you can do.
How To Manage Photos On Facebook Page
This will be shown on my Windows 10 PC laptop on Facebook.com.
Step 1: Go to Facebook and log in to your account. Make sure this account is the one that is the Admin of the FB Page you want to change.
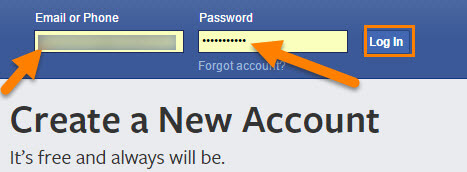
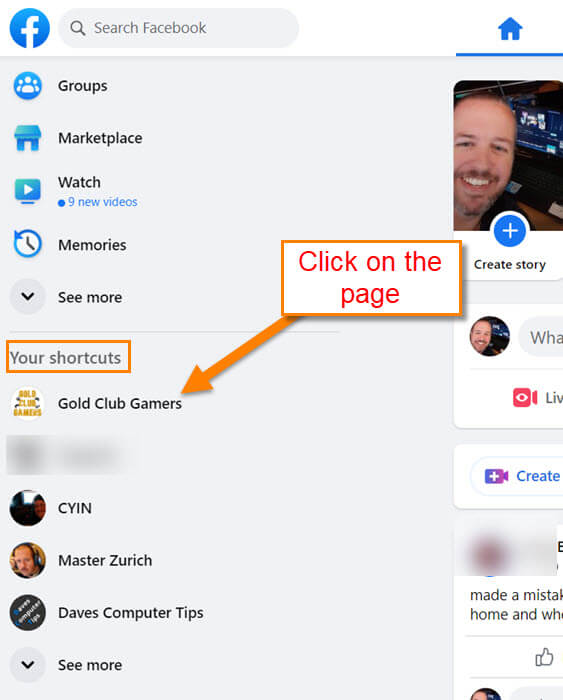
Step 2: After you are logged in, head to the correct page. To check the page, look to the left of the home screen under Your Shortcuts to see the accounts you manage. Click on the page. If you don’t see it, click the See more option at the bottom to find the page. Make sure you are acting as the Page profile or you will not get the options you need.
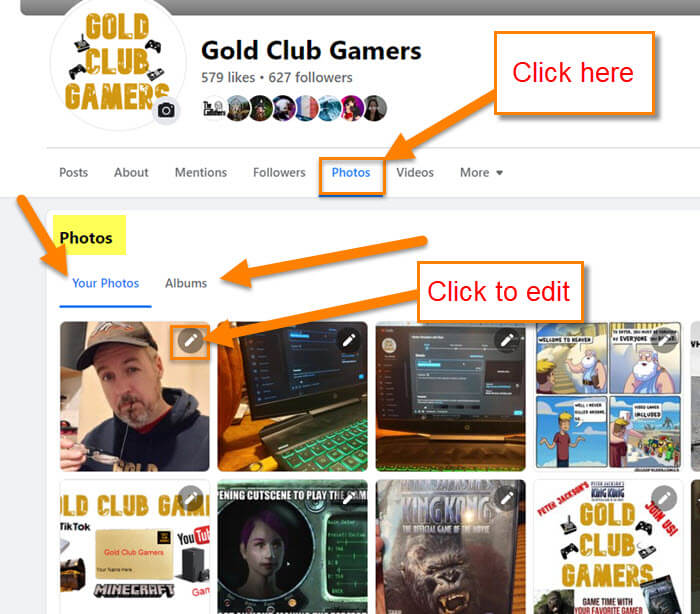
Step 3: Now that you are on the page where you want to manage the photos/images, look to the top tabs. These are under the main banner of your page. Tap on the Photos tab. Once on the Photos screen, you have some choices:
- Your Photos (This is the first tab you will be on when arriving here)
- Albums (This link is to the right on Your Photos tab)
- Add photos/videos (this is found on the Right side of the screen. See the second image below)
- See Photos Hidden from Timeline
The two we will focus on here are the Your Photos and Albums tabs. Let us click on the Albums tab first.

Step 4: On the Albums screen, you will see any Albums that have already been created. You can click on the album you want to view and see what is inside. They even offer a way to create a new one by clicking the Create album option on the screen. You can try that but I found another way to do the same thing from the main screen. That is the one I will be showing you in this article. Head back to the Your Photos tab.

Step 5: Now that we are back on the main photos tab, every picture has an edit pencil in the top right corner. Click on one of the edit options. This will bring up a menu with many choices (this will vary a little in some cases):
- Change Alt Text (This shows up when the image can not be shown)
- Edit Location (Add a location of where the photo is from – for example, City or State)
- Deleted Photo (Remove photo)
- Edit Date (Changes where it shows up on your timeline)
- Download (Download to your device)
- Make Profile picture
- Make Album Cover
- Move to another Album (you may not see this option. If not, choose another photo further down the timeline and click edit again)
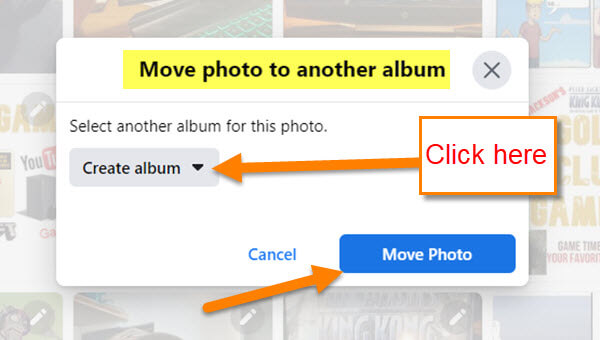
First, I want to show you how an Album can be created from here. Click on Move to another Album.

Step 6: That will bring up this window. Click on the down arrow to the right of Create album. You should see all the other Albums you have and a plus sign to create a new one. Click it.
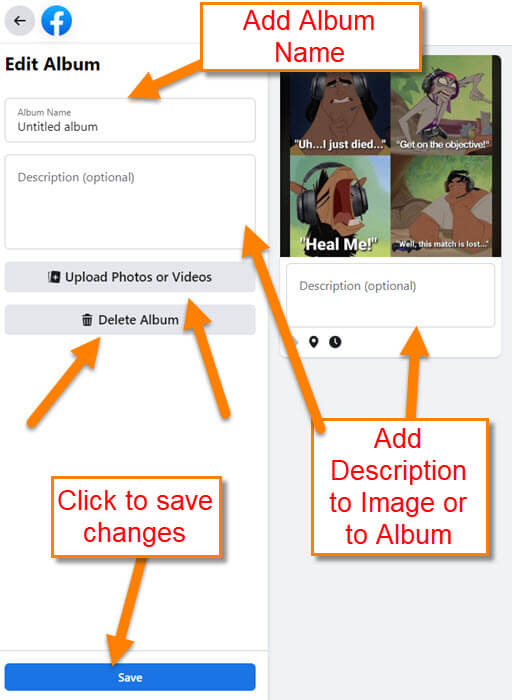
Step 7: The Edit Album screen will appear. You can do a few things in this area:
- Album Name (Add a cool name here)
- Description
- Upload Photos or Videos
- Deleted Album
- Even have a way to add a description to the images
Once you are all done here, click the Save button at the bottom. You have now created an album.
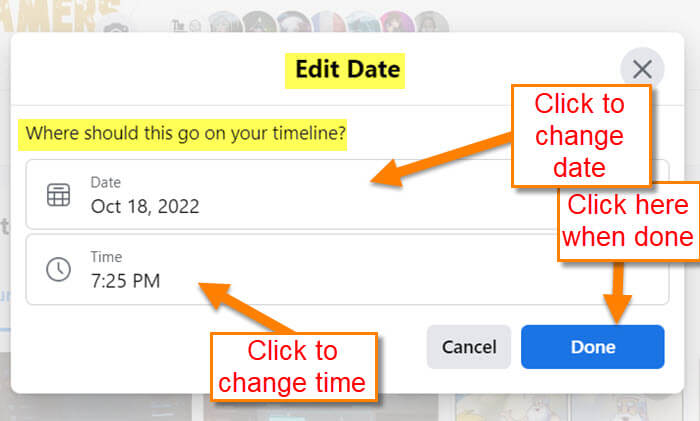
Step 8: One last highlight I want to show you, how to do is Edit Date. Go back to the menu option from the photo you want to work with and click on the Edit Date option. You will get a window offering to change where this appears on your Timeline by changing the date. Doing this will move the photos/images around on the timeline. This is a great way to sort and move the picture around on your page.
There are many other features you can mess with but this will get you moving in the right direction. Now you know how to Delete a photo by creating an album to organize these photos.
—
I don’t have to much problem managing photos on FB, but I would like to see if there is some way I could update my Book/Reading section in my profile. I see lots of pages and screwtube vids that all say the same thing and MY books section is totally locked. I assume it is because I am so controversial and they desire to silence me.
Recovery account login two-factor authentication code stop not have my old phones or mobile number