
A lot of folks are afraid of fields and would rather use old methods of doing things instead of familiarizing themselves with the lovely Fields in Word. I love fields and now I am going to spread the love so that you, dear readers, will learn to love them as well when you see how handy they are and how they make your work so much easier.
Field codes are very useful as placeholders for data that may change in your document. You can use them to automate some aspects of your document as well.
Field codes are inserted for you when you use Word features such as page numbers or a TOC (Table of Contents). Bet you didn’t realize that, did you? You can, though, insert field codes manually for many other tasks such as calculations or document content from a database.
The steps below will work for inserting any field code in Word. See this list of field codes and their detailed information.
Inserting A Field
Follow the steps below to learn how to insert a field:
- Click in your document where you would like to insert a field.
- Click Insert | Quick Parts | Field.
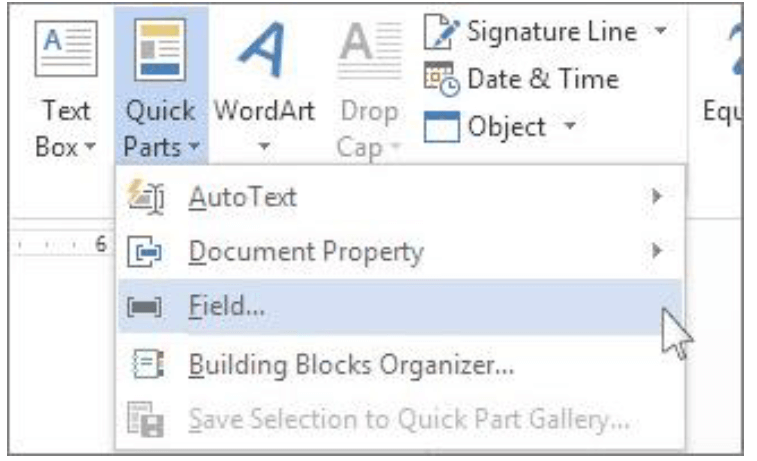
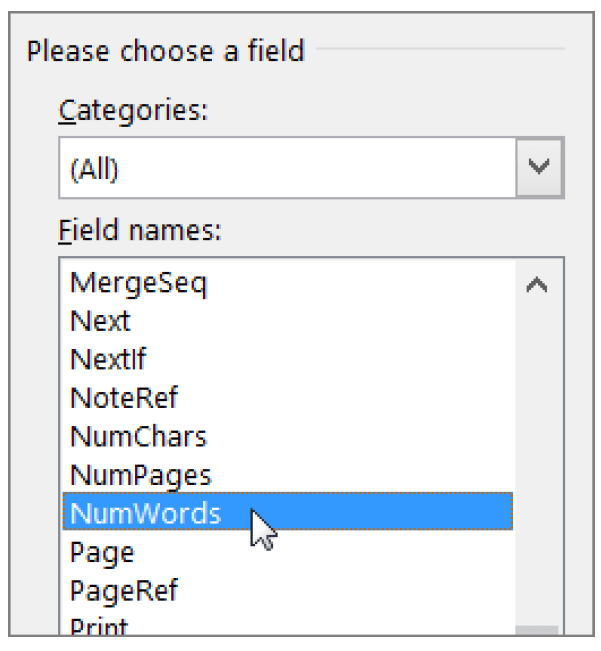
- In the Field names area, select a field.
- You can filter this list by clicking the down arrow in the Categories list.
- Under Field properties, select the properties or options you would like and click OK.
If you would like to see the codes for a particular field:
- In the Field box, select Field Codes. For some fields, you will find this button is by default, selected.
- If you would like to next a field within another field, insert your first field as above. Then place your cursor inside the field code where you would like to insert the next field and repeat Steps 2- 4 above.
Editing A Field
Moving on to editing a field:
Right-click in your field and click Edit Field.
Change your field properties and options as you like. This is where the link above can be helpful if you want to see the properties and options for a particular field.
For some fields, you need to display the field code to edit your field. Simply press Alt + F9 to accomplish this.
Also, some of your fields are edited in their own dialog box rather than in the Field dialog box (i.e., if you right-click a hyperlink and then click Edit Hyperlink, the Edit Hyperlink dialog will open).
Field Code Syntax
Now let’s discuss field code syntax, shall we?
I could almost hear you groan when you read that, but I find that if you know the background, purpose, etc., of something, the more you understand it and are more willing to use it. So on we go!
Press ALT + F9 to toggle between viewing a field code and viewing field results in your document. When you view a field code, your syntax will look like this:
{ FIELD NAME Properties Optional switches}
- FIELD NAME – This is the name that appears in the list of field names in the Field dialog box
- Instructions – These are any instructions or variables that are used in a particular field. Not all fields have instructions. In the Field dialog box, these are listed as Field properties
- Field-specific switches – These are settings that can be turned off and on for a particular field. Not all fields have switches. In the Field dialog box, these are listed as Field options
- General switches – These are settings that govern the format of the field results (i.e., capitalization of text and date/time format). In the Field dialog box, these are listed as Format choices
Caveat: Since Field codes can be visible to anyone perusing your document, be certain that the information you put in your Field codes is not sensitive information that should not be viewed by just anyone.
To display field codes, or not??
Word displays the field results by default with the content of your document such that anyone reading the document is unaware that part of the content is in a field. Fields, however, can also be displayed with a shaded background, so that they are more visible in your document.
To learn how this works, follow the steps below:
- Click File |Options. In version 2007, click Microsoft Office Button | Word Options.
- Click Advanced.
- Under Show document content, in the Field shading list, do one of the following:
-
- To make fields stand out from the rest of your document content, select Always
- To make fields blend in with your document content, select Never
- To make users aware that they have clicked in a field, select When selected
When your field option is set to When selected, your field displays a gray background when you click within the field. The gray shading, however, does not indicate that the field is selected. When you select the field by double-clicking or dragging your mouse, highlighting that, indicates selection is added to the gray shading.
Ok, now here is the part for all you control freaks out there!
Word, by default, automatically updates fields when your document is opened. In this manner, the information stays updated. There are instances, though, where you may not want this to occur. For instance, you may want the date in your header to reflect a particular date rather than updating automatically to the current date every time you open your document.
Fields also can be updated by right-clicking a field and clicking Update Field or by clicking in a field and pressing F9.
If you would like to manually update all the fields in the main body of your document, press CTRL + A |F9. Fields in headers, footers, or text boxes must be updated separately. Click within your header, footer, or text box and press CTRL + A | F9.
You can lock fields to prevent automatic or inadvertent updating.
Follow the steps below to learn how.
- To lock a field so that field results are not updated, click your field and then press CTRL + F11
- To unlock your field so that field results can be updated, click your field and then press CTRL +Shift+F11
The Lock Result (\!) field switch prevents a field that is included in the result of a BOOKMARK, INCLUDETEXT, or REF field from being updated unless the field result in the original location has changed. Without this switch, Word will update fields that are included in a field result whenever the BOOKMARK, INCLUDETEXT, or REF field is updated.
So now that you know all these tasty little tidbits about fields, go forth and use them. I am certain you will be glad you did.
—
There’s only one Field I’ve ever used, but it’s a favorite.
Let’s say I’ve made a simple checklist for keeping up with air conditioner maintenance. By the time the form is completed, almost a year has gone by and I’ve forgotten, looking at the paper copy kept with the spare filters, where the form is to print out a new copy.
Wait! The path to the form is printed at the bottom of the page, because I used Fields to put it there. On my current form, it looks like this:
c:\users\steve\documents\house and home\home 1303 magellan\air conditioner and heater\ac record of maintenance.docx
But it’s not necessary to type that all out.
Insert > Quick Parts (under Text) > Field > FileName (under Field names) > lowercase (or whatever you like) > and check the box “Add path to filename.”
Neat, huh?
Even neater would be to create a macro that included all those steps, but the time that would take to figure out would be more than individual clicks.
Yes, very neat! Are you sure it would take a lot of time to figure out? I’m not so sure of that. I will cover that in a future post. I will definitely be looking into this for you. Thank you for your comment and take care.