
At my work, I acquire new eBook titles for our website. When doing this, we receive the eBooks in three formats: Epub, Mobi (Kindle), and PDF. The PDF format can sometimes be a very large file. This has to do with either the company I’m getting it from or someone that does not know how to reduce the file size, or as we call it, “Compress/Optimize” the PDF file for easier download. With that being said, I wanted to show all of you how you can “Compress/Optimize” those large PDF files to make them easier to share. It does not have to be an eBook– it could even be homework, a contract, or anything else you have that is saved as a PDF. Now get ready to learn something useful.
How To Compress/Optimize A PDF File
I will be showing how to do these in two different ways: One way will be using Adobe Acrobat 9.0 Pro and second, with PDF Converter, a free online Compress/Optimization website.
How To Optimize With Adobe Acrobat 9.0 Pro
![]()
Step 1: First open Adobe Acrobat Pro. Once in, head up to the top left and click on File, then Open. Find the PDF file you want to optimize and open it.


Step 2: Once it is open, head to the top of the screen and find the Advanced tab. Click it.

Step 3: From here, look for PDF Optimizer. Click it.

Step 4: Here is the screen where you can set up how it Optimizes/compresses the PDF file. My settings are custom since I need to make the images a little smaller. So I leave mine this way but you can use the Standard/Default setting. These are the settings I leave mine on and they come out great. You will need to mess around with this and do some test Optimizations to see what results you get. The best thing to test first is the default settings since it should work well without adjustments. There are two parts I do want to go over with you.
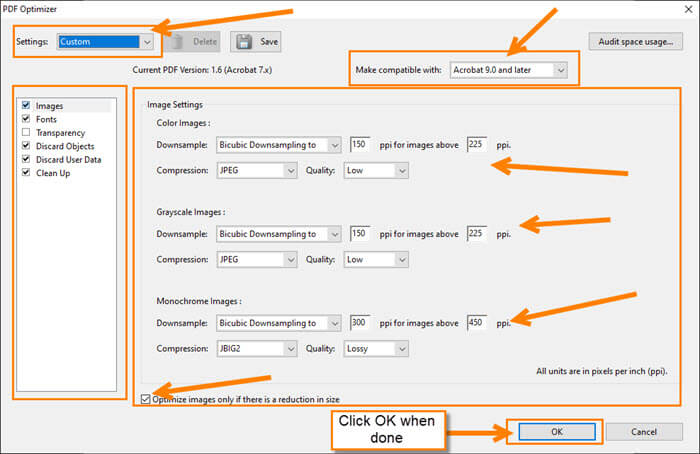
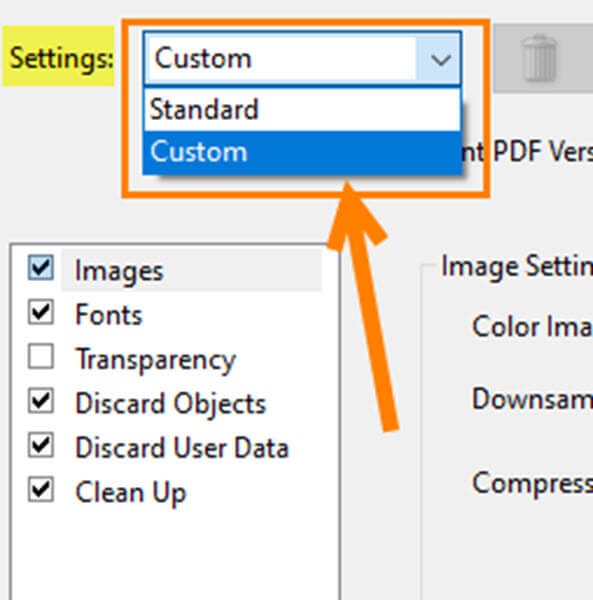
Step 4.1: The first one is how to set it as a standard or custom job. At the top left, you can change this by clicking the Down arrow next to settings. Choose between Custom and Standard.
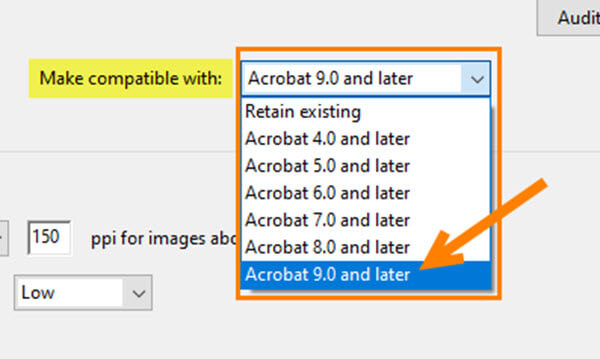
Step 4.2: Last is to make sure to set the ”Make compatible with:” option. On this, I recommend choosing the highest version so that way if you use an older program, it still can be used.
Step 5. After we are done checking over the setting it is time to click OK. Now it will ask where you want to save the optimized PDF and what to name it. Choose the folder, name the file, and click save. DONE!

Here you can see how much the PDF was shrunk (optimized).

Now that you know how to do this in Adobe Acrobat Pro 9, it’s time to show you how you can do this online without buying expensive software. I checked out a few and wanted to highlight this one since it was quick and easy– Free PDF Convert.
How To Compress/Optimize A PDF File Online
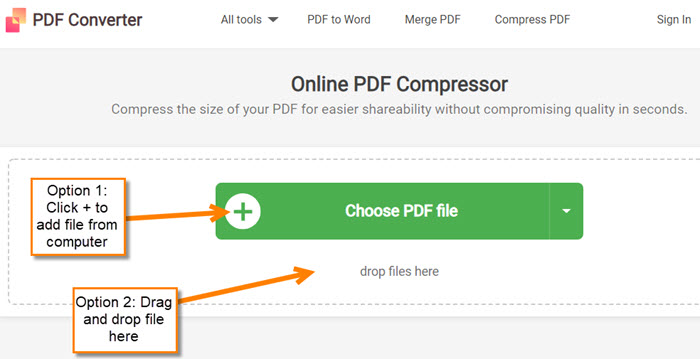
This one is called Free PDF Convert and is pretty straightforward on how to use it.
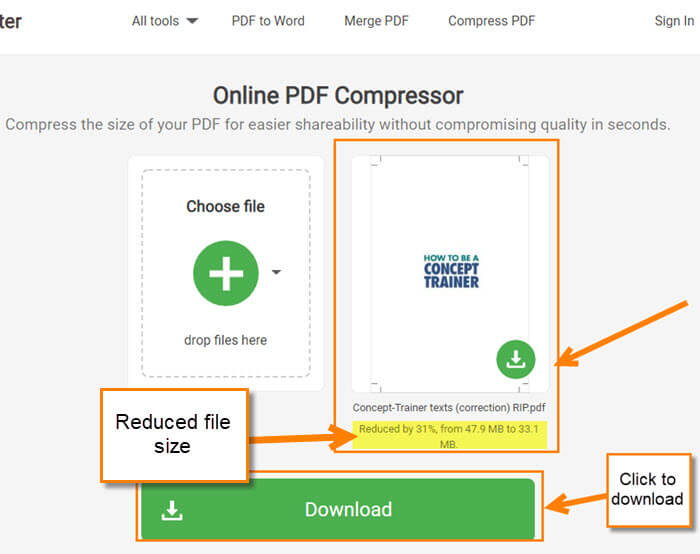
Step 1: Head on over to their website Freepdfconvert.com. Next, you can either drag-and-drop the PDF file or click the + (plus) sign to search for it on your computer. Either way, upload the PDF file.
Step 2: Once it is done optimizing the PDF file, you will be able to download it. As you can see, it did reduce the size of the file by 31%. Not as good as the Adobe software but good enough.
That is how easy it can be to Compress/Optimize those PDF files. Either on Adobe Acrobat 9.0 Pro or online for free.
Bonus website: This one was brought up to me by one of our wonderful readers. It is called PDF24 and is a really great free PDF tool which also does compression/optimization.
—
I use this site Jason: https://pdfcompressor.com/
Does a great job compressing and also includes conversion options.