
Last week, we covered how you could stop your phone from listening to you. If you missed that, you can find that here:
How To Stop Phone From Listening
We are sticking with the series covering our mobile devices. This week, I wanted to cover something that will help speed up the internet on your phone. Yes, you can tweak some options on your mobile device that could help speed up the internet. With some research, I found out how to do this and wanted to share this with all of you. Before we start the class, make sure to check out these other articles I have written:
- How To Hide Reaction Count On Facebook
- How To Change Chrome Performance Settings
- How To Change Side Button Settings Samsung
- How To Change Scroll Direction On Samsung
- How To Schedule Posts On Instagram
Also, I wanted to share what this will hopefully do for you:
Google Public DNS (8.8.8.8 and 8.8.4.4) can be faster than your ISP’s default DNS servers, but it’s not a guarantee. Whether it results in a speed increase depends on your location, your ISP’s DNS performance, and the specific websites you’re accessing (Google AI overview)
Let’s get this new lesson started and learn something new.
How To Increase Internet Speed On Phone
I will be showing you how this is done on my Motorola Edge phone. This has also been tested on my wife’s Samsung Galaxy S22 Android phone. It works the same way on both.
PART ONE:
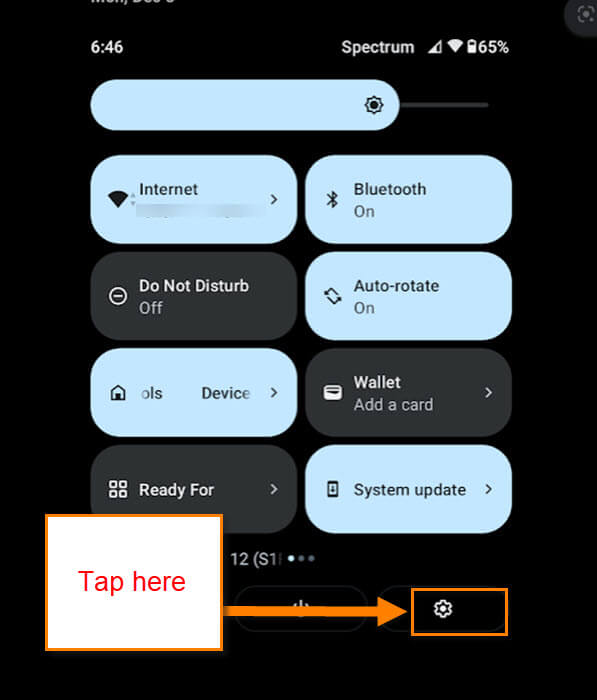
Step 1: Swipe down from the top of your screen twice. You should now see the gear icon on the bottom right. Tap it.
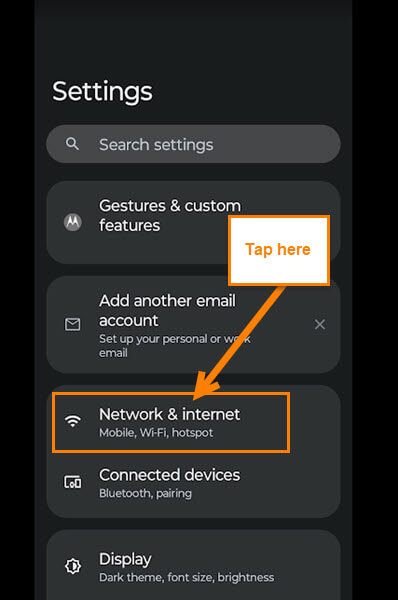
Step 2: On the Settings screen, look for the Network & internet option. Tap it.
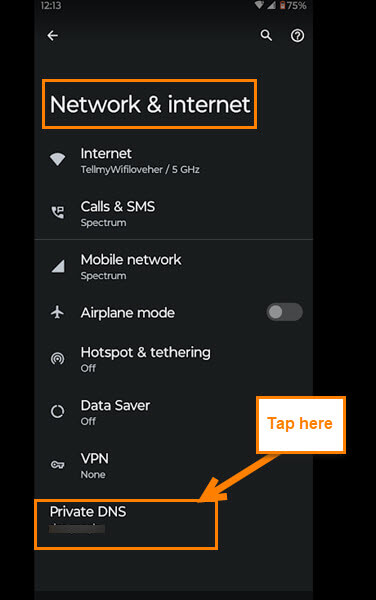
Step 3: Here, you are going to look for Private DNS. That should be at the bottom of the screen. Tap it.
Step 4: A menu will pop up with some options.
Select Private DNS Mode:
- Off
- Automatic (this is chosen by default)
- Private DNS provider hostname.
Tap the circle to the left of the 3rd option. Now tap the space below it and type dns.google. Now tap the Save. We have one more part to complete.

PART TWO:
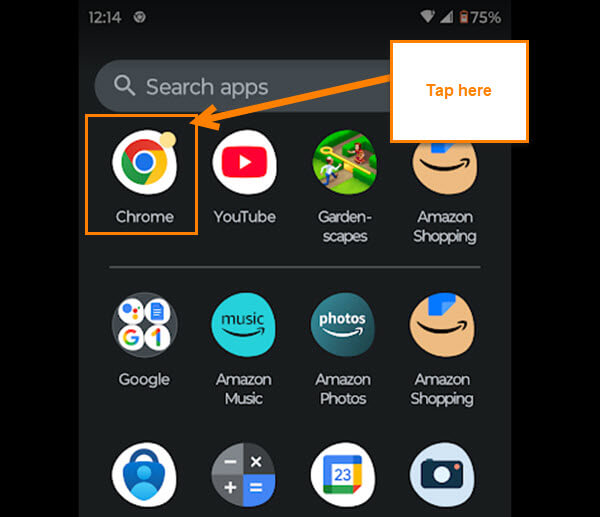
Step 1: Find your Google Chrome app on your device. Tap it.
Step 2: After the app opens, look to the top right for the 3 dots. Tap them, and a menu will appear. Find Settings and tap it.
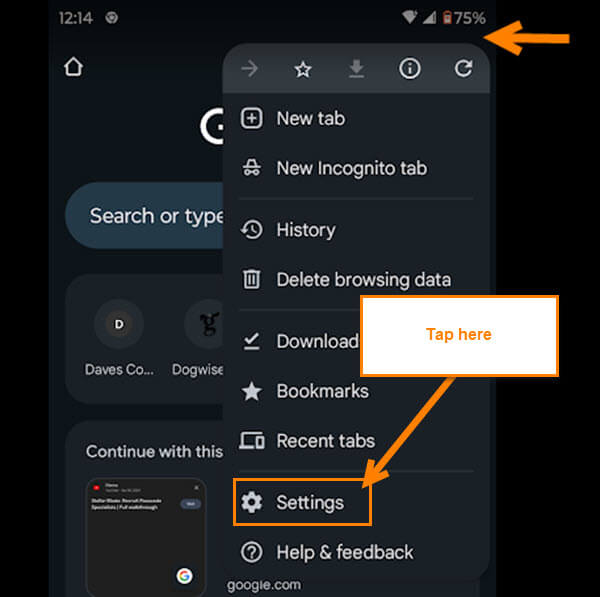
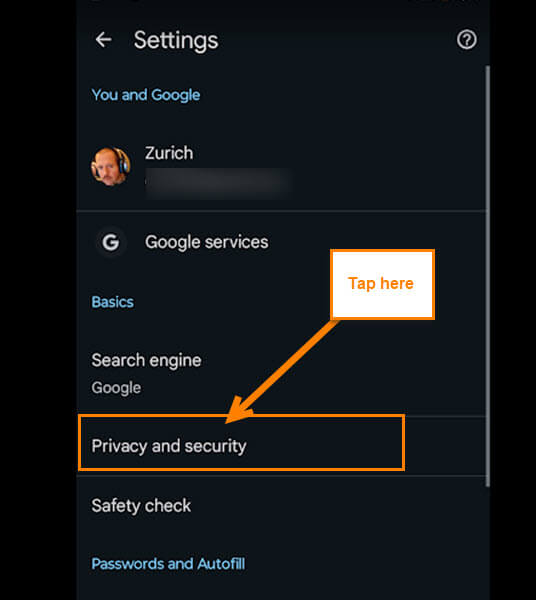
Step 3: On the Settings screen, tap on Privacy and security.
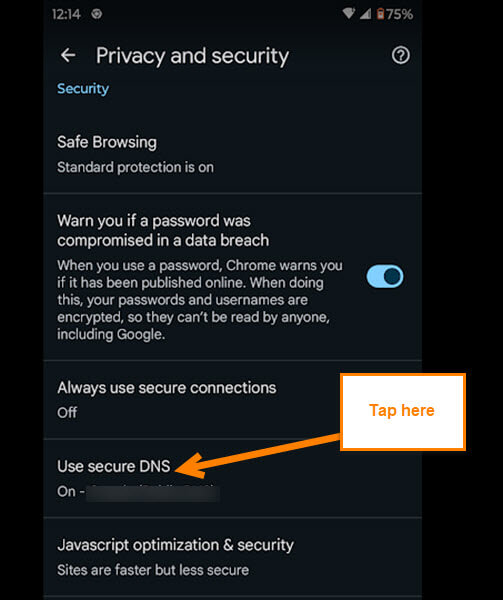
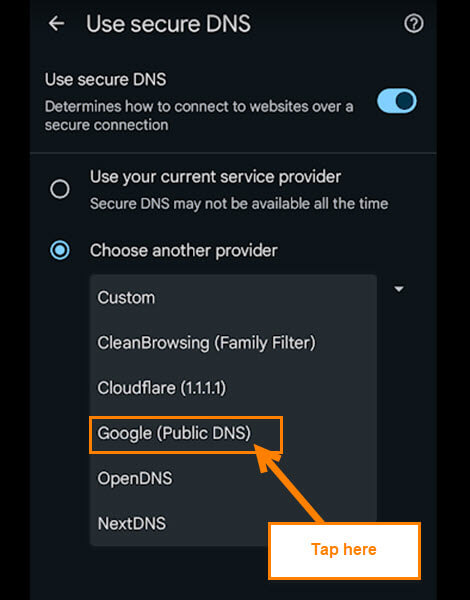
Step 4: Under the Security section, find the Use secure DNS option. Tap it.
Step 5: They give you two choices here:
- Use your current service provider
- Choose another provider
Make sure you have the switch (toggle) at the top right On. Now tap the circle to the left of the second option. After that, tap the DNS option below, Choose another provider.
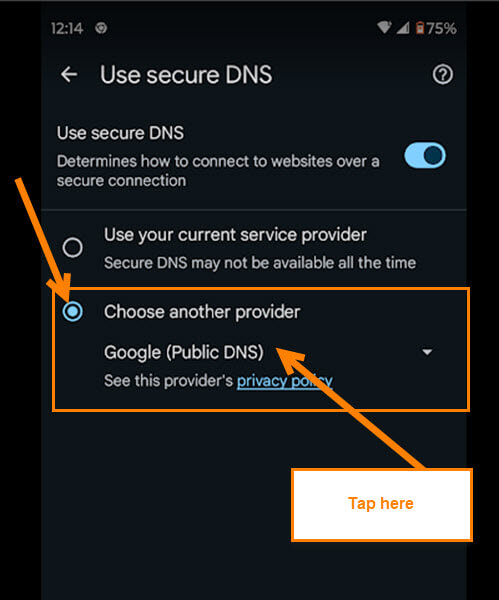
Step 6: Tap on Google Public DNS. You should now have faster internet on your device.
That is how you set this up. Make sure to share your new knowledge with your friends and family.
—
Hi Jason, this is a very interesting amendment.
But just reading it set me on edge.
Exchanging your private service provider for a public domain doesn’t sound like keeping the phone safe from hackers and malware.
Can you explain to the readers how this option can give a foul free usage please?
And since I am in Australia where country internet and mobile services are patchy at best, how will I benefit from changing to a public domain?
Cheers