Last week, we covered how you can Change the Side Button Settings on Samsung. If you missed that, you can check it out here:
How To Change Side Button Settings Samsung
This week, I wanted to change gears and talk about our favorite browser. That is right, we are going to talk about Google Chrome. We all have had the experience of having the browser run slowly. Most of the time, it has to do with all those tabs you have left open. What if I told you there is an option that lets you adjust the performance settings of your browser? Since I have done all the research, I’m going to share this with all of you. Before class starts, make sure to check out these other articles I have written for you:
- How To Check Your TikTok Account Status
- How To Change Facebook Video Notifications
- How To Change Facebook Chat Settings
- How To Unblock People On Facebook
Now that it is out of the way, it is time to learn something new.
How To Change Chrome Performance Settings
I will be showing you how to do this using my Windows laptop.
Step 1: Head on to your computer and open up your Google Chrome browser.
![]()
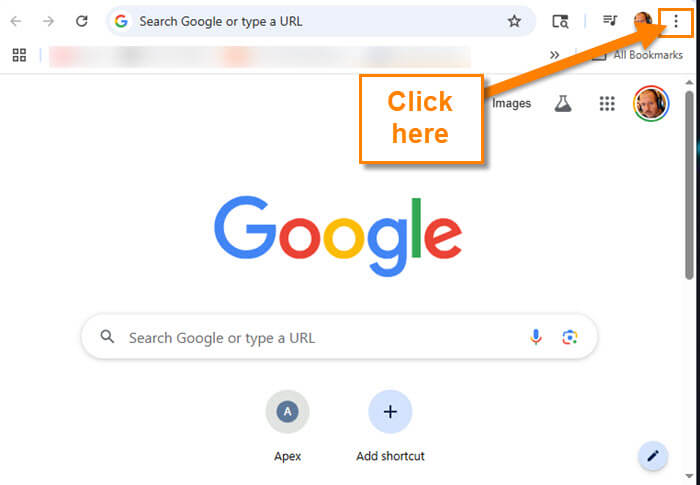
Step 2: Once on the Home Page, look to the top right. You will see the 3 dots next to your profile image. Click them.
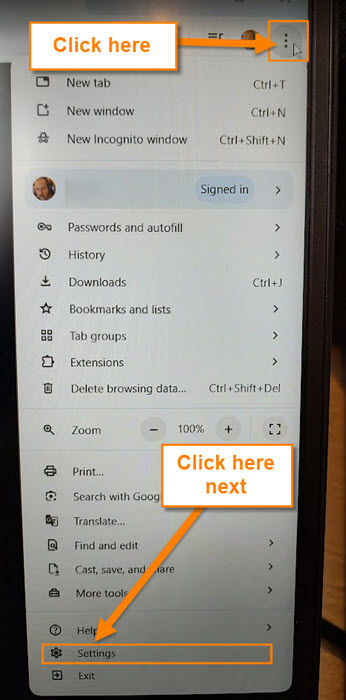
Step 3: A menu will appear, and you will want to find Settings, which is usually near the bottom. Click it.
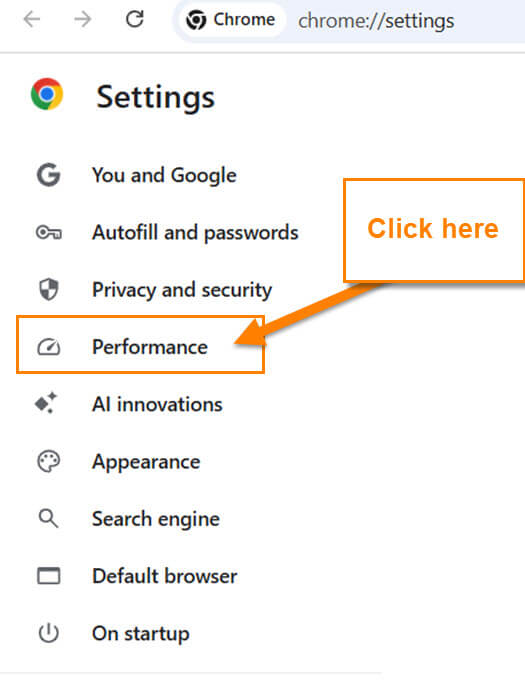
Step 4: On the Settings screen, look to the left menu. On the left menu, find Performance. Click it.
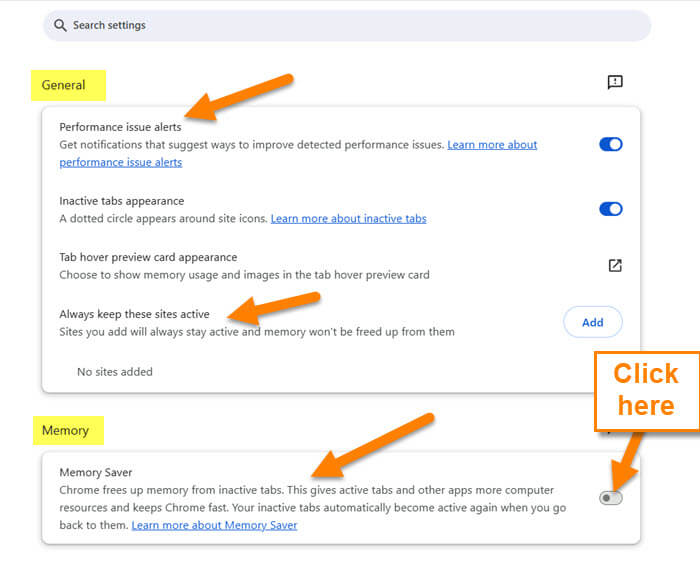
Step 5: This is the screen where all the magic happens. They give you some choices here:
General:
- Performance issue alerts (Get notifications that suggest ways to improve detected performance issues)
- Inactive tabs appearance (A dotted circle appears around site icons)
- A dotted circle appears around site icons. (Choose to show memory usage and images in the tab hover preview card)
- Always keep these sites active (Sites you add will always stay active, and memory won’t be freed up from them)
These you can adjust to the way you want them set. The one I found most helpful is the next section called Memory. You are given three options to choose from:
Memory: Chrome frees up memory from inactive tabs. This gives active tabs and other apps more computer resources and keeps Chrome fast. Your inactive tabs automatically become active again when you go back to them.
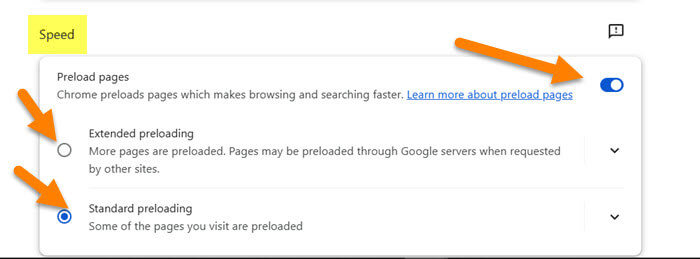
Step 6: This one is called Speed. On this one, you are given 2 options to choose from:
Speed: Chrome preloads pages, which makes browsing and searching faster.
Now you know how to increase the performance of your Google chrome browser. Time to share your new knowledge with the world.
—
Great article!! Thank you!
Glad you liked it and it helped you out. 🙂