
I’ve fixed a number of computers over the years using the following procedure. I first came across this when trying to fix a Windows XP computer, a long time ago, that wouldn’t boot. No amount of scanning, poking or prodding was able to clear it out.
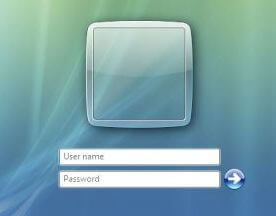
A while after, I had to fix a desktop computer running Vista. It would boot up to a log-in screen which seemed oddly different – there was no picture, just an empty frame with a empty space under for a user name and an empty space for a password.
At first, fixing involved booting up from a recovery disk, opening a command prompt and typing the commands in manually. But then I found an easier way using a boot CD called Hiren’s Boot CD – http://www.hirensbootcd.org/download/
I downloaded the ISO, burned it to disc and then booted from the CD. It uses a Windows XP operating environment as its base. One downside to this CD, because it is based on Windows XP it doesn’t have any SATA support. So to boot off this disc you would have to go into your BIOS and change your SATA settings.
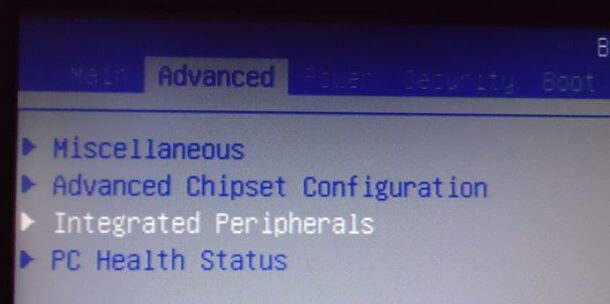
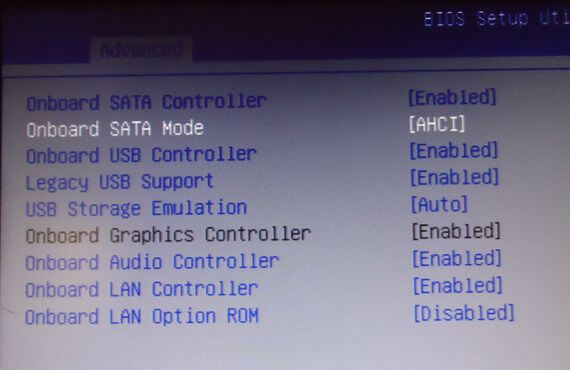
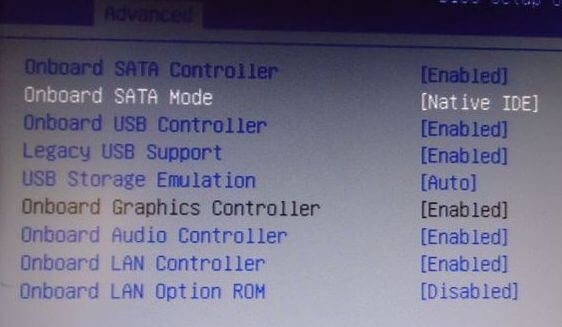
For example; on my Acer desktop, I would press the Delete key to get into the BIOS settings and then go to the Advanced section, then Integrated Peripherals, then I would have to highlight Onboard SATA Mode, which is normally set to [AHCI]. I have to set that to [Native IDE] by pressing my spacebar, otherwise when I boot off the CD my main Windows hard drive will not show up.
I might see a C: drive but it may be for the boot disk CD and not my main hard drive, so I would not be able to access anything on it.
If you have a newer computer with the UEFI – an advanced version of the BIOS system. I know some people get cranky when you keep calling it a BIOS. 🙂 Anyway to boot off a CD/DVD/Flash drive you’ll have to look for a setting to disable Secure Booting. I don’t have that setting on my computer.
You can change the boot order in the BIOS or UEFI to boot off the CD or you will have to press a key during your computer’s boot. I have to press F12. Choose your DVD drive. That sends you to Hiren’s boot menu, use the arrows to highlight Mini Windows XP and press Enter. There is also a Mini Linux option if you’d prefer.
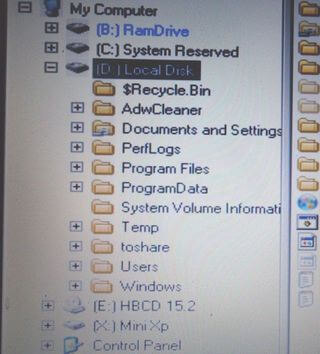
When Mini-XP loads, just use Windows Explorer to access the files on the hard drive. If it’s not listed as C: it will be the largest drive there.
In this example from my laptop my hard drive is listed as D: Local Disk.
Using Explorer I navigated to the C:\Windows\system32\config. Inside this folder you’ll find the following files (without any extension)
DEFAULT
SAM
SECURITY
SOFTWARE
SYSTEM
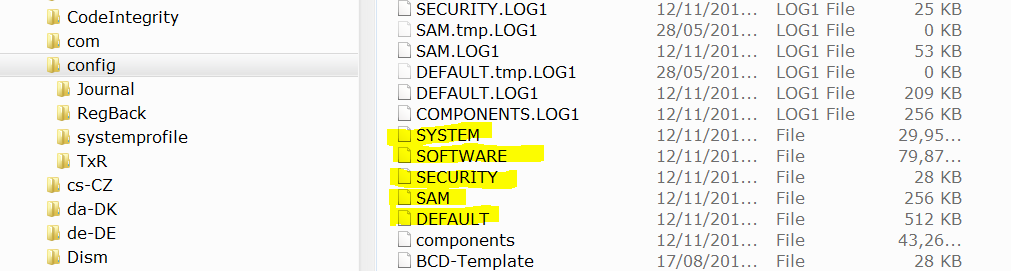
I like to create a new folder called “backup” and move these five files to it. Or you can just rename them by adding an extension; for example renaming Default to Default.bak.
Now look inside the folder called Regback. Find the same five files. Copy all 5 over to the config folder, as is. That’s it. Now take out the CD and restart the computer.
I have done this a number of times in the past when all other options failed. Of course you can use any bootable CD/DVD that you are already comfortable with.
When I was fixing that Vista system with the strange logon Window, after the computer restarted I was taken to a menu with two options; Start Windows Normally and Repair Windows. To be sure, I chose Repair Windows. The system rebooted almost instantly, and booted up normally after.
Hiren’s and UBCD are pretty much indispensable, so thanks for that Terry mate.
Your welcome. I’ve used UBCD as well.
I also like to point out you could use this for data recovery by just plugging in a flash drive and copy your files/documents/etc to it.
Those files are inaccessible while windows is running.
Do not, I repeat DO NOT, change the SATA settings in your BIOS. If you set it to Native IDE, it may boot once but when you try to set it back to SATA to regain your HD speed, the computer will never boot again. You will have to do a complete wipe and reinstallation of Windows. Use another boot disk that does not require the SATA settings to be changed.
I can honestly say I haven’t had any problems with it. Just to prove it to myself I just recently went into my BIOS and changed to Native IDE. The only thing I noticed was the add new hardware icon pop up down by the clock. Then I turned off my computer and switched back to ACHI. I’m writing this now on my computer that is still working as normal. It’s always possible for anything to go wrong that’s why it’s always recommended that you back up before anything happens. Anybody concerned with possible problems concerning this, after your done doing whatever your going to do with the boot disk, remember to go into the BIOS and switch back before restarting your computer normally. If you have Windows 8 or 10 you might want to re-enable secure boot. Windows will nag you to death otherwise. 🙂
Update: I have an old Vista laptop (Acer Aspire 5315). It’s SATA settings are set on IDE. If I switch over to AHCI the laptop boots to a BSOD. The error message is to check the hard drive. If I switch back to IDE mode in the BIOS the laptop boots normally. Go figure. Also I found a way to add SATA drivers to Hiren’s and I was able to boot and see my desktop hard drive without having to change the SATA settings. An article for another time.
Update to update: fixed the non-booting SATA issue by following the info here: http://www.tomshardware.com/forum/271111-32-windows-booting-ahci
It involves editing the registry:
1) Run the Registry Editor (regedit.exe)
2) Navigate to Registry Key: HKEY_LOCAL_MACHINE\System\CurrentControlSet\Services\Msahci
3) Set the “Start” value to 0 (zero)
4) Navigate to Registry Key: HKEY_LOCAL_MACHINE\System\CurrentControlSet\Services\Pciide
5) Set the “Start” value to 0 (zero)
6) Shut down
7) Start up again, but before Windows boots go into the BIOS configuration screens and change the disk mode to “AHCI”. Save the new BIOS configuration and restart so that Windows boots.
I can confirm it works.