Following up on my customization of lists posts, today I will show you how to customize multi-level lists. Although most people shudder at the thought of this, it really is quite simple and easy to do. So let’s get started, shall we?
Follow the steps below to learn how:
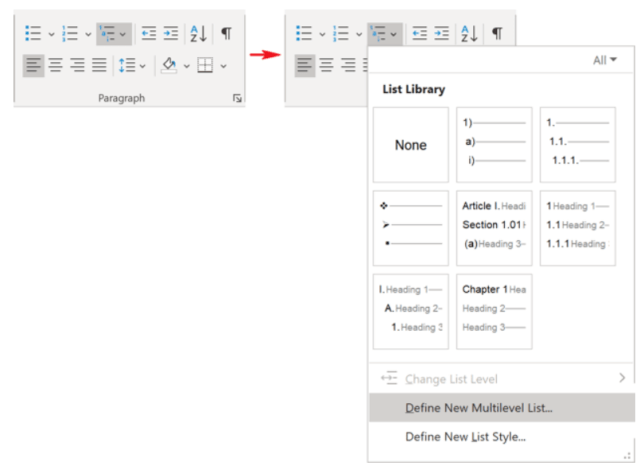
On your Home tab, in the Paragraph group, select Multilevel List.

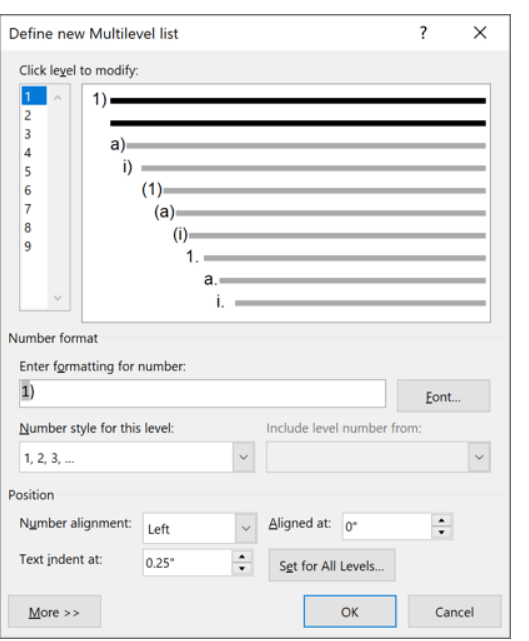
- In the Click level to modify list, select the list level you would like to change. Word will select the first level 1 when you open the Define new Multilevel list dialog box.
- In the Number format group:
- In the Enter formatting for number text box, Word will display the number formatting for the selected list level. Key in any changes for the text of the format in this text box. Do not key over the number in the box! If you do so, even replacing it with another number will break the automatic numbering; each number in the list will be the same.
- To specify font formatting, click Font. Word will display the Font dialog. Select the font, style, size, etc., and then click OK.
- In the Number style for this level drop-down, choose the number format of your choice.
- To include the number from the previous level or a higher level, select the level from the Include level number from drop-down list. This drop-down list will not be available for the first level because there is no level above it. For instance, if Level 1 uses 1, 2, 3 numbering and Level 2 uses a, b, c numbering, applying Level 1 in the Include level number from the drop-down list to Level 2 changes the Level 2 numbering to 1a, 1b, etc.
- Using the controls in the Position box, customize where the number appears:
- In the Number alignment drop-down list, select the distance from the left, centered, or right margin that Word places the number.
- In the Aligned at text box, select the position at which to align the number.
- In the Text indent at text box, set the indent position for the text.
For example, the multilevel list whose first level is centered, while the text itself is indented:
- Use Set for All Levels to customize alignment and indents for all levels in your list.
- Word will also change the More >> button to a << Less button that you can use to hide the extra section of the dialog box again. If you need to link this numbered list level to a certain style, select the style in the Link level to style drop-down list.
- To customize the numbering, use the Start at spinner to change the starting number. For example, Level 3 starts on the fifth of the Roman numbering.
- If you would like to restart numbering after a specific level, select the Restart list after checkbox and choose that level in the drop-down list. If the Restart list after controls is not visible for the first level in the list, it is because there is no higher level. For example, Level 3 has end-to-end numbering from Level 2 and restarts numbering only after changing Level 1.
- Select the Legal style numbering checkbox if you want to use legal-style numbering– changing any Roman numeral to an Arabic numeral. For example, Level 3 includes the numbering from both previous levels, but it should show the Legal style numbering 1.1.1 instead of A.1. In the Follow number with drop-down list, choose the character to include after the number: Tab character, Space, or Nothing. If you choose a Tab character, you can select the Add tab stop at checkbox and set the distance at which you would like to place a tab stop.
Yes, it is a little bit to take in, but if you follow the instructions, I think you will see that it is not that difficult at all.
—

