Ripping the CD/DVD
 I recently had to upload a music CD as a video to Facebook. First, I had to rip the CD to my computer, so I used Windows Media Player for that.
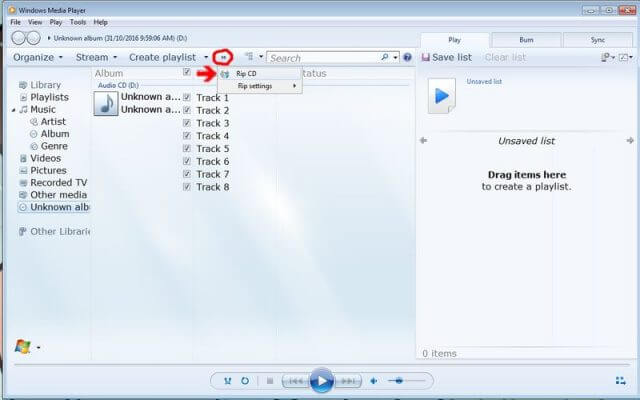
If you open Windows Media Player full screen, you should easily see the Rip CD button. If you don’t open it full screen, you’ll need to click on the two little arrows to open the drop-down menu. You can also change the Rip settings here if you want.
If you leave the default settings, then all ripped music automatically goes into your My Music folder.
Windows Movie Maker
 Once the CD was ripped, I ran Windows Movie Maker. You can create a slide show with many pictures, but my client only wanted one picture plus the entire CD, so the first thing I did was scan in the cover photo from the CD.
In Windows Movie Maker, you can choose Click here to browse for videos and photos, but I prefer the drag-and-drop method, so I dragged the photo over to Windows Movie Maker, then a song. In my case, I had about 15 songs and wanted to stretch the photo out over the entire length.
I clicked on the Project tab and there is a button called Fit to music. Clicking on this automatically stretches the picture out over the full length of the song. Otherwise, once the picture(s) end, so does the music, even if the song is not finished.
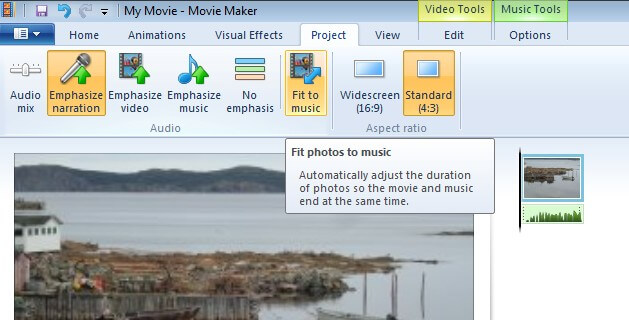
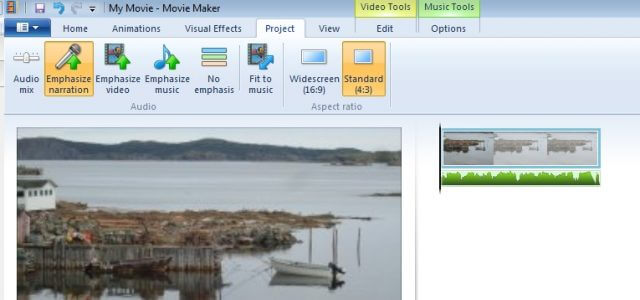
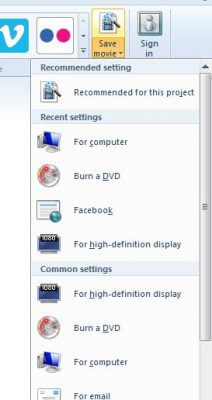
I did this with all 15 songs. Add a song, then click Fit to music, until the entire CD is added. Then click on the Home tab and the button to Save movie. I usually choose the For computer option.
It then asks you to save the movie. Put in the name you want, or leave it at My Movie.mp4, and that’s it. How long it takes to save will depend on the length of the movie.
When closing Windows Movie Maker, you will be asked if you want to save the changes. This is actually saving the Project information and will not effect the movie if you say no.
If you need help uploading videos to Facebook, read How To Upload Videos To Facebook.
More Facebook video help can be found at Uploading and Viewing Videos.
Final Notes
The copyright owner of the CDs involved asked me to upload these videos for her. Make sure they are your videos and if copyrighted material is involved, that you have permission to upload it.
Facebook has changed their maximum allowed video upload size. It used to be under 20 minutes and under 1GB in size but now seems to be a maximum of 120 minutes and 4GB in size.
If you choose the Burn a DVD option, Windows DVD Maker (Windows Vista/7) will open after your movie is created giving you the chance to burn it on a DVD .
If you don’t have Windows Movie Maker for some reason, you’ll find it at this Microsoft Movie Maker download page. This installer, if I remember, includes options to install other programs like Windows Live Mail. Uncheck what you don’t want.
Editor’s Note: DCT has previously published several articles covering this subject. Here are a few to check out for further reading:
- How To: Extract part of a video using Windows Live Movie Maker
- How To: Create slideshows using Windows Live Movie Maker
- How to create a slideshow using Windows Movie Maker
—
Terry, good article. I’ve been doing this for a couple of years now and have tried to explain it to friends who are not as computer literate as you and I, so this is a great link for me to send to them.
Yes, the licensing is the main issue here and the “FaceBook License Police” (my term) have sent me warnings about licenced CD copying and have deleted a couple of my past posts along with a “don’t do it again” kinda warning like YouTube & others. Yes, I know that copying other’s work isn’t a good thing especially being in a band and recording live music at venues here in Canada.
Trying to get permission is tough if you’re using music from bands that don’t even exist any more, but that’s another story like the recent Stairway To Heaven court case between Led Zeppelin and of late guitarist Randy Wolfe, who played with the group Spirit.
All that being said, your article is dead on and very easy to follow.
Thanks,
GPrice