If you have been following me the last couple of weeks, you know I have been teaching about Google Photos. Last week, I showed how to create highlight videos. If you missed that, you can find it here:
How To Create Highlight On Google Photos
We are going to stick to this subject and teach something new. When I find something that lets me be creative, I want to share it. Like last week, our lesson today will show another cool feature to spice up those photos. What could this be? Glad you asked. All my research on this platform showed me another way to be creative. Did you know you can create cinematic photos here? That is right, and I’m going to show you how to do it. Before we start our class, make sure to check out my most recent articles:
- How To Remix Photos In Google Photos
- How To Disable Google Photos Suggestions
- How To Create Animation In Google Photos
- How To Manage Screen Time On Roblox
- How To Change Roblox Maturity Settings
Guess you need to pull out those devices and listen up.
How To Create Cinematic Photos On Google Photos
This will be shown on my Motorola Edge Android Phone using the Google Photos app.
Step 1: Find the Google Photos app on your device and tap it.
![]()
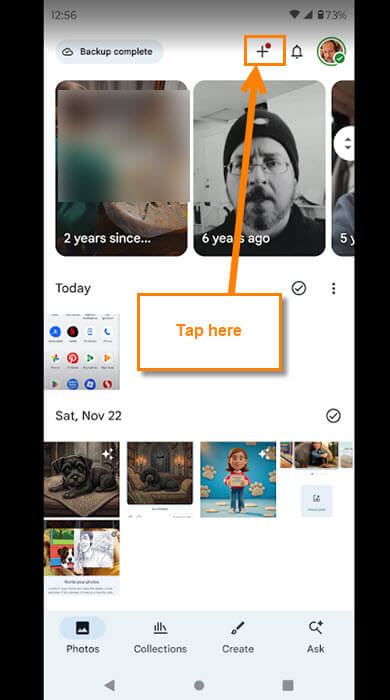
Step 2: After the app opens, you will be on your photos screen. Look to the top right for the plus sign. Tap it.
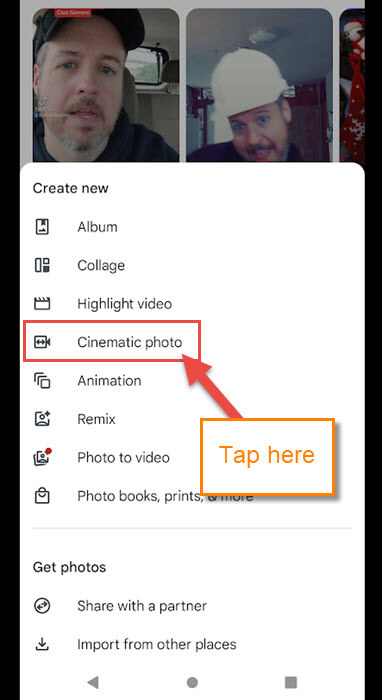
Step 3: This will bring up a menu. From the menu, look for the Cinematic photo link. Tap it.
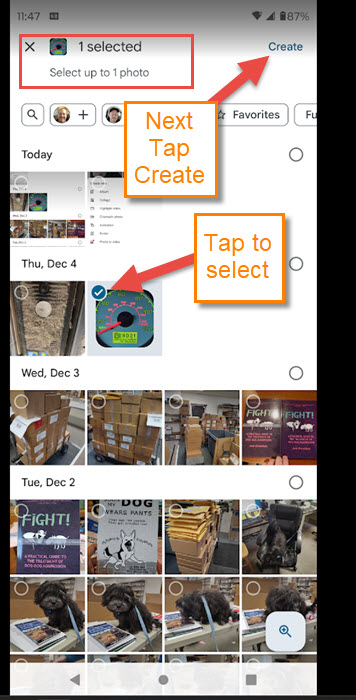
Step 4: It will bring up all your photos with the select circle on them. You can only choose one, so tap on the one you want. After that, tap the Create link at the top right.
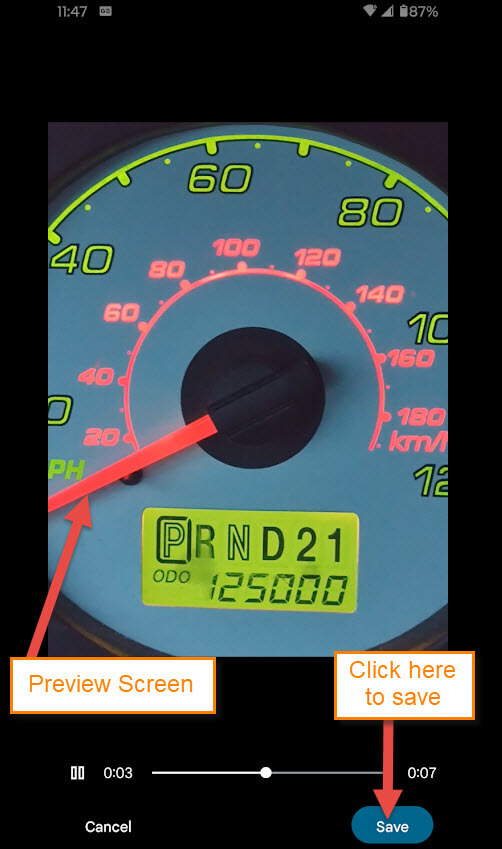
Step 5: A preview screen will appear showing you the cinematic movement. Click the Save button at the bottom.
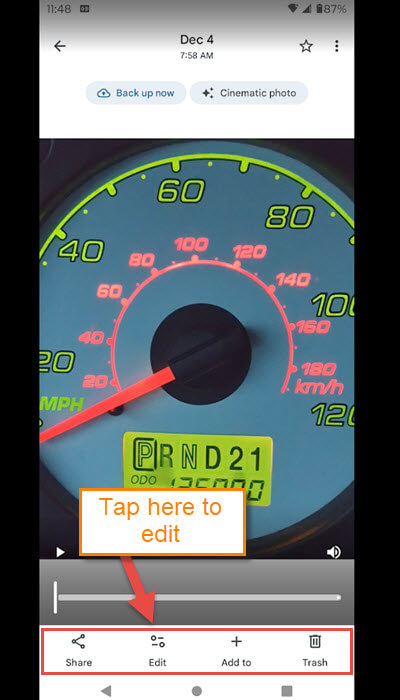
Step 6: That will take you to a screen with some options:
- Share
- Edit
- Add to
- Trash
For this article, I want to show the Editing options for this. Tap the Edit link at the bottom.
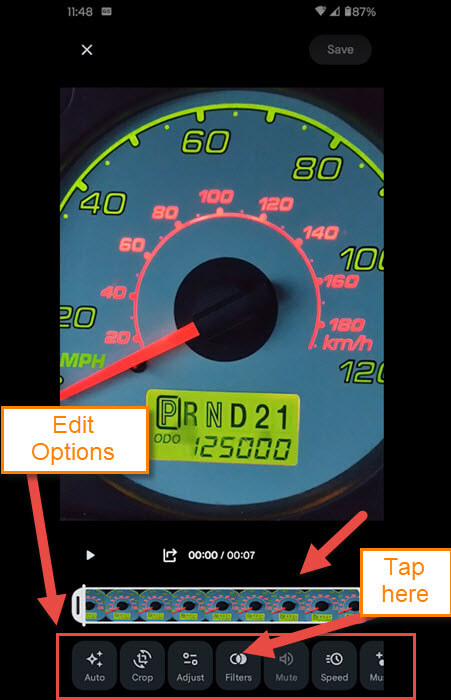
Step 7: Once you have tapped the Edit link, you will end up here. At the bottom, they give you many options to edit your photo with. For this article, I want to show the Filters option. Tap it. There are many other options here that I would suggest checking out after this article.
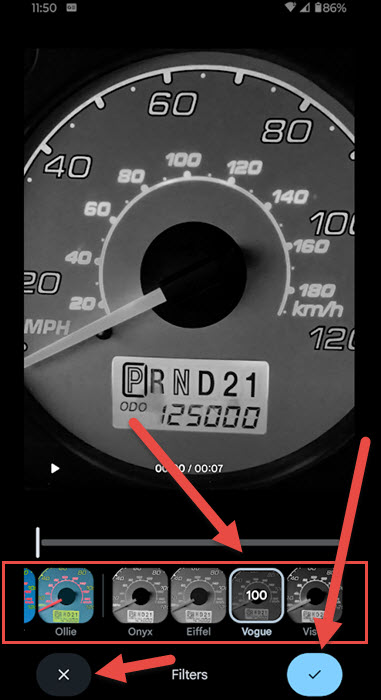
Like any filter, you can pick the one you like. I chose Vogue, so tap it. If you like the filter, tap the checkmark at the bottom.
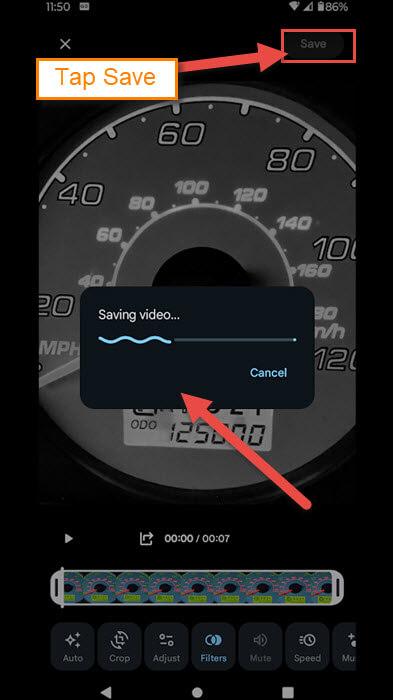
Step 8: After you have fully edited your photo, tap the Save button at the top right. You will see a save bar in the middle showing it is saving.
Step 9: After it has saved, you will end up on the Start screen with the Share option at the bottom. They also offer the option to Favorite this at the top (Star). You can share this now or trash it. You will need to mess around with this to get the hang of it. I have one more thing to cover here.

Step 10: The final step is to know where this Cinematic creation will be on your device. At the bottom, after you save your creation, tap the back arrow at the top left of the screen. Now you are on the Photos main screen. There is a Collections tab at the bottom. Tap it. It will show you where the photos are located. The easiest way to find what you created is by scrolling to the bottom. Then tap on Videos. Since it is technically a video, that is where it will reside. DONE!

You now know how to create a Cinematic photo from your Google account. Time to share this new knowledge with the world.
—
What’s the Google setting on my Pixel for condensing a video to send by text?
Thx