Creating forms in Word is easy – folks do it all the time! But suppose you want a form that folks can fill in – on their computer?
Not to worry! Turns out you can do this, and fairly painlessly as well! You will need to use the Developer tab in order to create your fillable form, but fret not, I will tell you how to go about doing just that.
Follow the steps below to learn how:
- On your Ribbon, click on File | Options.
- Next, under Customize the Ribbon, click on Customize Ribbon | Main Tabs.

- You will now need to select the Developer box and click OK.

- Now that you have done this, you will notice than an additional menu has been added to your Ribbon with new Developer options.

- Now, there are two main options to be considered when you start to create your form. The first option is relatively easy if you can find a template that contains everything you want/need for your form.
- To find out if you can use the first option, click on File|New and you will see the Templates that are available to you. Just click on forms and scroll through the selection until you find the one of your choosing.
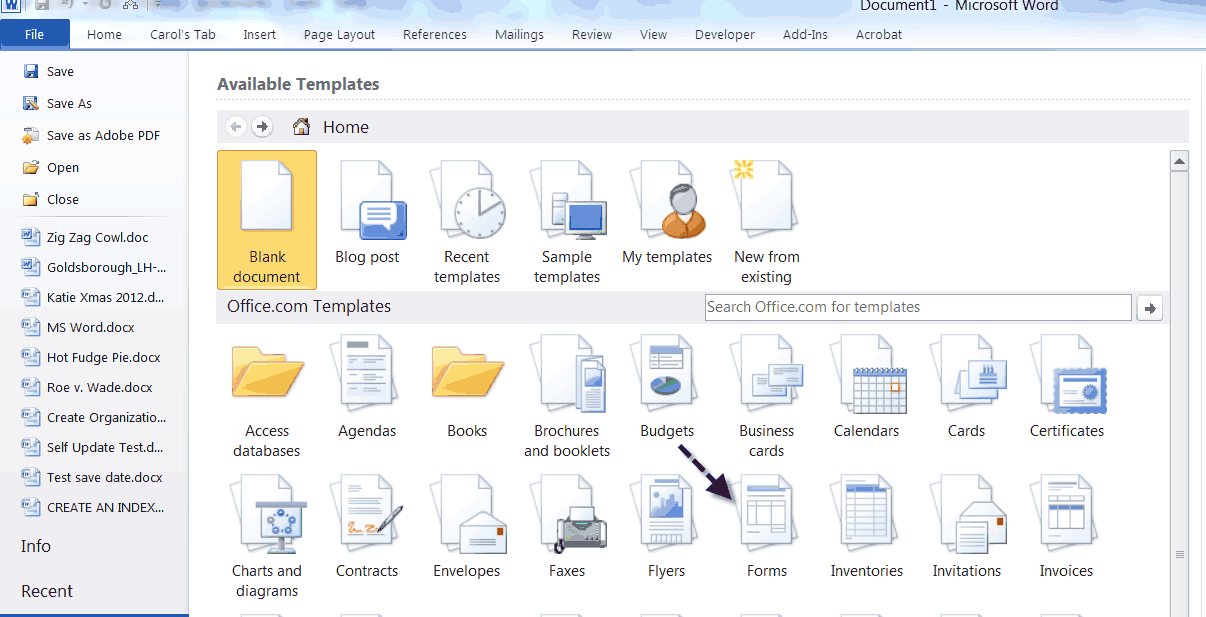
- When you have chosen a template, simply download it and make any changes you feel are necessary for your creation.
- For our purposes, we will create a form to gather information from the recipients we send it to. You may not find the template that suits you. If that is the case then you will need to create your form from scratch. So Go to the template options again, but rather than selecting a ready made template, select My Templates.
- Click Ctrl + S to save your document with an intuitive name or, in this instance you can simply call it Form Template 1.
- In this instance, I selected a blank document so that we could create our form together.
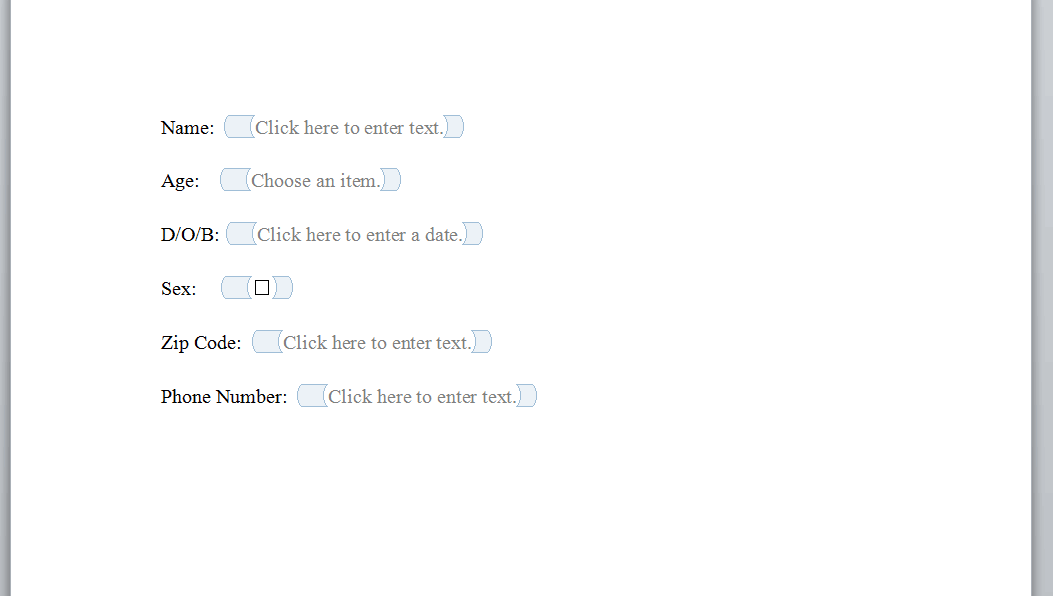
- You are now ready to start adding information to your form.
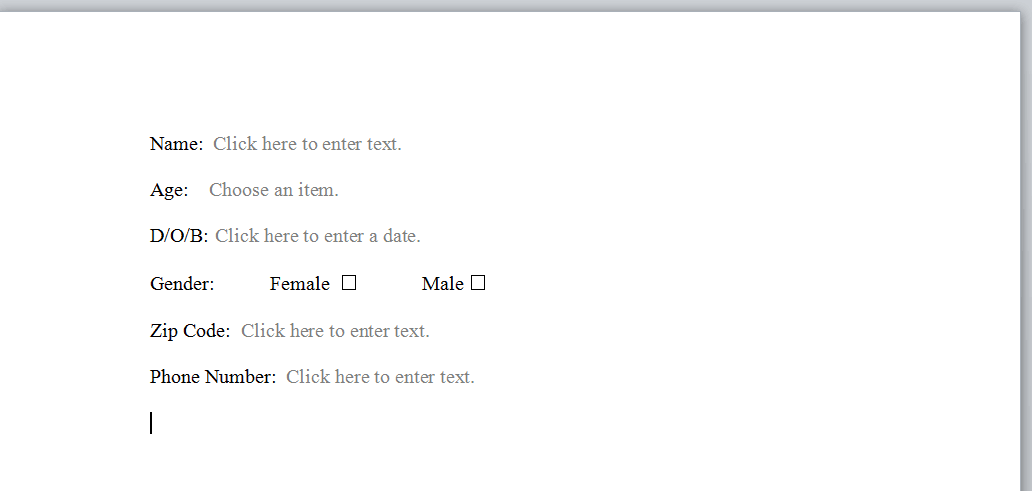
- We will want the recipient’s name, age, date of birth, Gender, zip code, and telephone number.
- So, click on the Developer tab of your Ribbon and in the Controls group, select Design mode to begin creating the fields for our form listed above.
- You will use either a Rich Text Content Control (which allows editing) of the Plain Text control (allows only plain text without formatting).
Your form should look like this once you start adding different controls:

- You can edit the text in the control boxes to match the requested information by clicking in them and keying in the text of your choice.
- When you need a date, you can add the Date Picker Content Control.
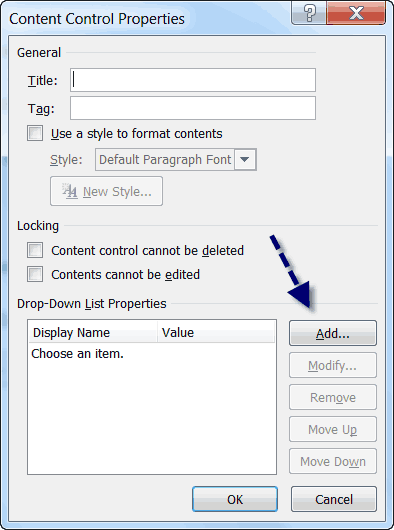
- You can also use a Drop-Down List With Option. For instance, you could use that in number two where we are asking for an age. Once you use that control you can then right-click in it and select Properties. Next click on Add to key in age ranges for your recipient to choose from.
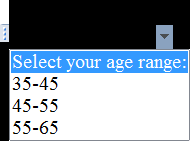
Once you are finished adding your properties it should look something like this:
As an alternative, you could also use a Combo Box, which would allow you to add any options you like, as well as allow the user to enter additional text if needed.
For the gender question, you would add a Check Box after you enter the male and female options.
Once you have completed your form it should look something like the images below.
You now know the basics of creating interactive forms in Word. It’s wasn’t all the difficult either was it? You can now send your .dotx file to clients and when they open it, Word will automatically open a Word document that they can very easily complete and send it back to you!
—
Will the functionality of the document remain if I convert it to a PDF? Everybody I know has access to a PDF reader but only a few have MS Office.