If you’ve ever used the Administrative Tools listed in Control Panel, you know how handy they are for accessing the tools you need for maintaining or fixing Windows.
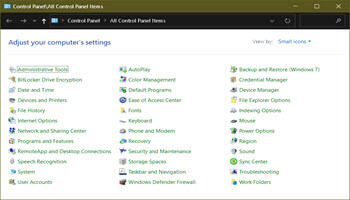
Below is what the upper-left corner of my Control Panel looks like when the “Small icons” Category is selected. Note that Administrative Tools is at the top of the list.
Did you know that you can be in complete control of the entries in the Administrative Tools? You can add, delete, or change them as you wish. They are just Shortcuts to the programs they run. Below is a list of typical entries in the Administrative Tools. Note that the list of tools might vary depending on your edition of Windows, but the list below of 19 tools is typical:
- Component Services
- Computer Management
- Defragment and Optimize Drives
- Disk Cleanup
- Event Viewer
- iSCSI Initiator
- Local Security Policy
- ODBC Data Sources
- Performance Monitor
- Print Management
- Recovery Drive
- Registry Editor
- Resource Monitor
- Services
- System Configuration
- System Information
- Task Scheduler
- Windows Firewall with Advanced Security
- Windows Memory Diagnostic
Making Changes To Control Panel
- If you are NOT in your Admin account, you will need to get in it. You can do that by right-clicking on the Start button and then > Shut down or sign out > Sign out. Then choose your Admin account and sign in
- Right-click on the Start button and choose Control Panel to open it. If the View by Category is not already at Small icons, use the drop-down Category menu to choose Small icons
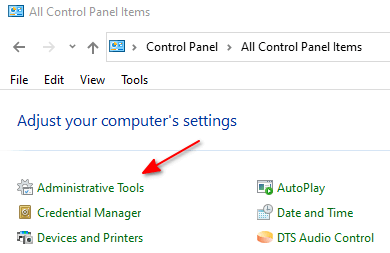
- Click on Administrative Tools
- You will now be in the File Explorer folder with all the tool shortcuts listed, one for each of the Administrative Tools. Here you can add or delete shortcuts as you want. I haven’t deleted any shortcuts from the original list because you never know when you might need them. However, I have added many and now have 34 shortcuts. NOTE: Deleting a shortcut from the Administrative Tools folder means it is deleted from the Administrative Tools. I do NOT recommend that you delete anything already there. These are some examples of what I added:
- Action Center
- Default Programs (%windir%\system32\control.exe /name Microsoft.DefaultPrograms)
- Defaults by Program
- Device Manager (devmgmt.msc)
- Internet Properties (inetcpl.cpl)
- Memory Diagnostics Tool (mdsched)
- Performance Options (%windir%\system32\systempropertiesperformance.exe)
- Task Scheduler (%windir%\system32\taskschd.msc /s)
- Troubleshooting
- Windows – Adjust appearance & performance
- Windows Reliability History (perfmon.exe /rel)
Creating A Shortcut
So long as you know or can find the location of each program you want to add, you can create a shortcut to it in the Administrative Tools. Shown above are the locations (in the parentheses after the names) of seven of my additions. Let’s take the Windows Reliability History that I’ve shown above as an example. To create the shortcut:
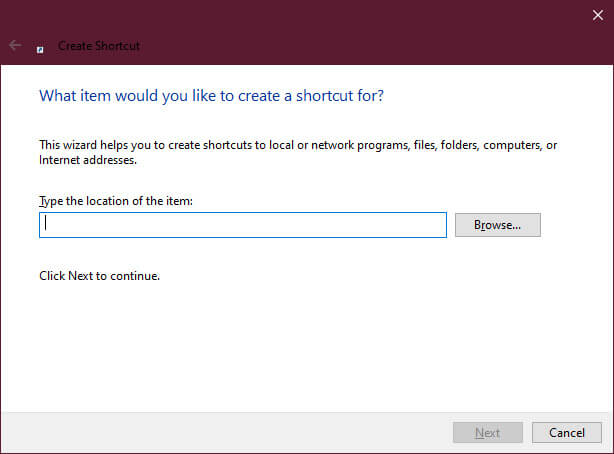
A. Right-click anywhere on your desktop and choose New > Shortcut and you should see this:
B. In the box under “Type the location of the item” type perfmon.exe /rel and click on the Next button to bring you to this next screen.
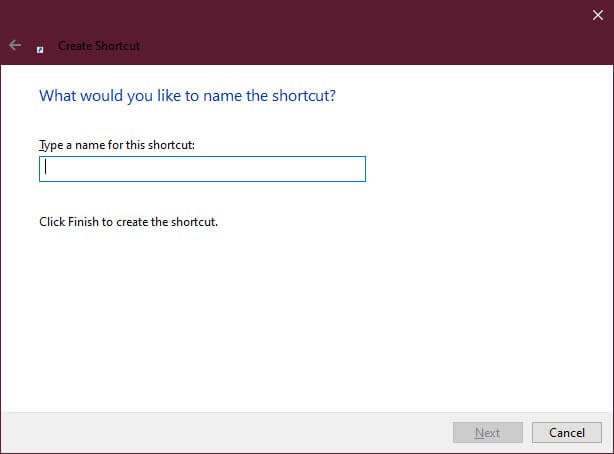
C. In the box under “Type a name for this shortcut” type Windows Reliability History (or anything else you want to name it). The Next button shown above will change to the Finish button. Click on it and you will have your Shortcut created on the desktop.
D. Open the Administrative Tools folder as described earlier and drag your new shortcut from the Desktop into the Administrative Tools folder.
NOTE: The location of all programs (i.e. perfmon.exe /rel) built into Windows can easily be found on the Internet. However, you are not restricted to just the built-in Windows programs. You may create a shortcut to ANY “.exe” file you have installed, any Windows Store app you have installed, or any BAT file you use, and place it in the Administrative Tools folder.
Having these added shortcuts in Administrative Tools allows me to go to one place for most of what I need to manage and fix in Windows. You most likely know other tools that you often use that should be in Administrative Tools. Please let me know in the Comments section below if you add one I didn’t list.
RELATED ARTICLE
- Windows 10 Quick Tips – Special Desktop Links
- Create Desktop Shortcuts In Windows 10
- How To Add Desktop Shortcuts


Right clicking on the Start button has no Control Panel option!
Win 10 20H2 19042.1237
Hi Otto,
Sorry about that! I must have added “Control Panel” to my Windows 10 Start button right-click menu years ago because it’s handy to have up-front. Perhaps a DCT article about how to add items like Control Panel to the Start button right-click menu would be a good future article.
Here is the easiest way for you to find Control Panel: Search Windows for the word “Control” (without the quotes) and it should find “Control Panel App” as the Best Match at the top. Left-Click on it and you will be in Control Panel.
Again, I’m sorry about that, but it could be a segway to another article.
Stu
Hi Stuart,
Thanks for your response, very good of you. Your penultimate paragraph tip works perfectly – thanks.
I prefer GOD Mode. It is all-inclusive.
Hi Charless,
GOD Mode is great, but is TOO inclusive for me. GOD Mode has 275 links to cover everything, 90% of which I’ve never used. What I keep in Administrative Tools is the 10% that I do use.
Stu