If you have been reading my last couple of articles, then you know I focused on covering Venmo. If you want to check them out here they are:
How To Update Venmo Profile Image
How To Change Venmo Privacy Settings
Now that you have that information, let’s show you another tip about this app. With all apps, you can get notifications sent to you by email, text, and something called push notifications. You might be someone who likes getting the notifications, but you might be someone who doesn’t. Either way, in this article I will go over how you can adjust those for the app. I have written a few articles on the subject already. You can find them here:
I have also created how-to videos on both of these. You can see them here:
Since you expanded your knowledge, it is time to start our new lesson. Pull out those mobile devices and let’s get started.
How To Adjust Venmo Notification Settings
I will be showing how to do this using my Samsung Galaxy Android Phone with the Venmo app.
Step 1: Find the Venmo app on your mobile device and tap it.
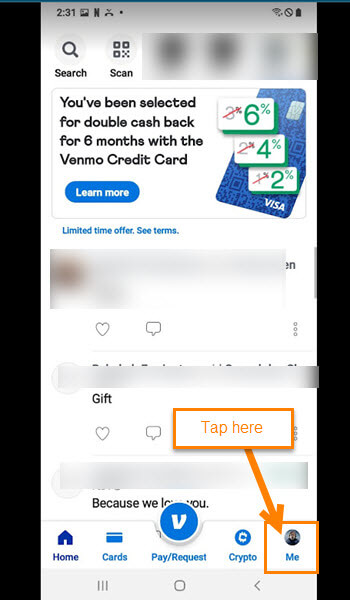
Step 2: After the app opens look to the bottom right. You will see your profile image. Tap it.
Step 3: On your profile screen look to the top right. Tap on the Settings (gear) icon.
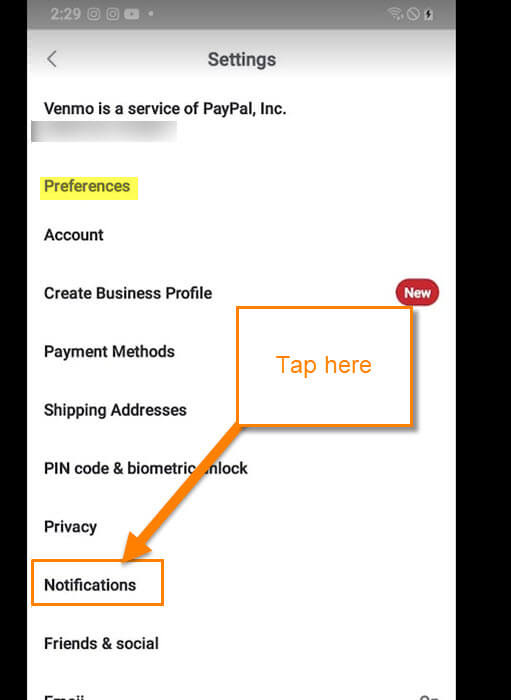
Step 4: Now that we are on the Settings screen look for the Notifications link. Tap it.
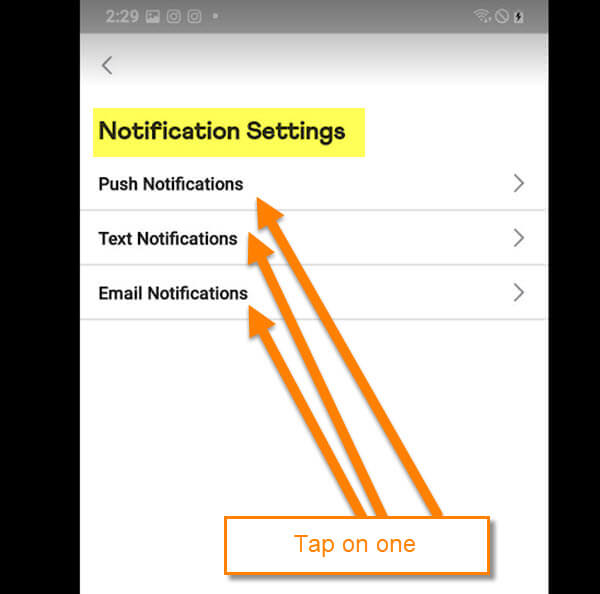
Step 5: On the Notification Settings screen you are given three choices:
- Push Notifications
- Text Notifications
- Email Notifications
Let’s start with the top option called Push Notifications. Tap it.
Step 6: What is a push notification? That is a great question.
A push notification is a message that is “pushed” from a back-end server or application to a user interface, e.g., mobile applications or desktop applications.(Wikipedia)
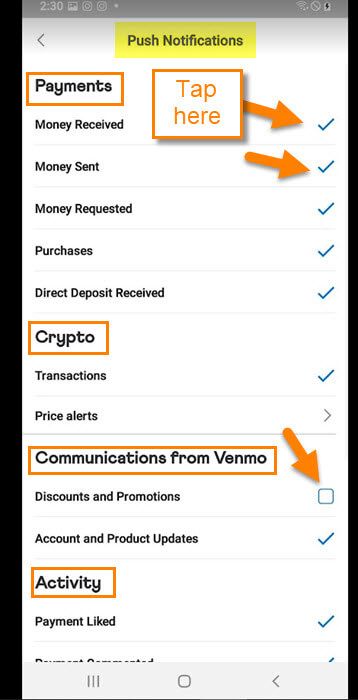
Now that you know what it is let me show you how you can manage it. On the Push Notifications screen, you can tell the app what you want notifications on and what you do not. You are given different categories to adjust.
- Payments
- Crypto
- Communications from Venmo
- Activity
- Groups
To turn on or off these options, all you need to do is tap the box to the right of one. This will turn them off meaning no checkmark will be there. You will need to look through this screen to decide what you want on or off. Once you are done here, let’s move to the next one on the list – Text notifications.
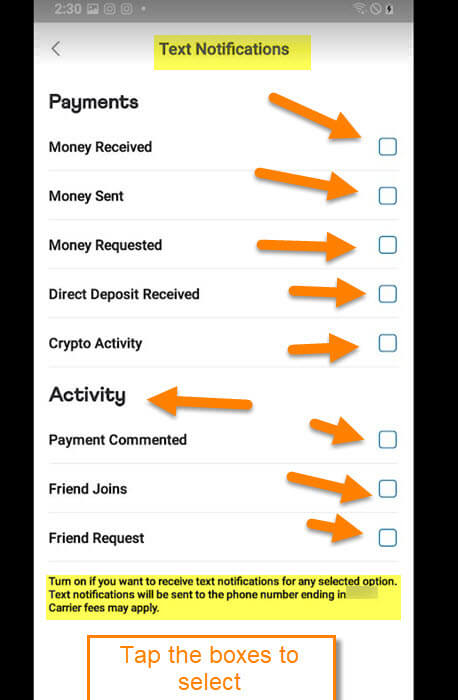
Step 7: I find this one to be the most important of all these since I use my mobile phone the most. Like we did with the last one, tap the ones you want to have on or off.
Turn on if you want to receive text notifications for any selected options. Text notifications will be sent to the phone number ending in (Your number here). Carrier fees may apply.
Once you are done selecting or not selecting the options, it is time to move on to the last one.
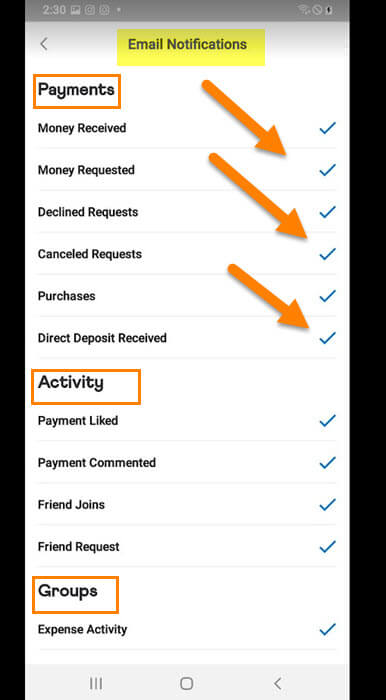
Step 8: The last option is the Email notifications. This one we should be all very familiar with. As we have done with the other two, select or deselect the ones you want. There is no save button to tap when doing these so once you have finished, you are good to go. Done!
There is a bonus tip I want to share with you in this article. How to turn them off altogether the easy way.
Bonus Tip: How to turn them off altogether – the easy way
This is being shown on my Samsung Galaxy Android phone.
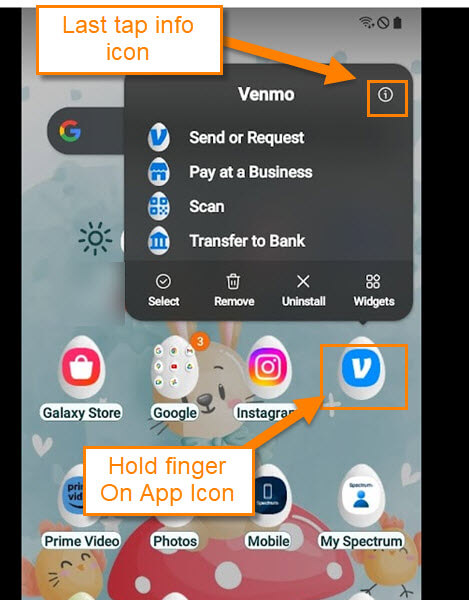
Step 1: Find your Venmo App and hold your finger on it and a menu will appear. On my phone, you will see the i(Info link) at the top right of the menu. Tap it.
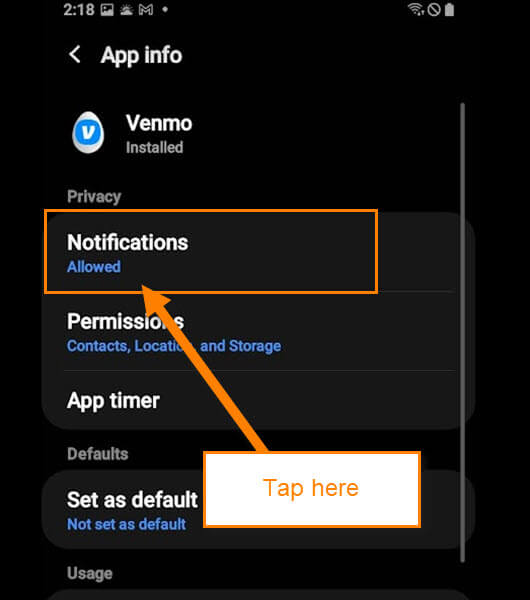
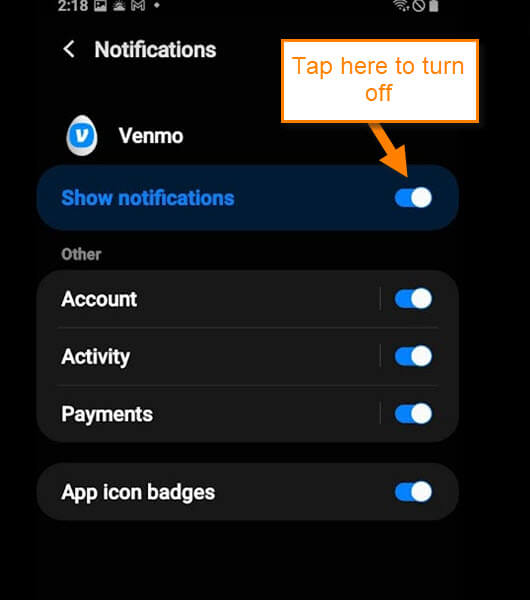
Step 2: This will bring you to the App info screen. Tap the Notifications option under Privacy.
Step 3: Here all you need to do is tap the switch to the right of Show Notifications. This will turn off all of them for this app.
Now you know how to adjust those Venmo notifications. Time to share your new knowledge with the world.
—


