
I have written a few articles on the video editing software Wondershare Filmora. If you have not seen them, here they are:
Since this software has been so useful for me, I would like to show you another feature of this software. Today I wanted to go over how you can add a voice-over to your video project. Yep, you can add your own Morgan Freeman (not all of us can pull off that amazing voice) narration to put a more dramatic spin to a project. This can also be great for introduction videos or even trailers that need a voice-over to give it the right feel and tell a story. For whatever reason you need to do this, this article will show you how easy it is to do this with Wondershare Filmora X. Now get your voice all warmed up and pull out that microphone. It is time to learn how this is done.
How To Add Voice-Over With Filmora X
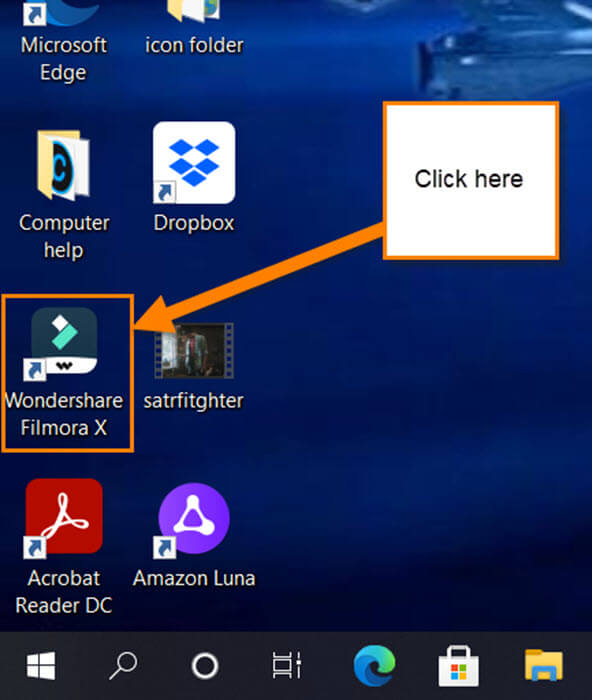
Step 1: Find the Filmora X software on your computer and open the program. Mine is on my desktop since I use it so often.
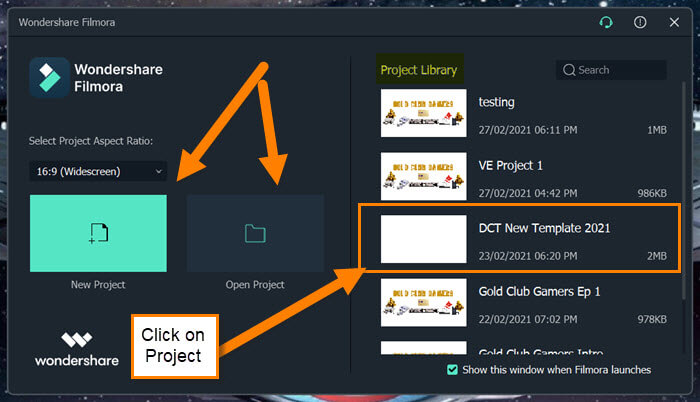
Step 2: On this screen, you will need to choose your project. You can create a new one or choose one from the recent projects on the right. I will be choosing the DCT template for this article.
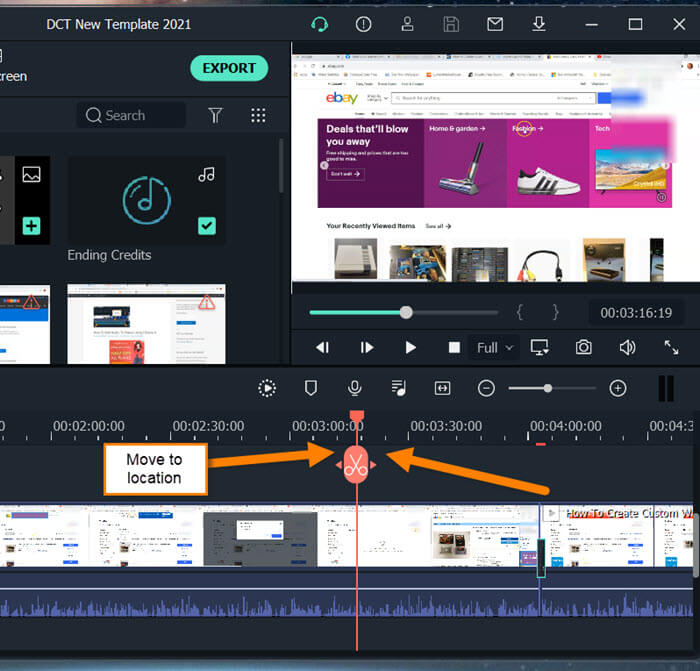
Step 3: The project will open and now it is time to get started. Before you start, make sure to have your microphone hooked up and ready to work. To add a voice-over you need to place the timeline marker in the spot you want the audio. This is the red line that shows you where you are in the video. After you drag the marker to the right place, it is time to open the recorder.
Step 4: To open the option to record your voice, look under the Video Preview screen on the top right. You should see a microphone icon. Click it and it will bring up a Record Audio window.
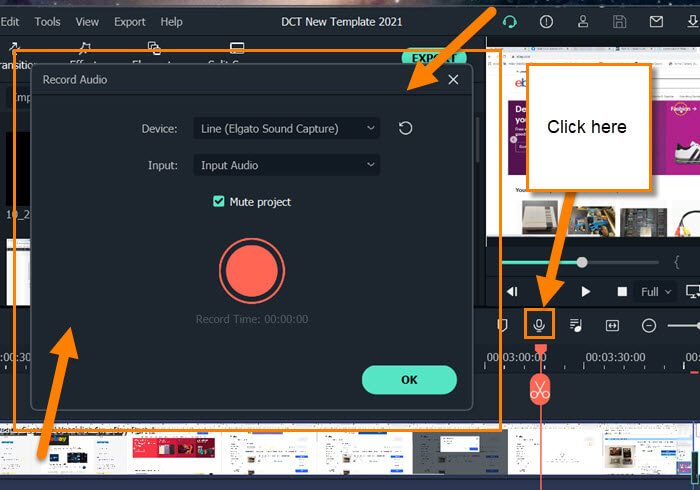
Step 5: Once in the Record window, you have some options to deal with before recording. The first option is Device that lets you choose the microphone you will be recording with. To choose the right device, click the down-arrow to the far right of the Device option. If your preferred device isn’t showing, make sure that it is connected properly. I’m choosing the Headset Microphone since it is the microphone I’m using.
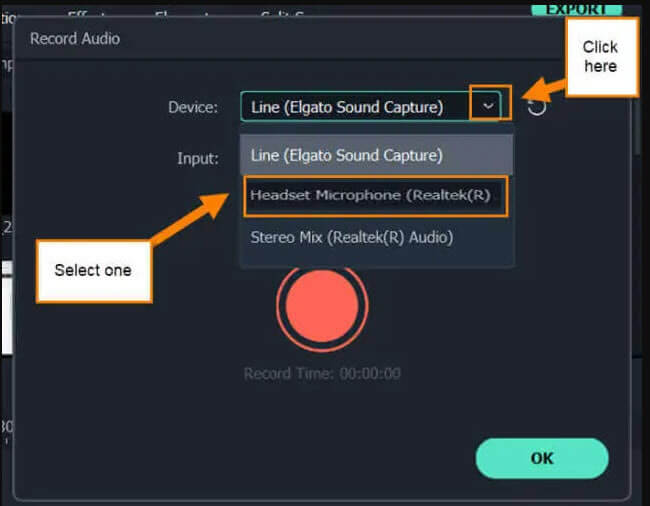
Step 6: Once the device is chosen, the next choice is the input. My input option only has Input Audio as the choice which makes sense. Under that, you will see the Mute project checkbox. This is if you want the audio muted on the project so you do not hear that sound while recording your audio. If you want to hear the project while recording, then uncheck the box. Time to click the red Record button. Once you have finished your voice-over, click the Record button again to stop the recording. You will now see the audio on the timeline. Click OK when done.

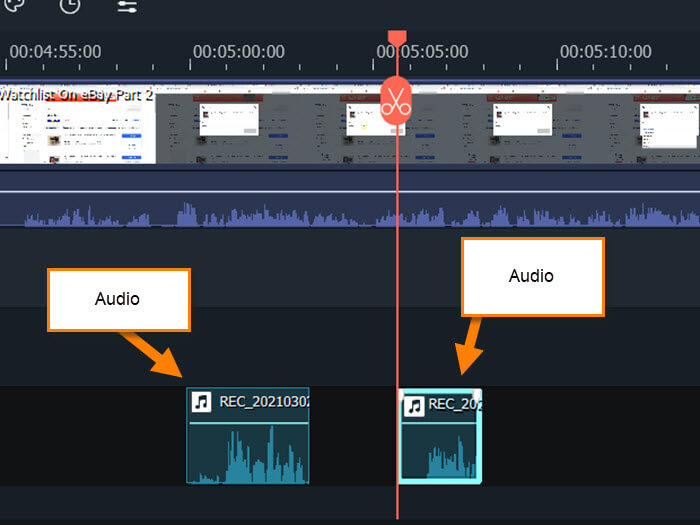
Step 7: Now that the audio is on the timeline you can move it and adjust the volume. You can see how to do this in my last article, How To Add Audio To Videos Using Filmora X. Now your voice-over project is all ready to go.
Time to get in those projects and create some amazing voice-overs.
—
Hi Jason.
Nicely written. Well done. Is it possible to do something similar but with adding text? Eg Our holiday video. To put text say location at a certain point in the video.
Thanks.
Hi KIE,
You can add text and place it in the video anywhere you want. In this software look to the top right and you should see Titles. Click that and then choose the option Lower 3rds on the left menu. Think that one would work best for what you want to add. You will have many to choose from but you add them the same way as the Audio. Once added to the video project look at the preview screen and on there you can click on the text and move it around plus adjust other ways. You will need to play with it a little but it should be straight forward. I will make this my next article so I can get this in more detail and visual for you and others. I hope this helped get you headed in the right direction.