In my last article, How To Add A Blur To YouTube Videos, I covered editing videos. I went over how to use YouTube’s editing software to add a blur. Their editing section on the site is helpful but it does not give me all the features to edit the videos that I need. Having to create many videos not only for Dave’s Computer Tips but for others, I needed to find a good editing software. The software I finally decided on was Wondershare Filmora9. This software is very user-friendly and has many of the features I was looking for in editing software. If you are a beginner or want to try it out for the first time, they have a free trial version to sample (be aware the trial version adds a watermark to the videos). I’m going to show you how you can add a Transition to your video using this software to make it look more professional. Now hop on to that editor and let us get started on showing you how this works.
How To Add Transitions In Filmora9
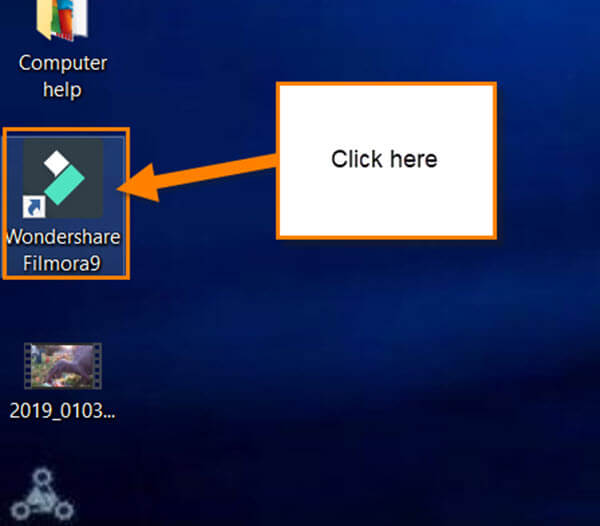
Step 1: Find the Wondershare Filmora9 program and open it up.
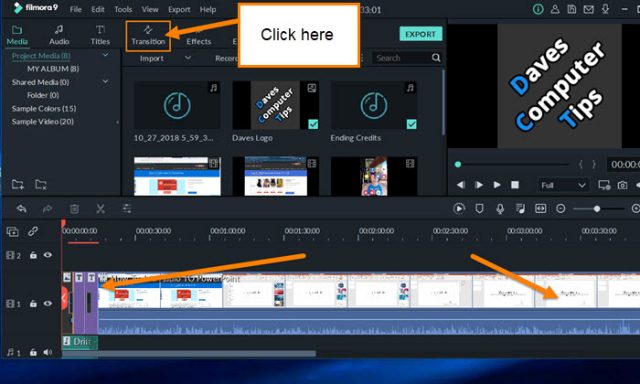
Step 2: Once you open it up, look for the project you want to add the Transitions to. You can even start a new project if you wish. I will be choosing the DCT Template from the Project Library on the right.
Step 3: Once in your project, it is time to find the Transition you want to use. You will see the Transition option at the top of the screen next to Titles. Click it.
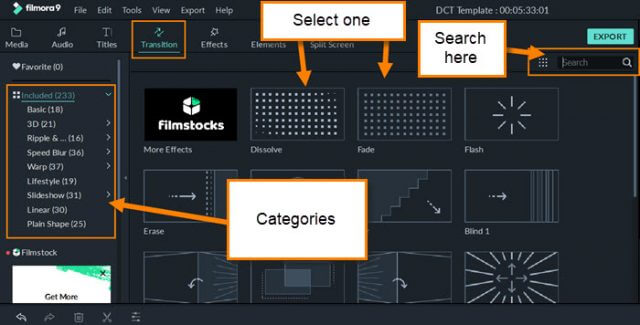
Step 4: Here is the screen where we will be able to find that perfect video element for your project. The menu on the left breaks down the transitions by categories (such as Basic, 3D, etc). If you know what you are looking for, there is a search box at the top right under the export button.
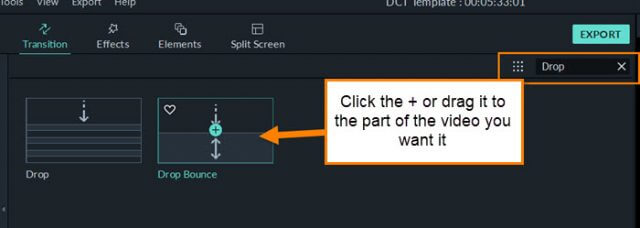
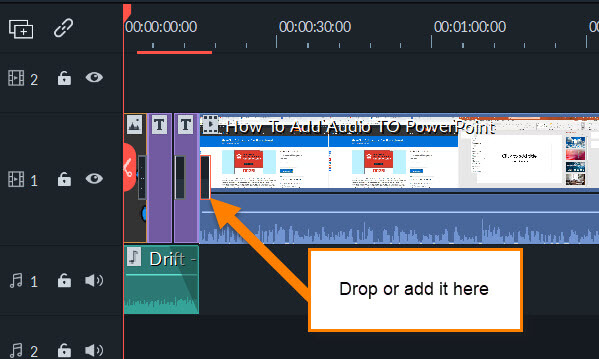
Step 5: When you find the one you want to use, you can either click the plus sign (+) in the center or drag and drop it to the part of the video you where you want it to appear. Make sure if you click the plus sign that you have selected the location/clip/image since that is where the Transition will be inserted. This will insert it on both ends of the clip/image. You can still drag and drop the transition if it ends up in the wrong spot, but it is helpful to have it close to the desired position. To drag it, hold the left clicker down and then move it to where you want it, then release.
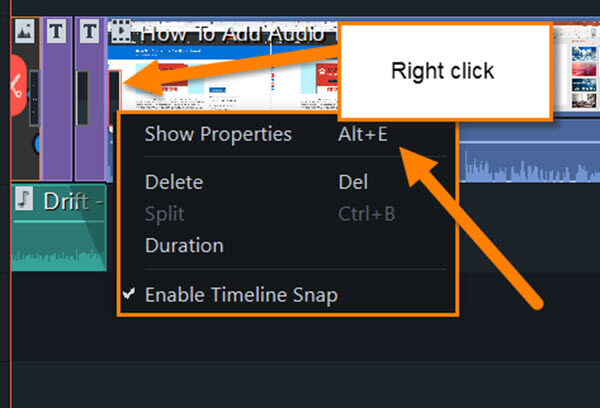
Step 6: We now have the right transition in the place we would like it. There is one more point I think you need to know before we finish. Looking at the transition on the timeline you can either double-click on it or right-click on it for a menu. This menu has Show Properties which is the place we want to go to. Double-clicking the transition will take you straight to Properties, too.
Step 7: Under Properties you are given some options to choose from:
- Duration (changes how long it takes)
- Transition Mode (this is for placement of the transition)
- Include Trimmed Frames
After you have adjusted it you can click the OK button at the bottom right. Done.
You now know how to make your video project more dynamic with Transitions. Time for you to show off your new knowledge and share it with the world.
FURTHER READING:
- How To Add A Blur To YouTube Videos
- How To Build A Video With Photos
- Download YouTube Videos With 4K Video Downloader
—

