The answer is, of course you can! You simply use the scrolling text animation.
Follow the steps below to learn how:
- Go to the final slide in your presentation.
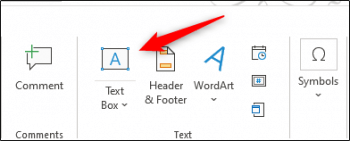
- On the Insert tab, in the Text group, click Text Box.
- Note that your cursor turns into an arrow and after you click, a crosshair.
- Click and drag your cursor to draw the text box.
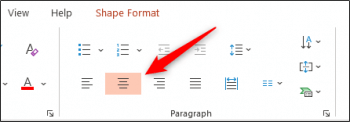
- Credits are typically aligned in the center of your page or screen, so we will set ours up in the same manner. On the Home tab, in the Paragraph Group, select Center. This will place your cursor in the center of your text box.
- Now, key in the names of your colleagues you would like to credit.
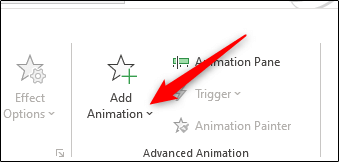
- Once you have finished entering names, you need to give your text box animation, so click your text box and on the Animations tab, in the Advanced Animation group, select Add Animation.
- A drop-down menu should appear. At the bottom of the menu– select More entrance Effects.
- The Add Entrance Effect window will display. Scroll down to the Exciting Group, and select Credits.
- Click OK to finalize your choice.
Your rolling credits animation will now be added to your PowerPoint Presentation.
To view your rolling credits in action, use Presenter view.
—


