When I was growing up my parents would take 35 mm slides during our vacations. When friends would visit, the projector would be set up and their friends would see the pictures and listen to my Dad give them the details about each one. Today, I have those slides and have no idea what many of them are.
In addition to slides, I also inherited boxes of old pictures from my parents. There are a few albums of their early days together back in the early part of the last century. My Dad added many captions to them and sometimes right on the old black-and-whites. I also found albums of me with hand-written captions but the majority of loose photographs were missing any descriptions at all. Other than a few notations on the back of some snapshots, I have no idea who most of the people are or where the picture was taken.
Years from now my children will inherit my pictures but they won’t be in boxes of printed ones. They will be on cloud storage, flash drives, CDs, external hard drives, and maybe even some old diskettes or Zip Drives. And many will be named IMG0123, or whatever the camera generated. They need captions or descriptions to identify them.
Facebook Pictures
When we post a picture on Facebook others get to see them right away. As someone clicks on the post to see all the individual pictures, wouldn’t it be good to have descriptions on each picture and even indicate where and when the picture was taken?
Click on a picture on your page, then find the Edit button in the right pane. This will only show on pictures you have added to your page and not ones added by others. To caption or describe those pictures, save their picture to your computer and then re-post on your page so it becomes yours.
Click Edit and add your description. When done, click Done Editing. The description will not show under the image, only on the right if they click on the image in your timeline. If you want an actual caption as part of your image, see using MS Paint below before adding the image to your timeline.
Google Photos
I like the ease in which I can have all my pictures placed automatically into the Google Cloud. I installed the App on my phone so every picture I take uploads to the Cloud. There are no steps for me to take. Photos knows the date and time I took each one and where I was when it was taken.
What you might not know is that you can add a description to each picture. Find the ones you want to share with others and place them into an album. Then go through the album adding descriptions to each image.
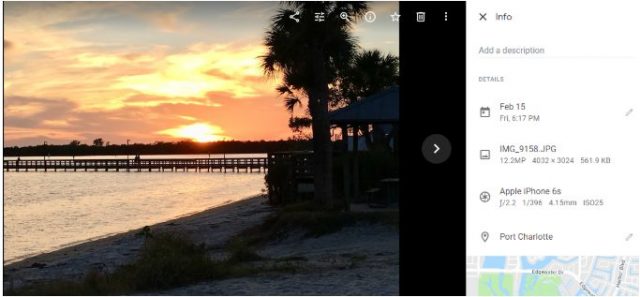
Click on any picture and then click the (i) in the upper-right
Enter the description in the upper-right.
The Caption appears in the lower-left of the image as you scroll through the album.
When you are finished adding descriptions to your Google Photos images, you can share the album with family and friends. They will be able to view each picture and read the descriptions you have added.
On My Computer
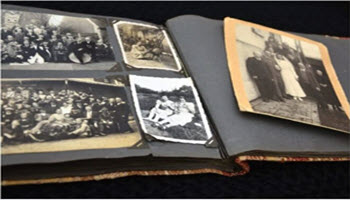
By the way, I used my cell phone to snap pictures from those old albums. They went up to my Google Cloud so I could post them on Facebook, print them out, and send them to others. If you do not use the Cloud, upload your pictures to your computer from your phone or digital camera and add your captions.
What about those images on your computer that are not stored in the Cloud? There are many programs available to add a caption. I like to use MS Paint that comes with Windows. It is so easy to use and adding captions is a quick process. (To open MS Paint in Windows use Win+Q and type paint, then click Enter to open.)
In the File tab in MS Paint, open the picture– File > Open and locate the picture on your computer.
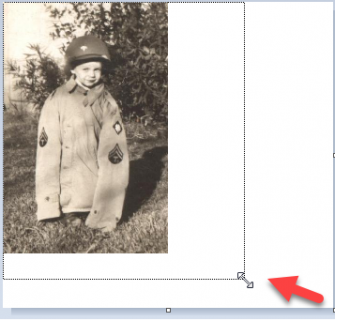
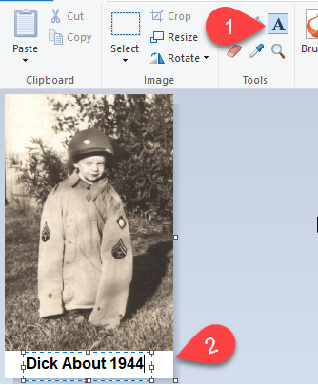
Drag from the lower-right corner of the white box to remove the white space and create a place under the picture for a caption.
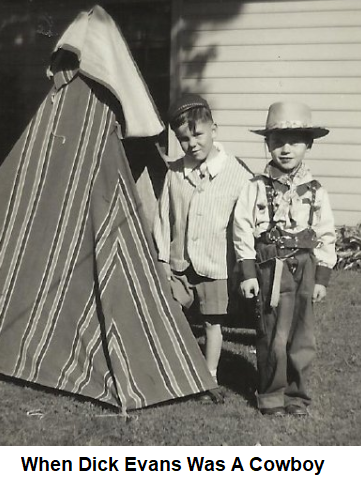
In the File tab, click the Text tool (big A) to draw a box and type the caption. When you click the “A” and draw the box to hold the text, the Text tab opens. There you can change the Font and Font Size, control the color of the text, and more. When done adding the caption, click File > Save or Ctrl+S to save the picture with its caption.
“Have I got room on my hard drive for all those pictures?”, you ask. Most computers today have between 500 GB and one TB of hard drive space. 500 GB can hold about 500,000 to 750,000 pictures, so I would not worry about space. Just back up your hard drive frequently so you don’t lose them.
Dick
—





Learned a lot, thanks.
My solution (until now, anyway) has been to rename the file. So instead of IMG_2133.JPG, it would be Mom, Yellowstone, running from bear, 7Apr2019.JPG.
And that is not a bad idea for locating them and sorting them together by name. Just does not help in the printing as the file name doesn’t print. I like the “shift click” method to rename. I list the files in File Explorer as Details. Then I select the first one, scroll down to the last and holding the shift key down, click again. All are now selected. Then I right click on any one and select Rename. All are renamed to the new name with a numerical suffix.
“…does not help in the printing as the file name doesn’t print.” You’re right, and why I appreciate the tutorial. But I’m afraid that printed photos are as obsolete as LP albums.
Speaking of albums, one of my retirement projects is to scan the photos in our photo albums. Bought a copy stand last year (for when I get around to it) for those photos that can’t be removed from the photo album. Digitizing the photos has the great benefit of letting all three of our children have a copy … instead of only one getting a photo album.
“I like the “shift click” method to rename.” Myself, I like to view a folder of photos using “extra large icons.” That lets me quickly delete photos that are clearly not keepers. Opening the others, one at a time, lets me see them full screen to decide if they’re not keepers as well. When they are keepers, I change their file name, as described in another comment.
When scrolling through File Explorer press alt+p to turn on the preview window and as you scroll done in the detail view a preview of the file will display.
Thanks Dick! A very good article. I am just learning to use the paint program and am glad it is so simple to do these captions with this program that is already on my computer.
Even the new 3D Paint is pretty easy. You just have to get used to it. They tell us Paint is going away, but we will be able to install it from the MS store.
Very useful. I plan on copying my parents’s albums this summer and instructions are very clear. But what is the best way to digitize my hordes of 35 mm slides.
My way costs less… You can bring your slides to Sam’s Club and they will do it for you for a fee. I set up a projector and screen and displayed each slide and took a picture of it (with my flash OFF) with my cell phone. Quick, easy, and a pretty good picture.
“What is the best way to digitize my hordes of 35 mm slides.”
It’s still one of my “projects,” but I plan to use either my Canon 8400F or 8800F scanner. (Have had the first for over a decade, bought the latter at a yard sale recently, and happily it works fine.) Both scanners are supposed to be able to scan slides well.
Hi Dick. Thanks for the tutorial. I have one further question: when you have a picture of a group of people, can you tell me how to add the names to each individual person so that they pop up when the mouse scrolls over them?
If you are putting a picture on a website, you can do that. I do not know any way to do that without some programming. UNLESS you put the picture on Facebook and there you can assign people, to the picture. The process is called tagging. The only downside is they have to have a FB account to be tagged.
Thanks, Dick. Guess I’ll have to make do with a list of identifiers as a lot of the people I want to identify are dead now and won’t be able to get FB accounts. I was trying to put names to pictures of family groups for my children and grandchildren so they would be able to know who were my parents and grandparents.
I suggest two photos. One with nameA on the people. I would use Paint to do that. And a second picture with no names. Hope that helps.