

If you’ve read Part 1 of this series of articles, then you’ve probably now tried out a few Linux distros using the terrific Ventoy multi-boot tool and are ready to install your chosen distro. Comments from readers in response to an earlier article tended to suggest that, compared to installing Windows, installing Linux is a bit of a rigmarole. Not so, in fact the process is very similar, and perhaps even less complicated with Linux.
In this guide, we’ll be clean installing Mint Cinnamon Edition as a standalone operating system to a blank SSD. If you want to install Linux alongside Windows in a dual boot system, that is an entirely different proposition and not something I’ll be explaining here.
Installing Cinnamon Mint Edition
If you followed Part 1 of this series, you will have learned that you can load Mint Cinnamon as a “live” distro which allows you to navigate around as if installed but with the huge difference that any changes you make are not permanent (persistent).
With Mint Cinnamon “live” loaded you should see an icon in the top left-hand corner labeled “Install Linux Mint“. Double-click that icon to begin the installation process.
Next, you’ll be presented with several settings to select:
- Select Language: obviously, in my case the selected language is English – (click Continue)
- Select Keyboard Layout: in most cases, this will be English (US) – (click Continue)
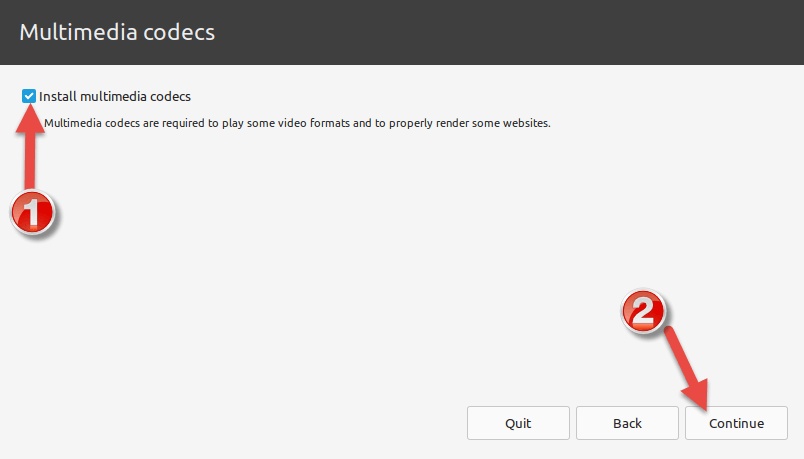
- Install Multimedia Codecs: to ensure that all popular media formats are supported – (click Continue)
Now we start the installation process in earnest:

Now you should receive a message to “Write the changes to disks” which explains the partitioning system:
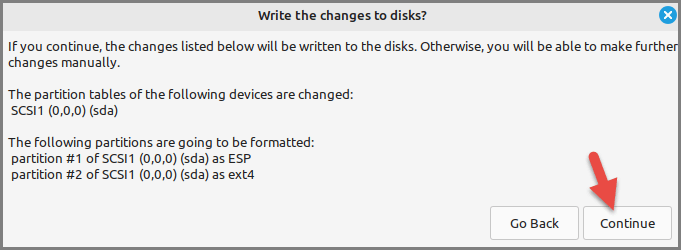
The selected (default) partitioning system is optimum so simply click the Continue button.
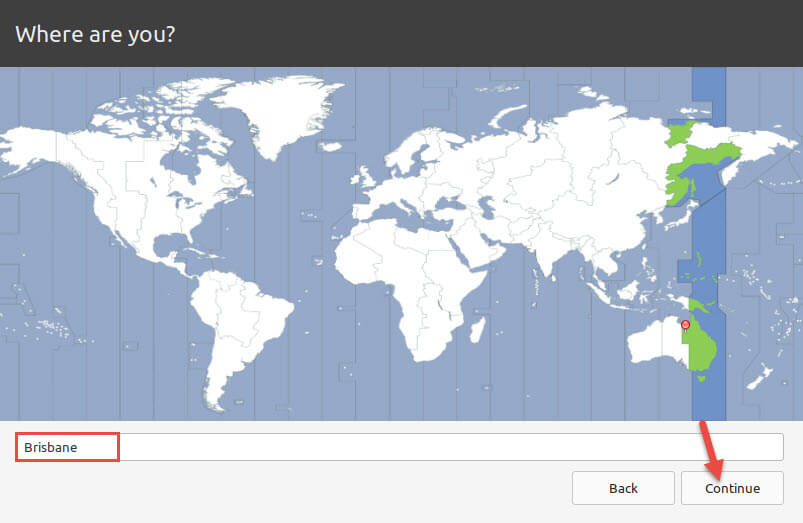
Once that process has been completed, you’ll see a location map that should include your approximate location. Mine was set to Brisbane which, although I don’t reside in Brisbane, is the closest major city to my actual location:
Next, set up your username, computer name, and password:
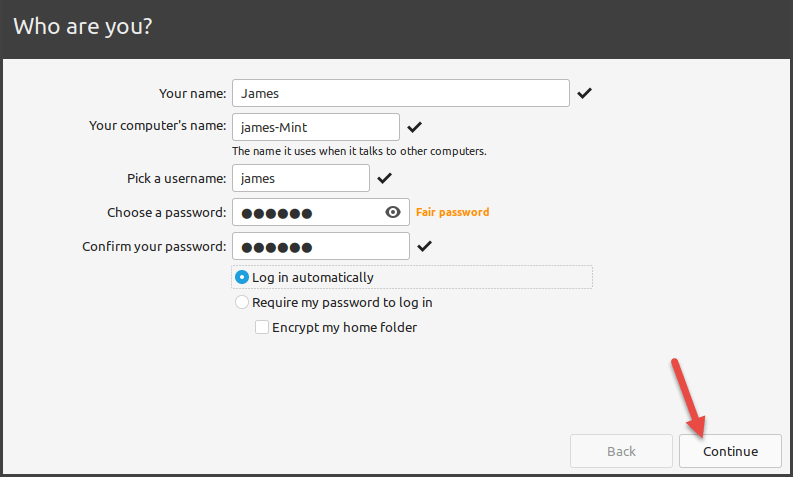
Depending on your preference, you can choose to require the password for each login or login automatically. In my case, I am the only user and installing on a desktop PC so I chose to log in automatically. If your computer is open to other users and/or a laptop, you might want to select the option to “Require my password to log in” for security purposes. You can also enable the option to encrypt your home folder. I chose not to.
You are very nearly there and, after a few minutes, you’ll be prompted to restart – to finalize the installation click the Restart Now button:

When prompted, remove the installation media and press Enter. You should now see the Welcome window:
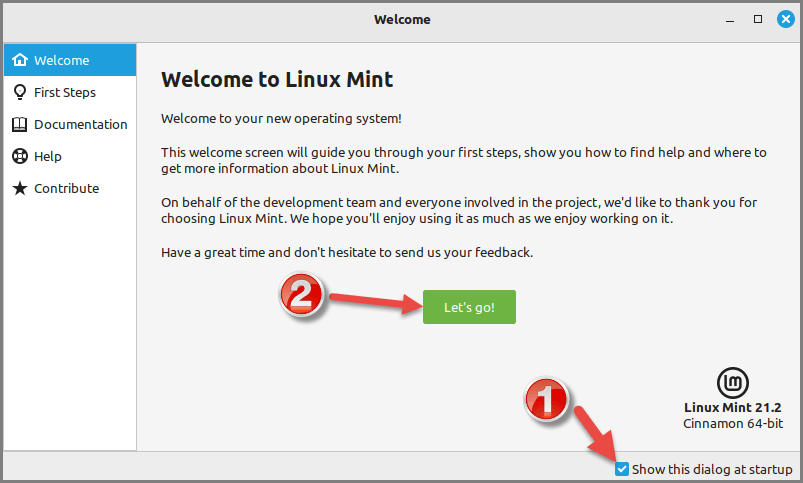
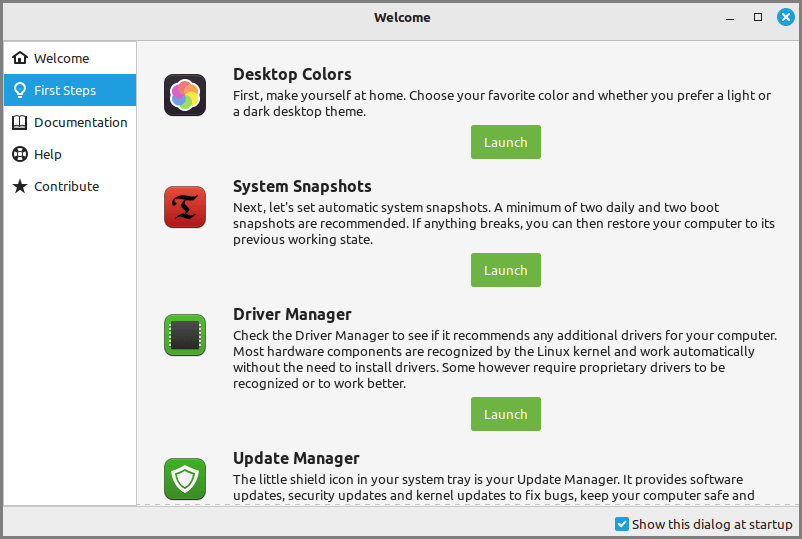
At the bottom right-hand corner, you’ll see an option to “Show this dialog at startup” which is enabled by default. I would suggest leaving that option enabled for the time being until you become more conversant with your new distro. The reason is that when you click the green Let’s go! button, you’ll be presented with a useful list of help topics:
You can close out the Welcome window at any time by clicking the X in the top right corner to reveal Mint’s desktop. All done… you are now ready to start using Linux Mint Cinnamon Edition.
One final note: I believe the Linux developers have taken steps to get around the Secure Boot issue. However, if you run into problems installing or running Linux, try disabling Secure Boot in your PC’s BIOS.
In the next and final installment in this series, I’ll be guiding you through several of Mint Cinnamon’s GUI elements, settings, and options. Stay tuned!
- Getting Started With Linux – Part 1
- Getting Started With Linux: Installation – Part 2 ⬅ You are here
- Linux Mint Cinnamon: A Beginner’s Guide – Part 3
—

