![]() I awoke this morning to a plethora of new updates for my Windows 7 machines, around 22 on one machine and 27 on the other. Fellow Windows 7 users should have also received the same slew of updates during the course of the past couple of days. The good news is that one of the updates (KB2852386) is a plug-in for the native Windows Disk Cleanup tool which cleans up redundant Windows updates.
I awoke this morning to a plethora of new updates for my Windows 7 machines, around 22 on one machine and 27 on the other. Fellow Windows 7 users should have also received the same slew of updates during the course of the past couple of days. The good news is that one of the updates (KB2852386) is a plug-in for the native Windows Disk Cleanup tool which cleans up redundant Windows updates.
If you’re wondering how updates can become redundant, here is an explanation included in an article on the Ask Premier Field Engineering (PFE) Platforms blog:
The WinSxS directory is a large consumer of disk space on Windows Clients and Servers. Over time, the WinSxS directory steadily increases in size.
So why is this?
One cause of this is Windows Updates. To allow the ability to uninstall an update, all the previously installed versions of Windows Updates are kept in WinSxS directory even when they become superseded by an update released in future. This accounts for Windows updates taking a lot of space and it continues to grow significantly as more and more updates are installed.
So how do we cleanup the WinSxS directory? Well, with each service pack released, we also give the option of performing a cleanup that removes all previous versions of the files updated by the service pack. However, service pack 1 released well over 2 years ago, and there has not been another service pack since. Think about all those files updated by security updates and hotfixes? Up until today, we have not had the ability to cleanup these files.
What this basically means for Windows 7 users is a lot more disk space freed up. NOTE: Applies to Windows 7 with SP1. This option is already built into the Disk Cleanup tool in Windows 8… although, for obvious reasons, will not be as effective at freeing up space in Windows 8.
How To Use the New Disk Cleanup Plug-in:
Windows Disk Cleanup tool can be accessed in several ways:
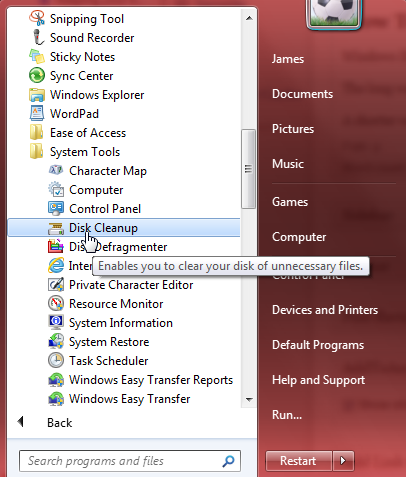
The long way: Navigate to Start>All Programs>Accessories>System Tools>Disk cleanup.
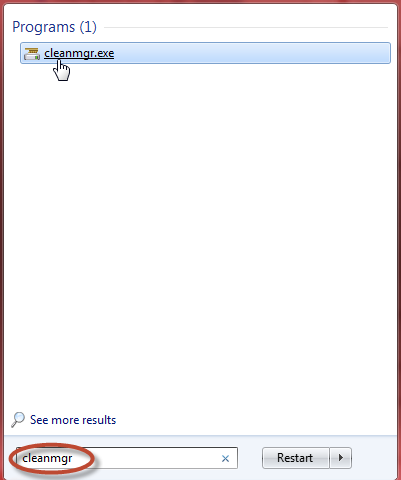
A shorter way: Click the Start button and type cleanmgr into the search bar and then click on cleanmgr.exe in the results.
Next you will be asked to select the drive – “C” by default
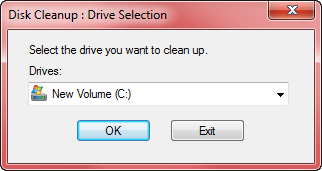
Click OK and a scan will start. At the completion of the scan a new window will open – click on the Clean up system files button
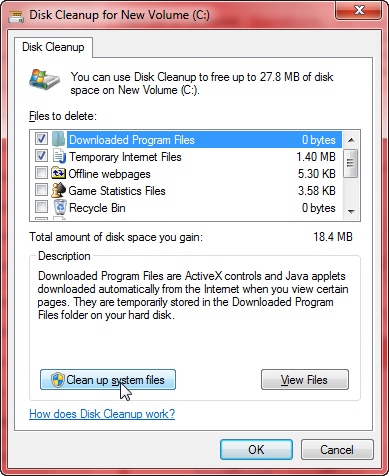
The drive selection window will appear again – click OK again to initiate a new scan. When the scan has completed a new window will open displaying a list of system files which can be cleaned – including “Windows Update Cleanup”
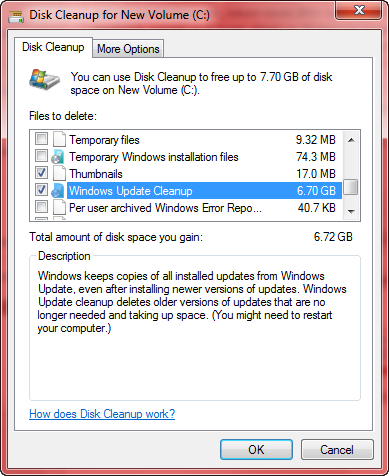
As you can see from the screenshot above, I can free up 6.70 GB of space on my C drive by cleaning out those redundant updates… and that, my friends, is quite a significant amount.
NOTES
- This is a recommended update which applies to Windows 7 with SP1
- Requires a restart to complete the process
- This option is already available for Windows 8 users
- More information here: http://support.microsoft.com/kb/2852386
3GB for me
Just a tad over 2gb for me on a 120gb SSD
Jim this works in Windows 8 also.
Thanks nightowl. I wasn’t 100% sure about that but just checked and yes, you are quite correct.
Now added that information into the article.
Cheers mate.
installed the update, ran windows update now my pc boots a little slower than usual. Could it be coincidence or this thing actually screwed something up?
Trolol,
I doubt this has anything to do with it. The SxS (side by side) files should (theoretically) not be in use – just taking up space should there me a need to uninstall an update.
A massive, huge amount of 10.1 MB for me lol 😀
Will this run on Vista/sp2?
Hey Dan – As far as I am aware this option is only available for Windows 7 (SP1) and Windows 8. So, the short answer is no.
Cheers… Jim
Actually, I do see a ‘cleanmgr.exe’ on my Vista PC so I guess I’ll give it a whirl!
cleanmgr.exe will be included in Vista Dan, that just just runs the Disk Cleanup tool. What will most likely not be available is the option for “Windows Update Cleanup”.
Thank you for informative article with screen shots.
I wonder if I could delete those updated KB files and recover space on Windows Vista or deleting file will be harmful. Any help in this regard will be appreciated.
Hey Ari – As far as I am aware, this feature/option is only available in Windows 7 (SP1) and Windows 8. The software actually identifies those redundant updates for you so, unless you know what you are doing, I would suggest leaving the updates well alone in Vista.
Cheers… Jim
Hi Jim, Here in South Africa, your excellent information doesn’t help me, as I don’t get the “Cleanup System Files” appearing on my Disk Cleanup. Yet I have SP1 installed on my Windows 7 Professional. How do I proceed now please? Thank you for a great tip.
Jim, Worked a little different for me (WIN 7). When I did the primary scan there was no “Clean up system files” button as indicated in the article. But as I scrolled down the list from the primary scan, “Windows Update Cleanup” was included. 4.1GB for me. Thanks, Tom
It’s funny you should mention that Tom, our very own Richard Pedersen had the same experience. Richard uses a batch file to automate disk cleaning across the board and we assumed that was what may have caused the Disk Cleanup tool to skip the first screen and go straight to system files.
Maybe some Win7 editions just work differently in this area. Anyway, as long as we all get there in the end. 🙂
Cheers… Jim
Sorry Jim, Being an Irish South African I’m always making mistakes. I used the incorrect name in using “BallyAdams”. Tom, though, gave me the right answer: sure enough I found the system files clean-up where he found his! Thanks Tom.
There was a 0 files there. Probably because I use PrivaZer, the best and most unique cleaner I have yet used. Please try it Jim and give us a write-up on it. Cheers mate.
No problem Bob. 🙂
I’ve been singing the praises of PrivaZer for some time now mate, see here: http://www.davescomputertips.com/privazer-pc-cleanup-privacy-tool/ and here: http://www.davescomputertips.com/privazer-2-released-revisit-this-excellent-cleaning-privacy-tool/ and here: http://www.davescomputertips.com/ccleaner-vs-privazer-which-is-more-effective/
Cheers… Jim
Hi Jim I didn’t have the Clean System Files either,but the apropriate files to clean were listed (Win7 HP 64)
Also,I’ve read about this new utility on several other tech blogs,and no one has made mention of the required reboot to clean the files.
In my case,upon the shut down phase of a restart,I got the “windows is configuring updates blah blah” up to 32%,and upon the restart,I got the same,from 32% to 100%,followed by a “cleaning files” notification,at which point one can go for coffee,or watch the first season of the Sopranos while the task is completed.
A side note here.On a one year old,very rarely used Lenovo,I was greeted with the need for a Check Disk at the next day’s boot.Coincidence perhaps?
Hey Chuck – I think you meant “no one else has made mention of the required reboot to clean the files”. I did, check item 2 under “Notes”. 🙂
Yes, the actual cleaning process only kicks in after a restart, and it can take quite a while. Strangely, there is nothing to indicate that a reboot is necessary, no popup message or anything to that effect.
Cheers… Jim
After rebooting, I also DEFRAGGED because there is large blank spaces in the hard drive, and need to organize and align the files so that they can be read orderly and smoothly. I used MyDefrag on “System Disk Monthly”, and I do that about every 3 months.
My apologies Jim! Of course, it was you who introduced me to PrivaZer in the first place – which is scoring very well everywhere with 5/5s.
Old age is not funny when you start forgetting things… hehehe!
I’m hearing you on that one Bob. I’ve even started wandering into another room and then wondering why the heck I went there in the first place.
No problem mate,
Cheers… Jim