
Windows 10: 3 Weeks and Counting…
Much to the chagrin of many people, the traditional Start Menu was dropped from Windows 8 and 8.1 and replaced by a Start Screen. As you would no doubt be aware by now, the Start Menu is back in Windows 10, albeit in a very different format. There is still an option to go full screen if you’d prefer but the new Start Menu displays as a popup overlay window by default.
Switch Between Start Menu and Start Screen
If you’d prefer the Windows 8/8.1 style full Start screen – go to Start>Settings>Personalization>Start and turn on the option to “Use Start full screen”.

Pin Folders to the Start Menu
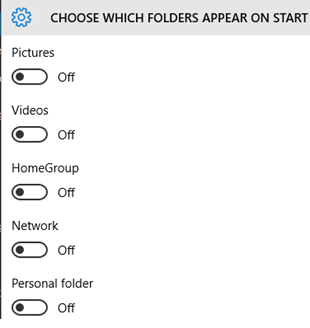
From the above location, you can also choose from a selection of folders to pin to the Start Menu – click “Choose which folders appear on Start” and use the on/off switches to add your chosen folders into the Start Menu:

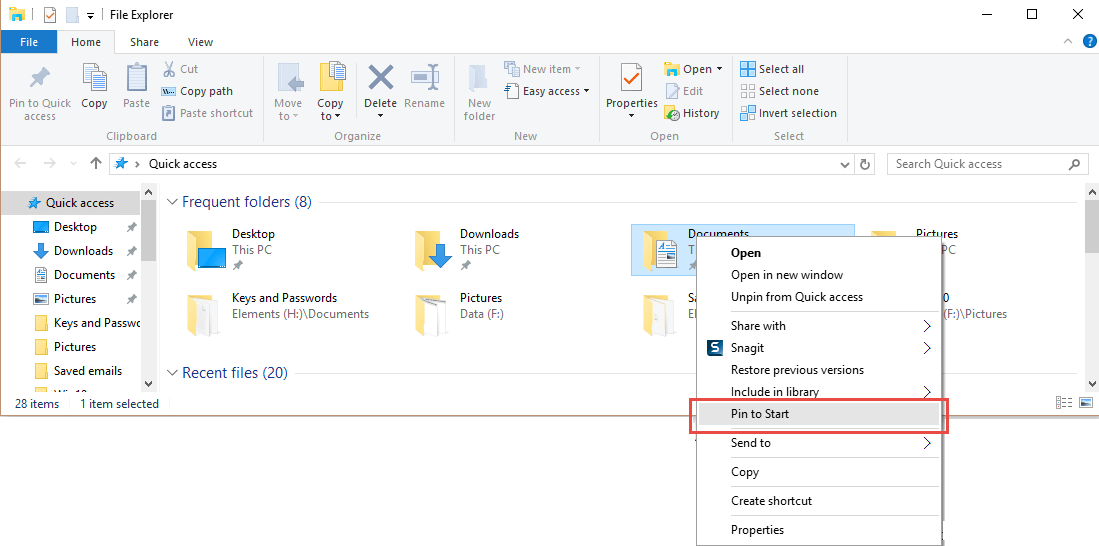
This will add textual links into the left side of the Start Menu. To add a tile, open File Explorer, right click the folder you want to add and choose Pin to Start:
Resize Start Menu & Customize Tiles
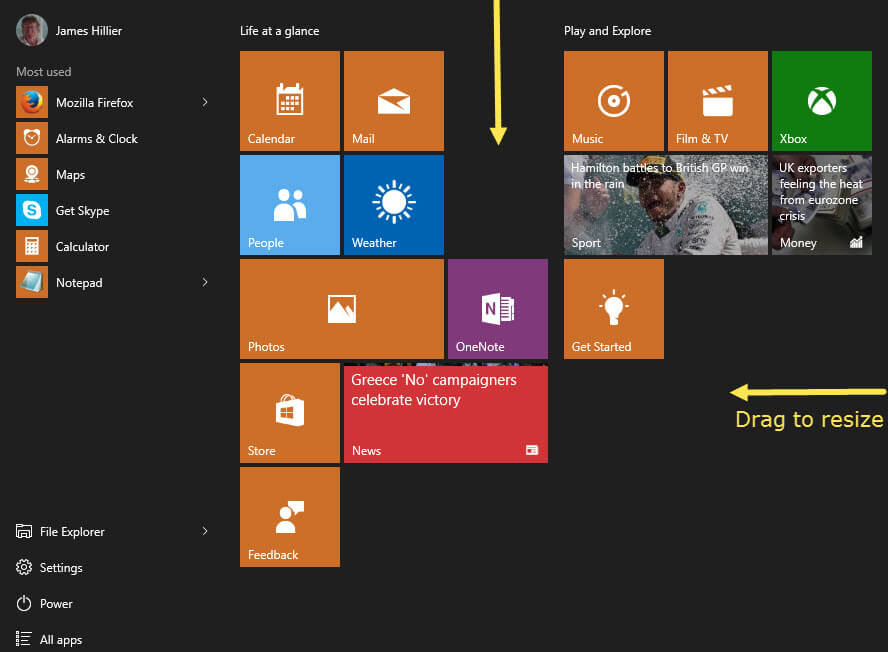
The new Start menu is much larger than the older traditional style, obviously to accommodate the added tiles. However, it can be resized to match your own preferences simply by dragging the borders:
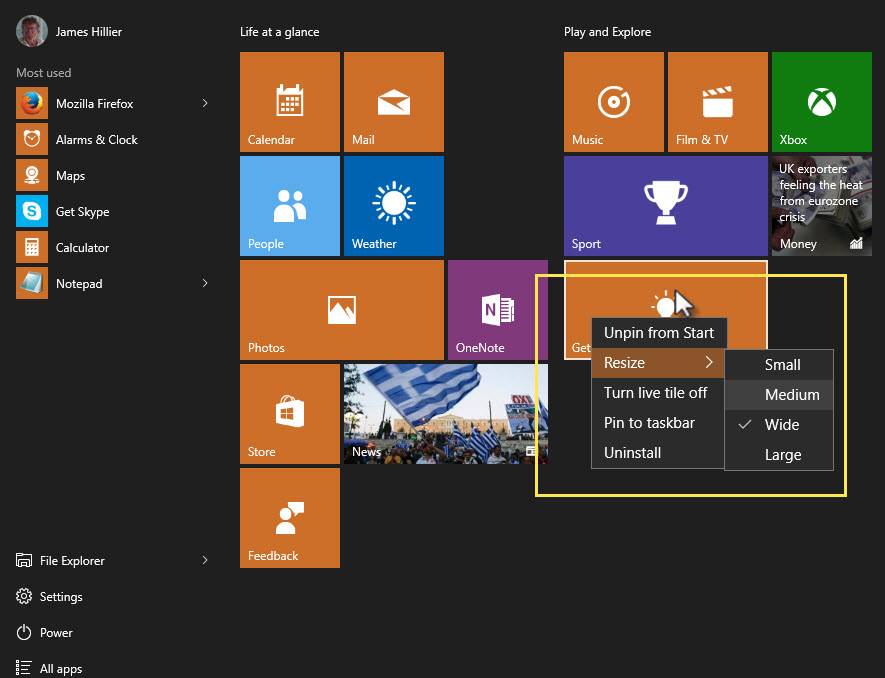
Tiles can easily be unpinned or resized via a right click menu, you can even uninstall associated apps from here – right click a tile and choose your preferred option:
Moving tiles around is a simple matter of drag and drop, just drag tiles into your preferred order. Here’s a screenshot of my Windows 10 Start Menu after completing the above steps – (size shown is actual size):
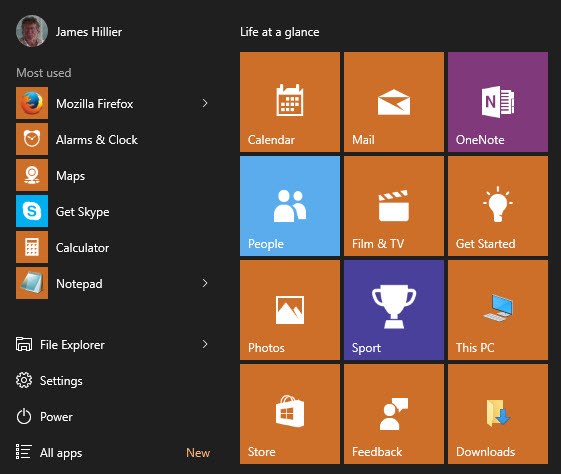
NOTE: The “All apps” item at bottom left. This provides a very similar function to the old “All Programs” button, opening a list of all installed applications in alphabetical order.
Change the Colors of the Start Menu, Taskbar, & Windows Borders
To change your color scheme, go to Settings>Personalization>Colors:
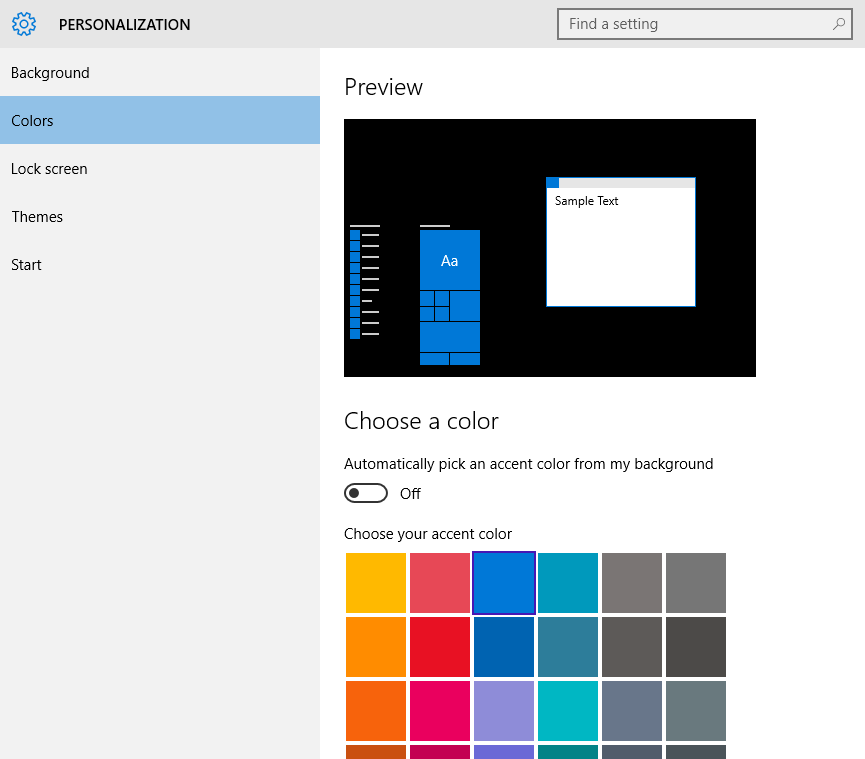
From here, you can choose an accent color from the chart (or switch on the option to automatically pick an accent color from your background image). If you want to completely change the color of the Start Screen and Taskbar rather than just adding a highlight, you’ll need to scroll down and enable the appropriate option:
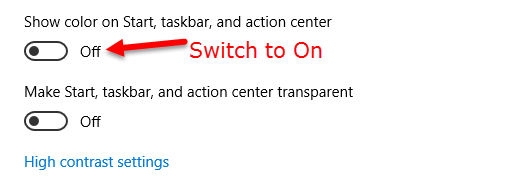
As you can see from the above screenshot, there are also options to choose a transparent background as well as a high contrast color scheme.
These then are the Windows 10 Start Menu’s basic customization options, no doubt I’ll come across more as time goes on. If you know of any further customizations that haven’t been mentioned here, please let us know via the comments.
*All included guides/settings pertain to Windows 10 Pro Insider Preview, build 10162.
I know it is a matter of liking but I just use full page start like in W8.1.
All this is well and good, but what can be done with a list of applications in alphabetical order. How to remember the name of each application you use from time to time only if you have many (especially at my age!). I always prefer a classification by categories of apps.
With forced updates for the Home edition, it will probably the reasons why I will stay under win 7 and win 8.1.
Jim
Can’t work out how I’m suppose to get favourite websites off the internet onto my tiles? I open them on google chrome.
John
Hi John – Not surprised you’re having a problem working it out mate, it’s a fairly convoluted process with Chrome.
1) Open Chrome minimized so you can access the desktop
2) Go to the site you want to pin
3) Drag the icon at the left of the URL in the address bar to the desktop
4) Click the icon on the desktop and then press Ctrl + C keys
5) Open File Explorer and paste (Ctrl + V)
6) You should now see an entry under All Apps>Chrome linking to the website
7) Right click that entry and select Pin to Start
You can now delete the original entry in All Apps if you want to:
1) Right click the original entry and select Open file location
2) Right click the file and select Delete
That’s all there is to it… LOL
Thanks, I’ll let you know in a month’s time how I got on!!!!!!