
Since the early 80s, I have been a big gamer. No matter that I’m getting older, I still love playing video games and have continued this tradition by playing with my own children. You can find my gaming channel, Gold Club Gamers, on Facebook, TikTok and YouTube (Shameless plug). You can check them out here:
The reason I bring this up is that I love to still play games on the old systems like Nintendo Entertainment System (NES), Super Nintendo Entertainment System (SNES), and many others. I’m also a collector of older games and consoles. When using older technology you have to learn how to get the games to play on newer TVs and Monitors, particularly if you plan on streaming or recording your game play. When I started this was a hurdle I had to get over. It took many months of research to figure out how to hook up my Nintendo to my Roku smart TV and my LCD monitor. Since I have learned this important skill, I thought it was time to share my knowledge with all of you. Time to get this old school gaming class started and maybe teach a few old dogs some new tricks.
Connect NES Console To Monitor/Smart TV
This will be shown on my ViewSonic LCD Monitor with HDMI connection. I tested this on my Roku Smart TV too.
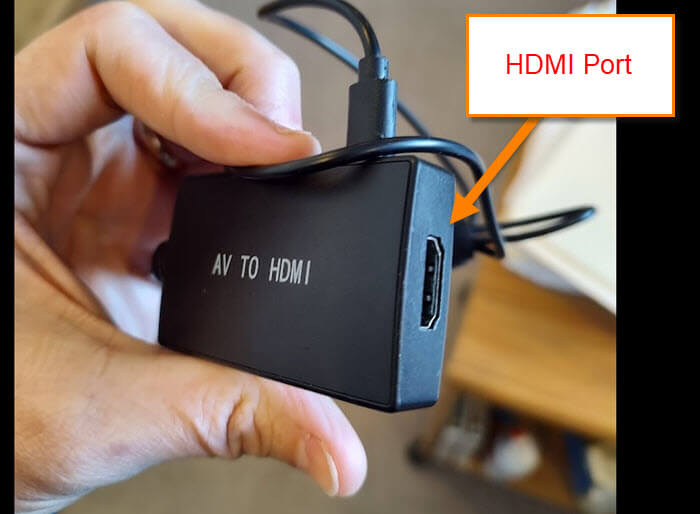
Step 1: The first thing we need to do is buy the right parts. Most Smart TVs and Monitors use a HDMI connection and this is what both of my devices use too. Head over to Amazon.com and look for an AV(RCA) to HDMI converter. Here is a link to the one I purchased and still use: RCA to HDMI Converter
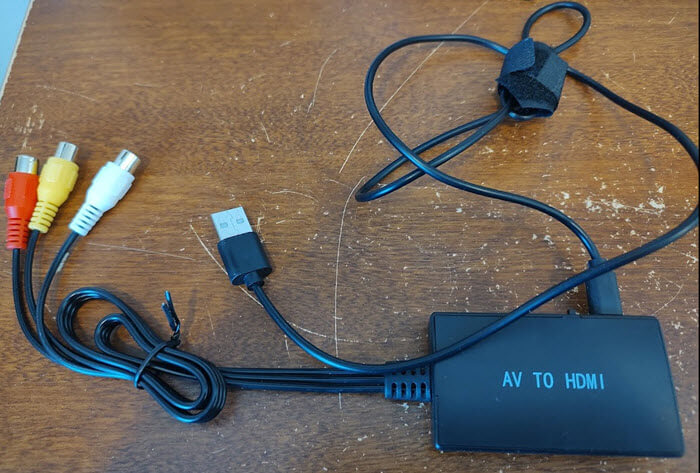
Step 2: Once you have a converter I will show you how to use it to hook up the NES to an LCD monitor. This will work the same on any smart TV with an HDMI port. Pull out the NES, power cord, and AV cable. You should have these items before you start.
- NES/SNES Systems plus power cords
- AV to HDMI adaptor
- LCD Monitor or Smart TV with HDMI connection
- HDMI Cable (Need 1)
- AV(RCA) cord that should have come with your console

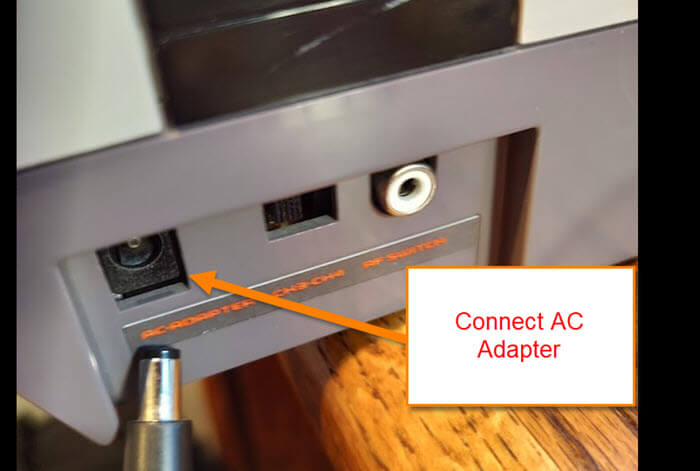
Step 3: Now that we have all the parts, it is time to start. Plug the power into the back of your console and then into the wall.
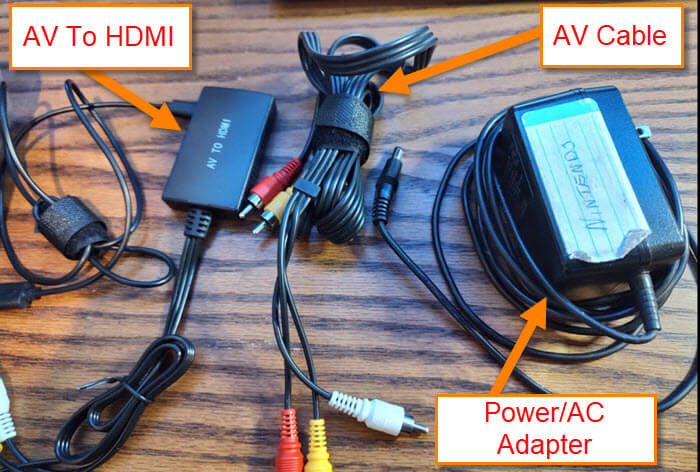
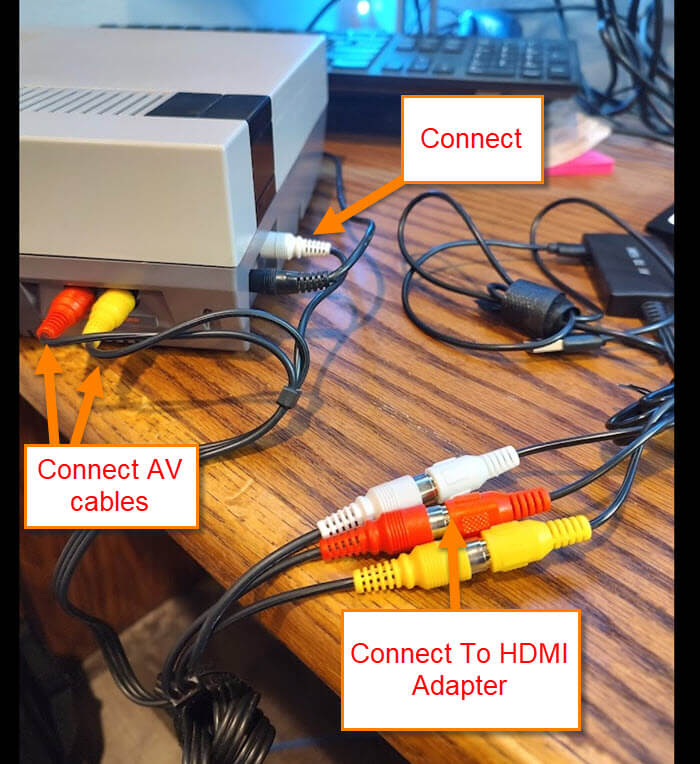
Step 4: Now we will need to pull out the AV to HDMI adapter, AV(RCA) cables (red, white and yellow ends) and the HDMI cable. Hook up the AV cables to the the Console then hook them up to the adapter (colors to match).
Step 5: Hook up the HDMI cable to the Monitor/TV and then to the HDMI port on the adapter.

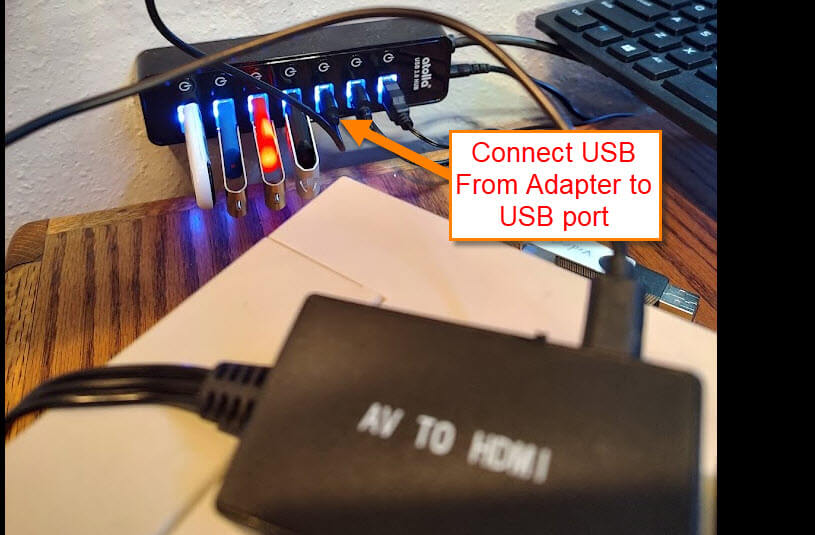
Step 6: Connect the USB for the Adapter to the port and then to the USB of your device to power it. Your Monitor/TV should now have a blue screen (not a bad thing in this case).
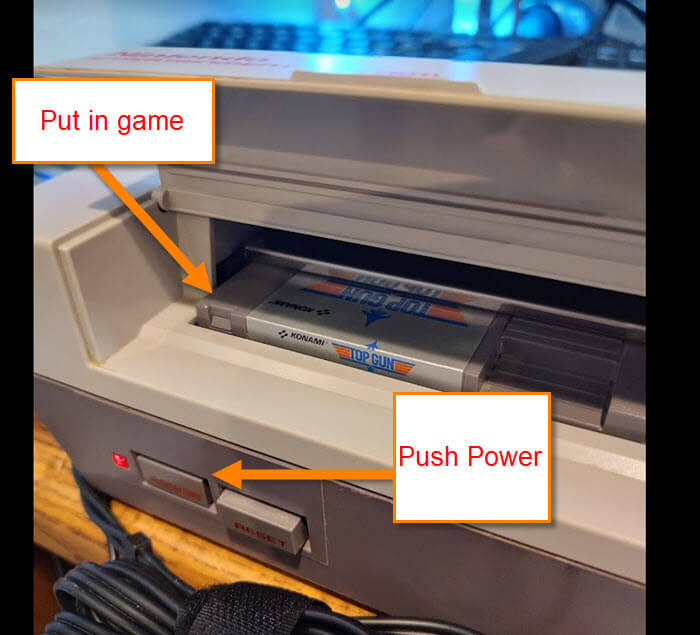
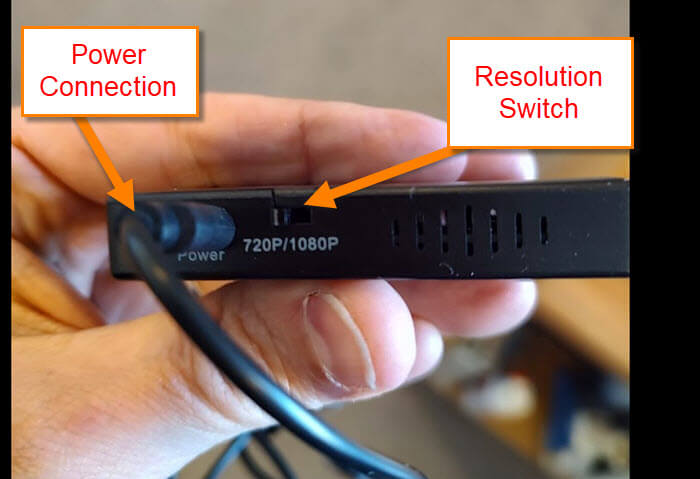
Step 7: Time to plug in the power for the NES/SNES system, if you have not done so. Find the game you wish to play and pop it in. Push the power button on your system. You will probably hear the game sound but still have a blue screen. No worries, look to the side of the adapter and move the switch either direction to 720p or 1080p it does not matter on this step.
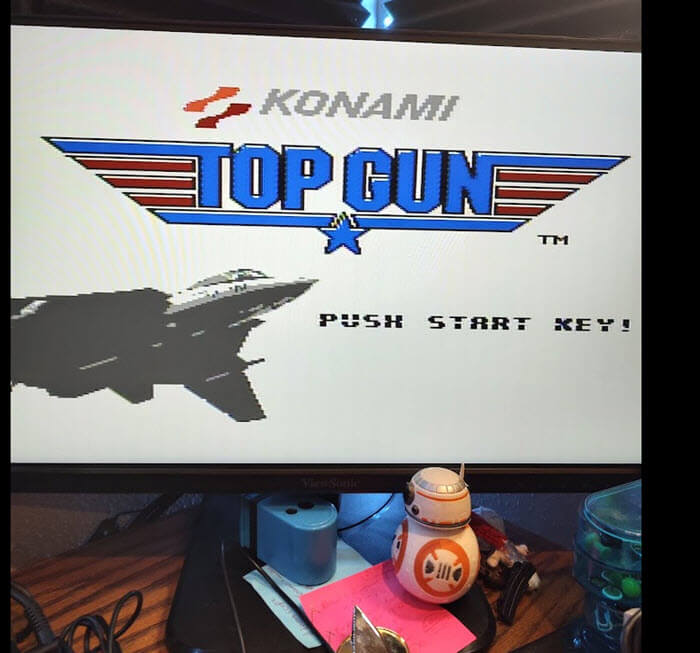
Now you are ready to play some old school games.
Side Note: If you hear a buzz sound from the speakers unplug the white cord from the console. I discovered that on the NES you might get this sound from the white cable being attached.
You can use this adapter with your NES, SNES or any other systems that use AV(RCA) cords to plug in. Time to get back and play your retro games. Share your new knowledge with your gaming buddies.
—