
I recently worked on a video where I needed part of a picture to be transparent, that is, make it see-through so the image in the background shows through.
Here are three ways to do this in PhotoFiltre.
First, the Basic Tools Used For This Project:

1. Transparent Color
Open your image and duplicate that layer. In the black layer dock to the left of the picture, right-click on the thumbnail called Background, and in the menu that opens click on Duplicate.
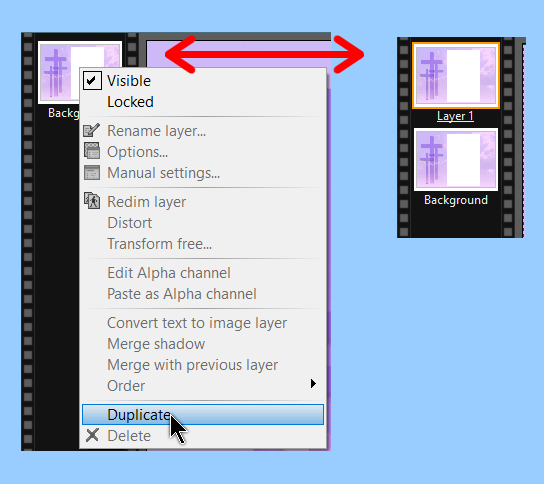
Now you should see a second thumbnail called Layer 1. In the top menu click on Layer, then Transparency, and then Transparent color.

In the color box that opens, pick your color and click OK. I’m using a purple cross theme that I used in my video. I want the white rectangle to be transparent. So I clicked on the color white.
The downside here is that it might make transparent sections that you didn’t want transparent, as in my case. Part of the clouds to the right and on the bottom became transparent as well, which I didn’t want.
Click on the Layer manager icon on the right side of the screen. Then go to the layer dock on the left, and click on the Layer 1 thumbnail to make it active. Go to Edit, in the top menu, then copy.
Then go to Edit again and click on Paste as new image. Save that image as a GIF, PNG, or TIF. I always choose PNG.
You can test your transparency by opening another picture and copying and pasting the image with the transparency onto it. You should see the background photo through the section you made transparent.
2. Automatic transparency
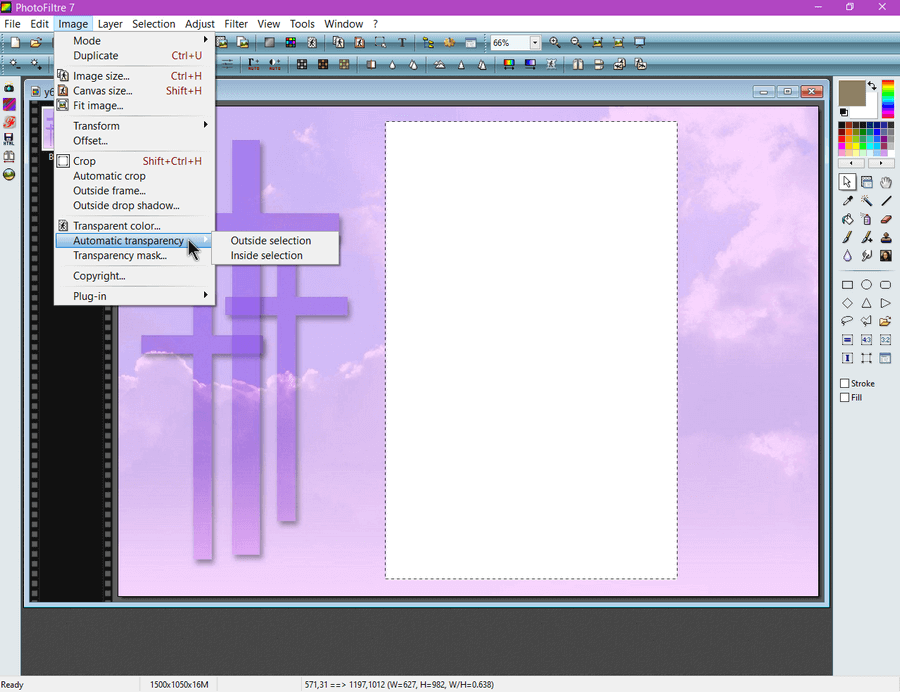
Using the selection tool (like a mouse cursor) I dragged a border around the white section I wanted to make transparent. On the top menu, click on Image, then Automatic transparency, and then either Outside selection or Inside selection. I wanted the white inside transparent so I selected Inside selection. Then save it from there.
3. Create Automatic transparency
Click on New, in the top menu, and in the box that opens set your page size, and check the Automatic transparency option towards the bottom. This will create a completely transparent background the size you selected. Mine looks checkered.
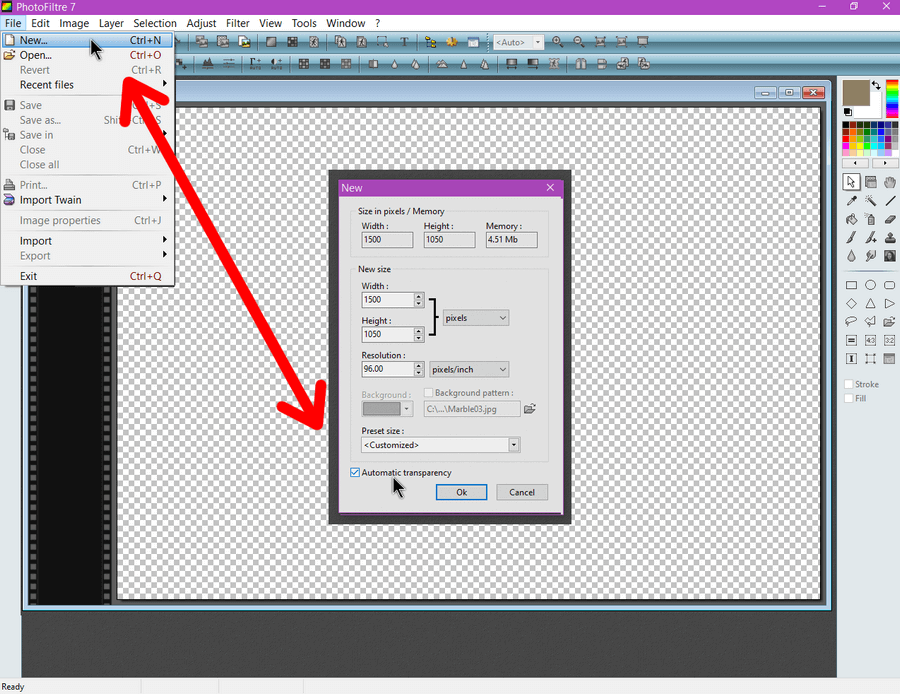
Now copy and paste your image on top of this one so you have two layers: A transparent background, and your image on top as Layer 1.
You could use the wand tool to highlight and delete the area you want transparent or use the selection tool to drag around it and delete it or erase the white area with the eraser tool. Save the end result.
This might be a fourth way but it’s very similar to what I’ve already explained. This is what I did. I duplicated the image. Highlighted the white area and deleted it. Then copied and pasted the top layer to its own image and saved it as a PNG. I did this before I figured out the rest. Yes, I put the cart before the horse. 🙂
For more photo editing tips, click here.
—