Making the switch to Windows 11 was not what everyone wanted and if I know my fellow PC enthusiasts, it will be a while before they do.
However, there are several very cool improvements that were made in Windows 11 that do increase productivity, aid accessibility, and give an overall positive feel when using applications. One important update is the Quick Assist App. If you are an individual that uses Quick Assist to help others or to receive help, you will need to get the update ,but only if you feel you will need it prior to the next Windows 11 Update 22H2 where it will automatically be included.
Quick Assist
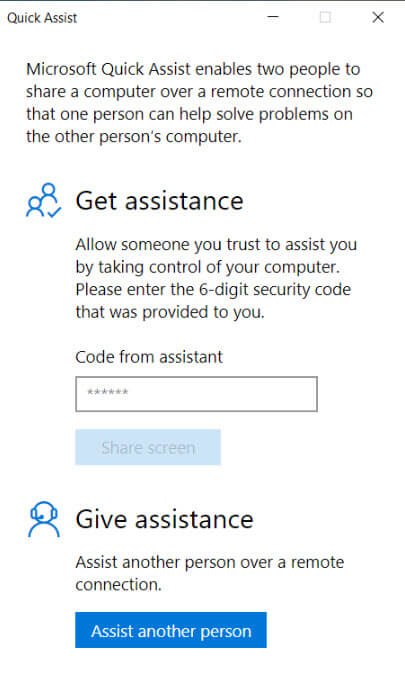
Quick Assist has been around a while and is an extremely easy computer-to-computer assistance program. If you are an individual that uses Quick Assist to help others or use Quick Assist to receive help, you will need to get the application for any required assistance now.
Microsoft has not only increased the security of Quick Assist, but users will find a much faster passcode generation time and a reduction of application errors. The current built-in Quick Assist app is reaching the end of service, but you can find the latest version in the MS Store.
One of my favorite improvements in Win 11 is the Screen Scale App.
Screen Scale
Not too long ago, most monitors maxed out at an 800 x 600 resolution and software followed suit allowing users to set their settings to that resolution. It is still a choice in Windows 11. But with monitors getting larger and larger, that resolution is no longer practical, and setting your screen resolution higher can make text and other features much too small for realistic use. The choices of resolutions have increased but some will leave your screen scrunched or stretched. To understand the way they function, defining each might help.
Resolution
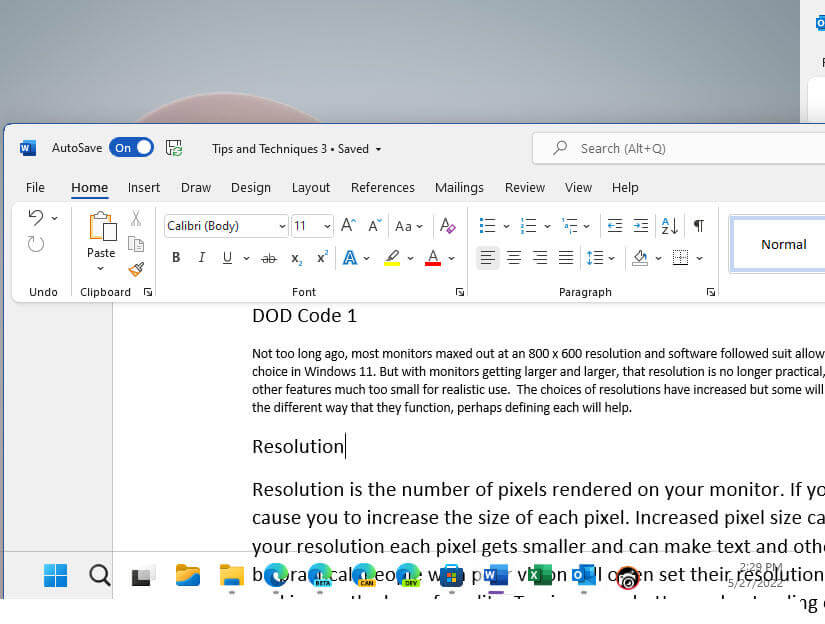
Resolution is the number of pixels rendered on your monitor. Let’s use an example of someone using a 27” monitor that uses the recommended 1920 x1080 resolution. If you decrease your resolution, (from 1920 x 1080 to 800 x 600) it will increase the size of each pixel. It will be displayed as if it were on an 800×600 monitor reducing the overall size of the screen. As you increase your resolution each pixel gets smaller and uses the entire screen, but can make text and other objects appear too small particularly for people with poor vision. Each resolution size drastically changes the number of pixels. To give you a better understanding of pixels rendered on your monitor, the image below is set to 800×600. This is how a word document would appear and take up all the monitor space leaving the top unused. Because the screen is shortened, my full taskbar does not show.
Enter Screen Scale
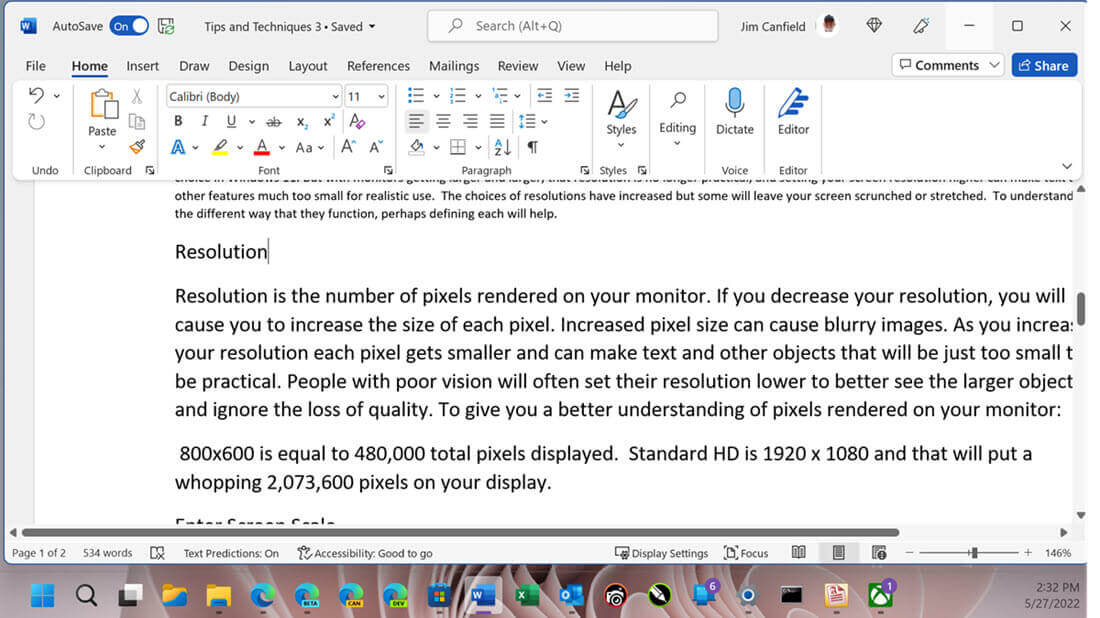
Leaving my computer resolution settings to 1920 x 1080 and then adjusting the Screen Scale to 150% increases the Word document items to the same size but now it is the entire width of my monitor, you can see the difference not only in the top of the Toolbar in Word but that my taskbar goes the entire width.
There are two major differences between adjusting Screen Scale and adjusting your resolution:
The full width and height of the monitor will be used regardless of the scale
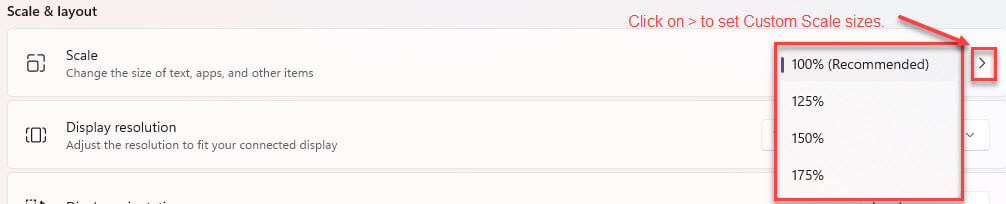
Windows offers you a quick set of options other than the recommended 100%, 125%, 150%, and 175%
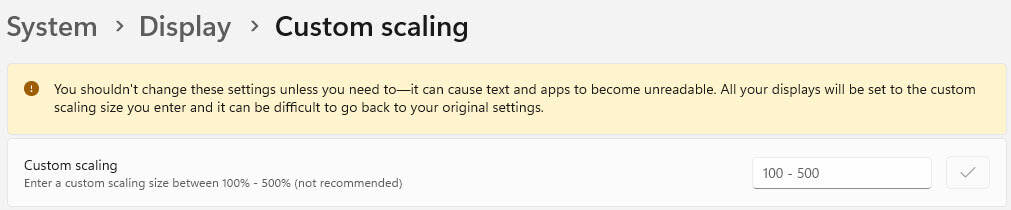
You may also click on the greater-than arrow to the right to make a custom size from 100 to 500%
The size of text, apps, and other items increase equally
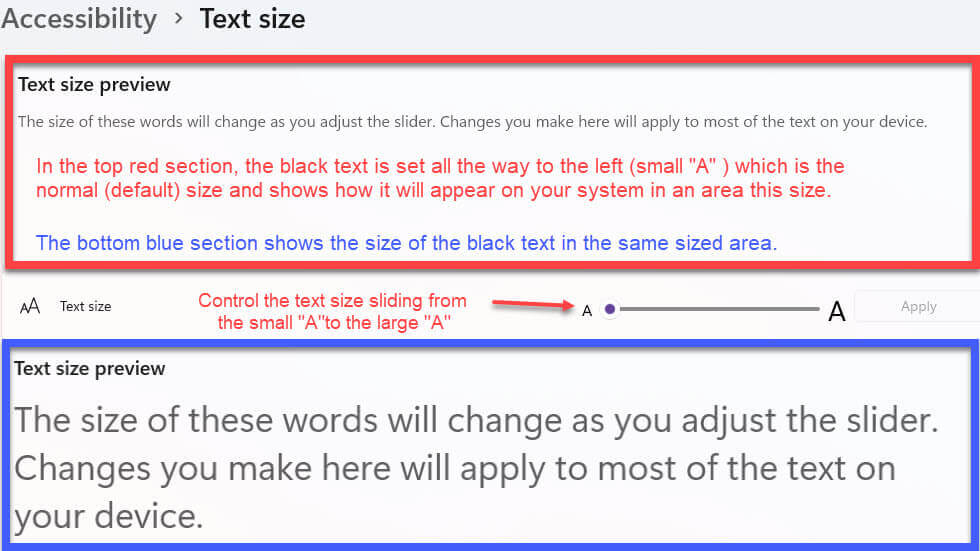
Text Size
Fortunately, users can individually adjust the size of the text in Windows. Using this feature, you can opt for a lesser scale percentage and increase the text size to meet all your requirements.
How To Hide Or Add Fonts In Windows 10/11
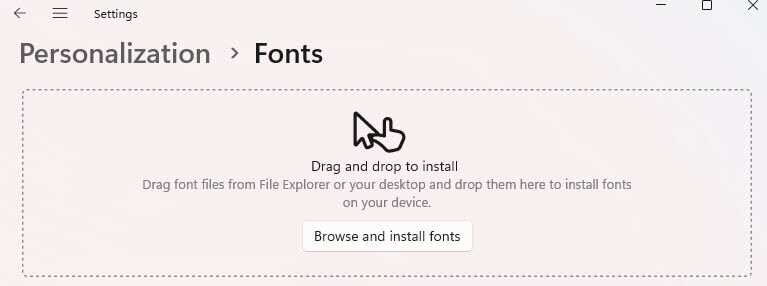
It is easy to add Fonts in Windows. With sites like MS Store, Google Fonts, FontForge, and Awesome Fonts being just a few, you only need to find the font you want and right-click the font file, and choose Install. You may also drag the file in Settings > Personalization > Fonts.
Too many fonts can make it hard to remember which fonts you used in the past and can result in unnecessary scrolling in applications to find the one you want. Too many fonts that look identical but have different names are not worth viewing each time.
Hiding Fonts
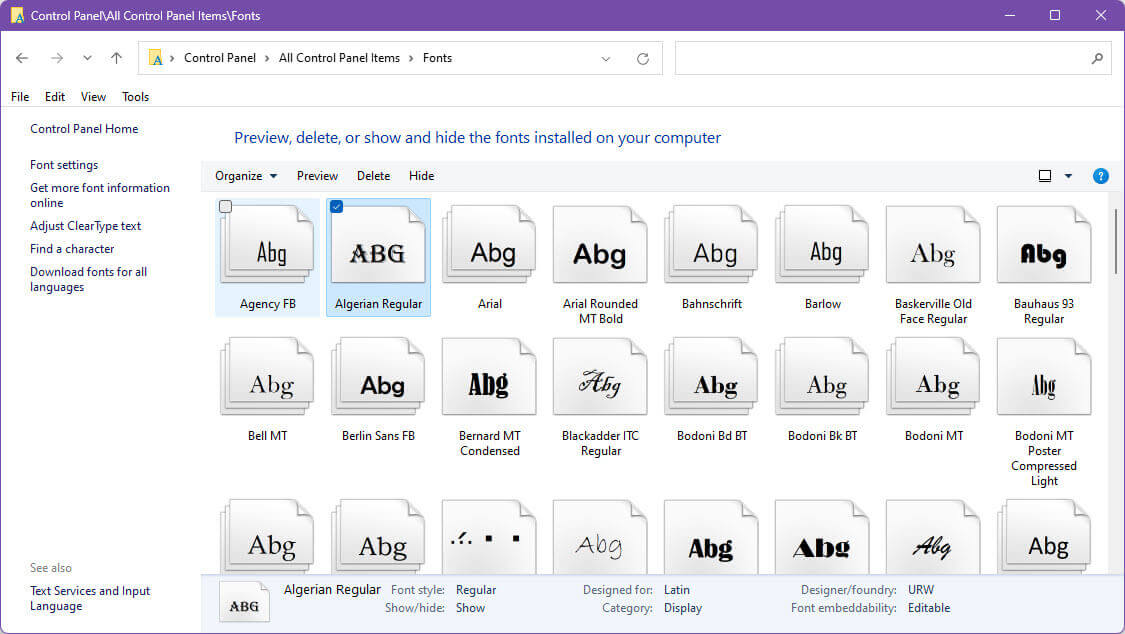
Fortunately, it is extremely easy to Hide Fonts in Windows using the Control Panel in either Windows 10 or 11…
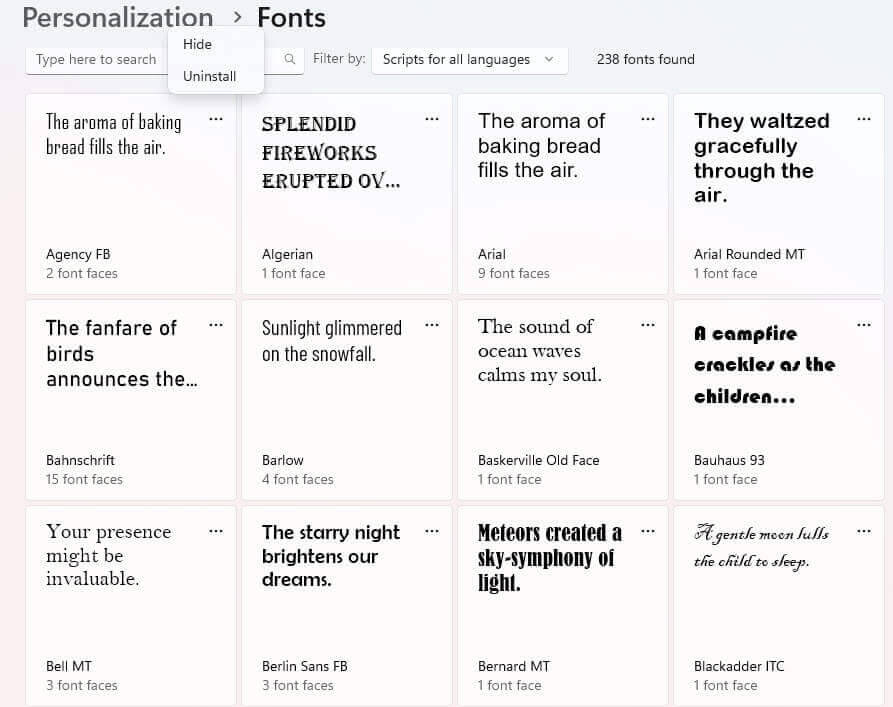
…or by navigating to Settings > Personalization >Fonts. Each location will let you select any font and select Hide. Once hidden, the font will be grayed out in this area in both options and not show up as a choice in your system. Selecting Show will return your font to the system.
Summary
From Screen Scale, Text Size, or reducing the number of excess fonts, each tip can help your productivity, making your system easier to use. Gone are the days of reducing resolutions to obtain a bigger image. Now select your desired scale, set your desired text size, and rid yourself of too many look-alike fonts. If you are unlikely to need a font, use the same process to uninstall it from your system completely, it will save resources and allow heavy-packed font programs to load faster.
My interest in computers was a natural transition from all things electronics. I was hooked after building my first Heathkit computer around 1976, which evolved into a TSR80 and a long list of Windows computers. My first full blown program was a graphics program which started my career path in graphic design and IT work for 40 years. I now run a small computer repair and service company focused on helping veterans and retirees in our area with computer and software training classes.