I’m guessing many Windows users might have or might be, toying with the idea of trying out Linux. Installing Linux as a secondary operating system is not only practical but also an interesting exercise. In this article, I’m going to provide a few tips to help newbies get started with installing Linux alongside Windows.
Choosing A Distro
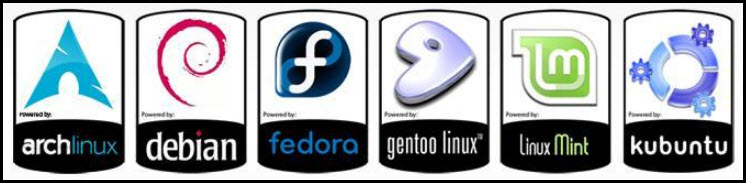
“Distro” is short for “distribution” and is the Linux term for an operating system. Selecting a distro to install is the obvious first step and, considering there are 300+ distros to choose from, can be quite daunting for the newbie. To help you out, here are three distros that I would recommend as best suited for a Windows user’s initial foray into the world of Linux:
- Mint Cinnamon Edition (2.4GB download): Mint Cinnamon Edition is my top recommendation. It is a full-featured and aesthetically pleasing operating system that is quite similar to Windows in both appearance and navigation
- ZorinOS Free Edition (2.85GB download): ZorinOS is probably the most similar to Windows and, if familiarity is a major consideration, well worth checking out
- Kubuntu (3.4GB download): Ubuntu is one of the most popular distros and comes in six different flavors. Kubuntu is one of those flavors and my preferred Ubuntu distro.
All downloads consist of an ISO file which can then be used to create bootable media; you can either burn it to a disc or create a bootable USB flash drive using Rufus. Pretty much all distros come in “Live” editions which means they can be loaded from the bootable media and you can then browse around the operating system to your heart’s content, getting a feel for the operating system without actually needing to install it. When you decide to install a particular distro, simply click the installation shortcut on the Linux desktop, and away you go.
Where To Install Linux?
You can install Linux on a separate partition on the main Windows drive but, personally, I wouldn’t recommend it. Far better to install on a completely separate secondary internal drive to maintain a good degree of separation between the two operating systems. Most desktop PCs include a spare drive mount plus at least one spare SATA connection on the motherboard, and new SSDs are quite inexpensive – 240GB SanDisk Plus SSDs are currently selling for less than $40.00US.
Important Note: When you install Linux on a separate internal drive I highly recommend disconnecting the existing Windows drive beforehand. Linux does not use the same drive-naming convention as Windows and disconnecting existing drives will eliminate any confusion and ensure you are installing Linux to the correct drive. It will also eliminate any potential conflicts. You can temporarily disable the drive by disconnecting either the SATA cable or power cable (or both) or disabling the drive in BIOS. Obviously, connect/enable the drive again once the installation has successfully completed.
Dual Boot Menu Or Not?

A dual-boot menu, or multi-boot menu if more than two operating systems are installed, is a simple and convenient way to choose which operating system to load. The menu will be the first window to appear whenever you start the PC and will contain a list of installed operating systems. Simply select the operating system you want to load and away you go.
That said, experience has taught me that dual-boot/multi-boot menu systems can be problematic, very easy to create but extremely difficult, if not impossible, to get rid of if/when no longer required. Plus, I prefer to maintain that good degree of separation as mentioned earlier.
If you decide to go with a dual-boot menu, your best bet is to use EasyBCD (free edition). Quite simple to use and effective.
If you decide not to go with a dual-boot menu you’ll need to choose which operating system to load via the BIOS boot menu which, on most modern machines, is initiated by tapping the F12 key very early on during startup before the operating system starts to load. Not as convenient but, trust me, quite a deal safer.
Let’s go over those steps again in summary:
- Choose your distro (see recommendations above) and download the ISO
- Create a bootable USB flash drive using Rufus – here is a guide: How To Create Bootable USB Drive With Rufus
- Boot from the USB flash drive you created and browse around the new operating system
- When satisfied, exit Linux and disconnect the existing Windows drive
- Boot from the Linux USB flash drive again and click the installation shortcut on the Linux desktop
- When the installation has been completed successfully, reconnect/enable the Windows drive
- Enjoy your new Linux distro
If you have any questions, ask away via a comment and I’ll do my very best to provide an answer.
—
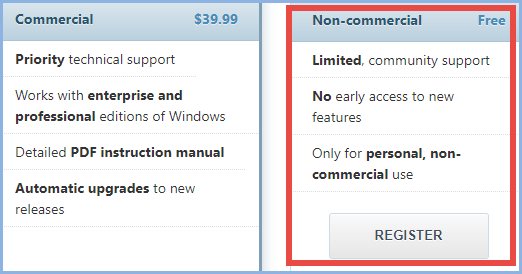
I have been using NeoSmart EasyBCD 2.4 for years to dual boot Windows with various Linux distros. My Easy BCD installer was free when I obtained it from NeoSmart Technologies years ago, but it now lists on their website for $39.99. Regardless, it is a great program for its intended purpose. I have used it to boot Windows 7, 10 & 11, with Ubuntu, Kubuntu, RoboLinux, Linuxfx, Zorin and, my favorite, Linux Mint (Cinnamon edition). Thanks for your above article.
Hey Elliott,
There is still a free version of EasyBCD available but with minor limitations. The screenshot in the article was taken directly off the EasyBCD website just 4 days ago. It is free for personal use with no early access to new features, which is no big deal. All features work as per normal.
Excellent article, I needed this info., appreciate the research and sharing.
Appreciate your comment Cassie.