I wrote before about my uncle giving me his old phone with the damaged battery charging port. The USB port built into the phone was either worn or damaged somehow. It would be a bit expensive but possible to fix it.
One thing that crossed my mind was whether it was possible to charge the battery some other way. So I searched the internet for answers. I was wondering if there was some third-party battery charger that could do the job. Turns out there was.
I came across one on Amazon. It was described as a Universal LCD Battery Charger, Travel charging for Samsung Galaxy S3 S4 S5 Note 2 3 4, Edge, Mega, LG, Huawei, HTC, ZTE, etc.
Here is a link to the product: Universal Android Battery Charger From Amazon
I have a Samsung Galaxy J3 (2018), not mentioned but might be included in the “etc” 🙂 I decided to order one anyway. If it didn’t fit my phone, it still might come in handy at some future time. I was concerned that the charger only has two battery contacts but my phone battery has four.
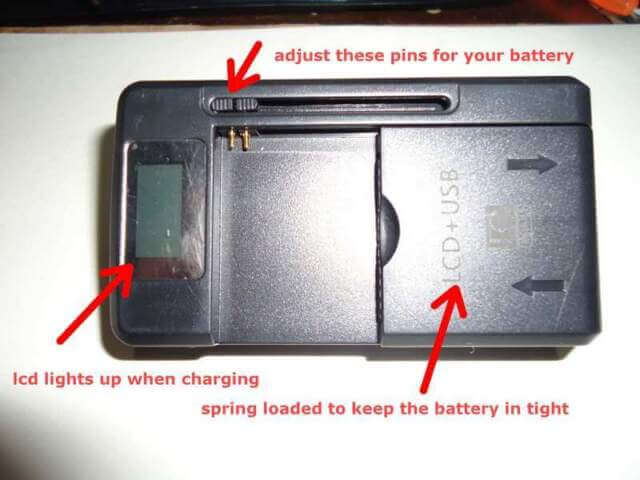
Ordered it and got it 10 days later. And here is what it looks like. The first issue that I had was no instruction manual. So, I decided to write my own.
You have to insert the battery so that the contacts on the battery line up with the pins on the charger. Pull out the cover labeled LCD + USB to insert the battery. The spring action holds the battery in tight.
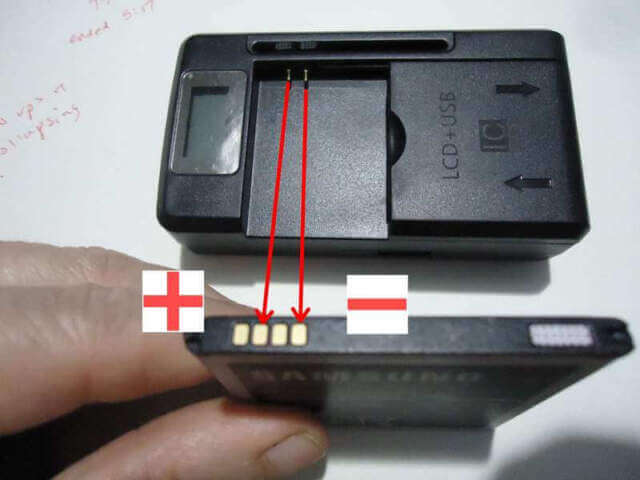
The tricky part is adjusting the pins by using the little sliders across the top. I did not know what pins should go on what contacts, so I made a guess. I was sure I needed one on the positive contact of the battery and one on the negative. This picture shows how I adjusted the pins. The battery in this picture is lined up properly to insert into the charger.
The left pin on the charger, I lined up with the second contact from the left-hand side of the battery on the positive contacts of the battery. Then I lined up the second right-hand pin with the last contact on the negative contacts on the battery.
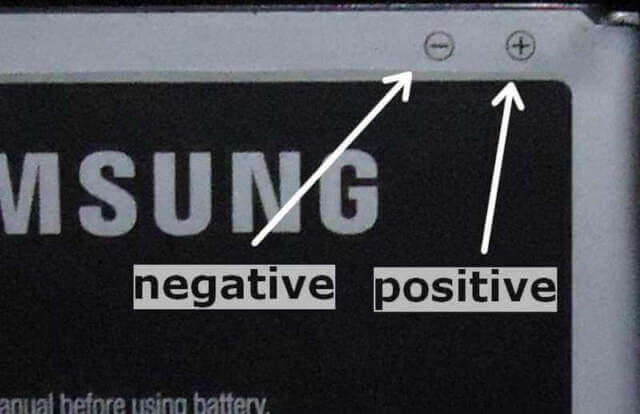
If you look up the corner of your battery you’ll see the markings indicating the negative and positive contacts.
Now it was just a matter of plugging it in. I plugged it into a power cord and kept a careful eye on it. I kept feeling it to make sure it didn’t overheat or anything. It never got warm.
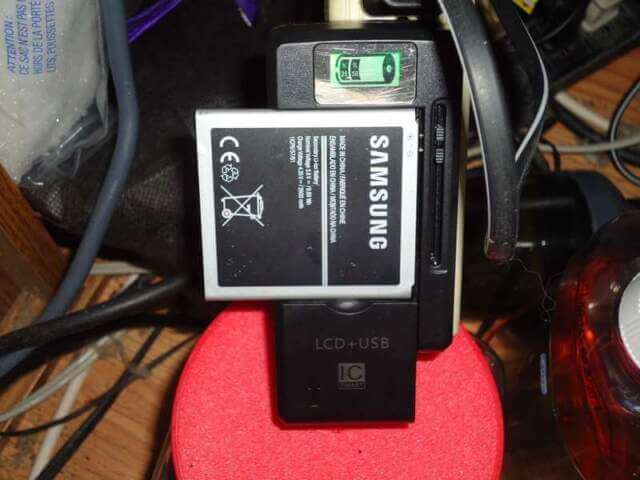
I assumed it was working because the LCD screen lit up green and there was a little animation of the battery filling up. So I left it for a while.
I started at 5:30 PM. At 7:30 PM, the animation was now showing two solid bars representing 25% and then 50% respectively. Here’s a picture (pardon the mess behind it).
I had to let it run overnight before it finished so I can’t tell you how long it took overall. But it was fully charged when I got up the next morning. I unplugged the charger and the LCD screen remained lit. A good sign I guess.
Now the final test – put the battery back into the phone and see what happens. Turned it on and sure enough, my battery indicator is now showing 98% charge. It started at 9%.
A Bonus! Apparently I also time traveled and now am living in December 31. I’ll let you know how the new year turns out 🙂 I can adjust the date and time later.
There you have it. A successful experiment with no burn-ups, meltdowns, or explosions and the universe didn’t collapse in on itself. 🙂
For more Android troubleshooting, read here.
—
