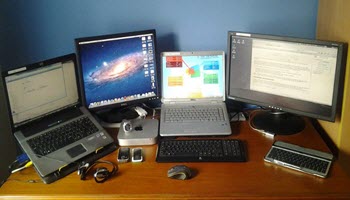
I was with someone this week who has a new laptop but he still had his previous one not doing anything. I searched for a way to let his old laptop serve as a second monitor.
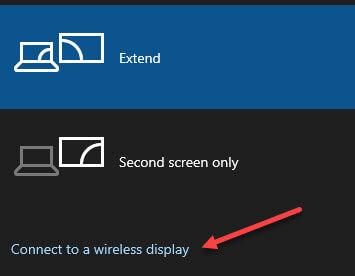
I found that this is possible with Windows 10 by making the second computer a wireless display and setting the primary to Connect to a wireless display on the Project screen (Win+P to open it). However, the second computer must have the hardware to serve as a wireless display and older computers are lacking this feature.
Further searching led me to a free application called ShareMouse that allows one keyboard/mouse to control two computers (more with the paid version).
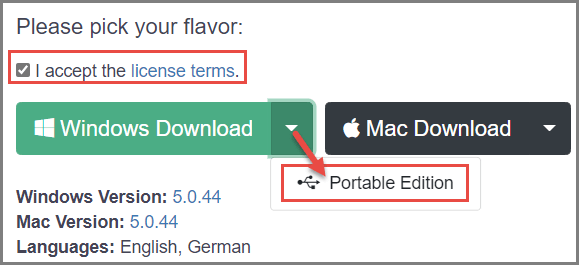
NOTE: ShareMouse is available in both installer and portable editions. To download, you need to place a checkmark in the box next to I accept the license terms. For the portable edition, click the down-arrow at the far right of the Windows Download button and then click Portable Edition:
I downloaded the tiny 8 MB program on both computers and it just worked. Whichever keyboard I used automatically worked to control both.
When you run the application, you have 30 minutes of a demo of the paid version with all the features active. When the demo is over, you have to restart for 30 more minutes or Exit and restart as the free version which allows you to share the keyboard/mouse with both computers.
When Sharemouse is running, a mouse arrow will display in the system tray.
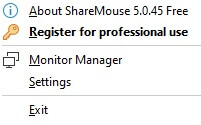
Click it to open the ShareMouse menu.
I just turned on my second computer and the arrow changed to include a green checkmark indicating that another computer is connected.
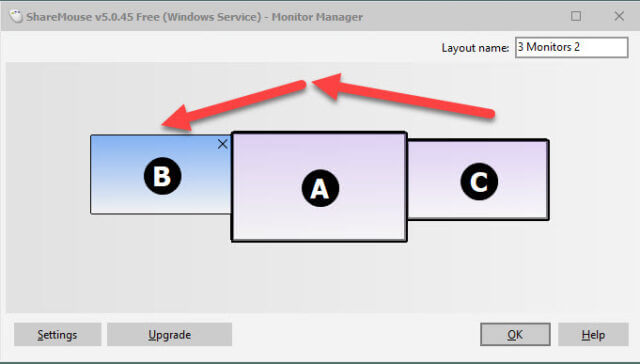
Click that arrow once again and then click Monitor Manager. Drag the monitor to the left or right or even on top to position it to fit where you actually have it placed on your desk. Mine is on the left (B).
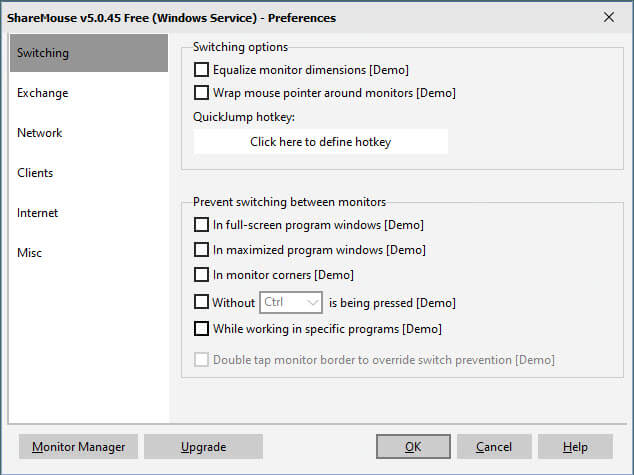
Click Settings on the previous screen to change some of the defaults. [Demo] means this feature is only available for the 30 minutes of demo use.
Move the mouse off the primary screen to the secondary screen and the mouse/keyboard controls the secondary machine. Move it back to the primary to resume primary control.
To run the free version, open the ShareMouse menu, and click Exit.
Open Windows Start and locate and click ShareMouse service restart. This restarts the application in free mode. (I right-clicked and chose Pin to Start to add this shortcut to my Start menu.) In this mode, you can control two computers with one keyboard/mouse and drag and drop files (not folders) from one computer to the other.
How is this helpful? With the second screen, I can now open and run applications while also working on the primary. I can have my email displaying on the secondary while working on the primary to write another article. It allows me to work on two computers (or more with the paid version) while using one keyboard/mouse. I don’t have to physically move back and forth between computers.
Download it. Install it. That is all you have to do. The only requirement is that both computers must be on the same network.
I hope this is a useful tool to add to your toolbox.
Dick
FURTHER READING: How To Use Mouse Without Borders
—
