Have you ever wanted to set up a network printer in Windows?
I have and figured I would share how to do this in Microsoft Windows 8.1 since this one can be a little trickier than other Windows versions. With all new Windows they seem to move things around to confuse you and if you are not a big tech person this can be frustrating. Below I will give you 6 simple steps that will walk you through installing your network printer by yourself.
Steps to Add a Network Printer to your Windows 8.1
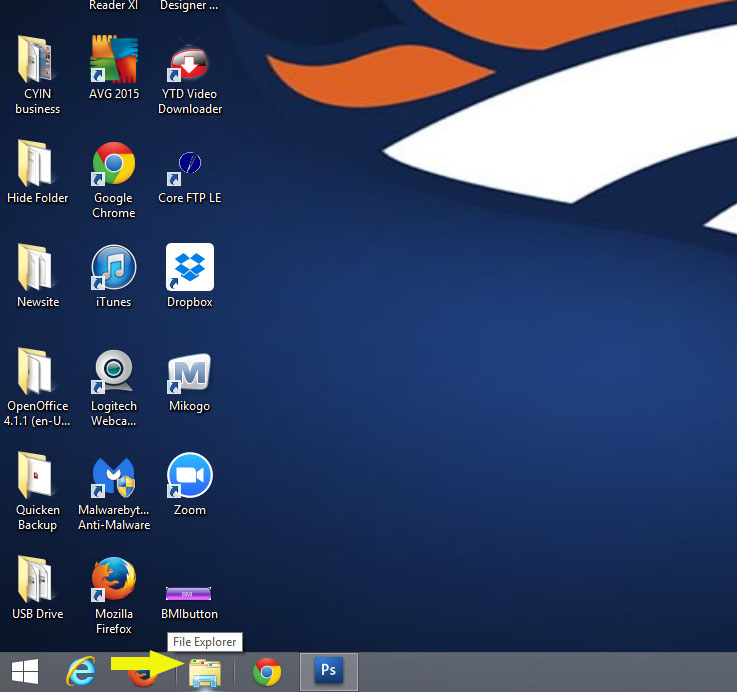
Step 1: First click on the “Folder” icon that is located on the right side of the “Start” button on the bottom of the screen. (I find pictures very helpful)
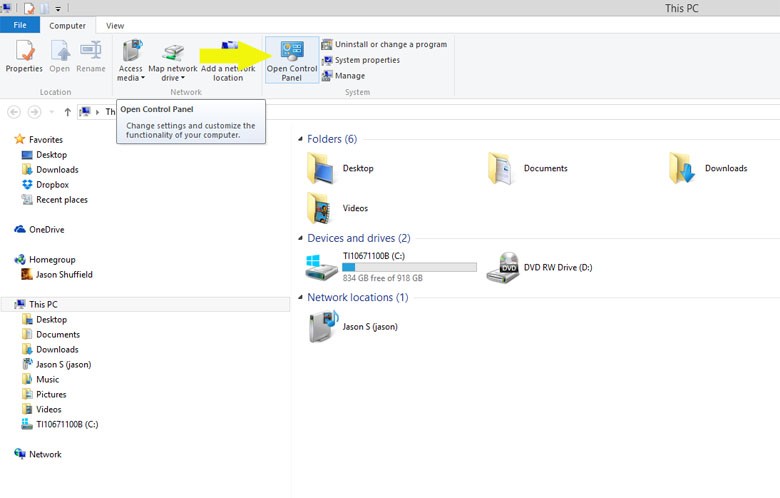
Step 2: In the next window there will be an icon that says “Open Control Panel” Click on it. It is located at the top of your screen.
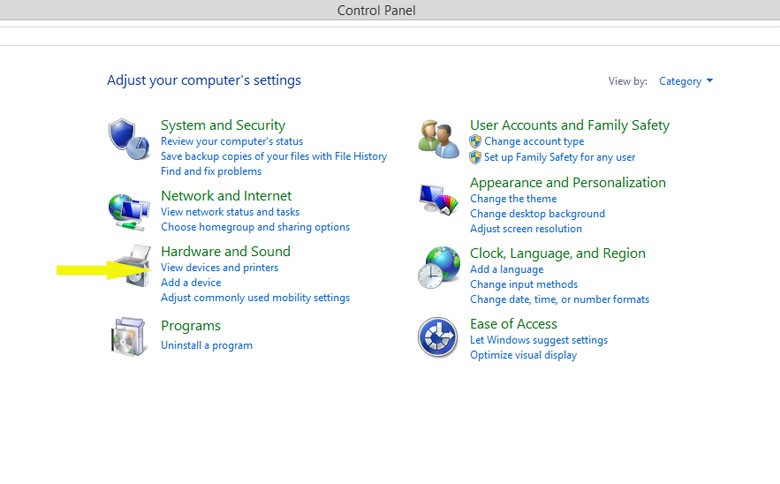
Step 3: In the following window you will need to select “View devices and printer,” under the “Hardware and Sound” category.
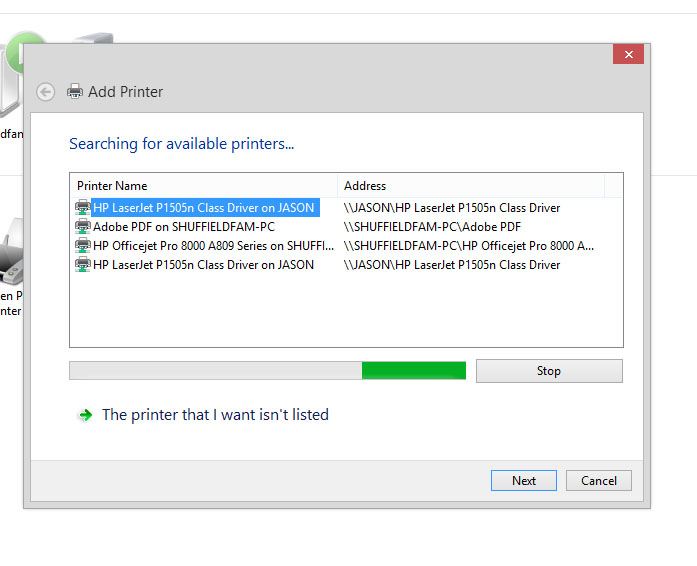
Step 4: This screen will show all available printers. If you see your printer here then it is already installed on your computer. If you do not see your printer then proceed to “Add a Printer” option on the top of the screen. At this step your computer will start searching for your printer.
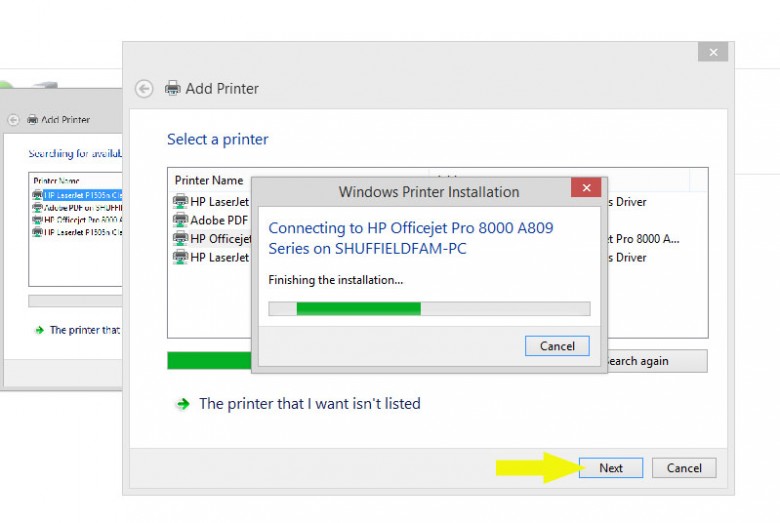
Step 5: Once the system has found your printer, go ahead and click on the printer name and then click “Next” (more pictures!).
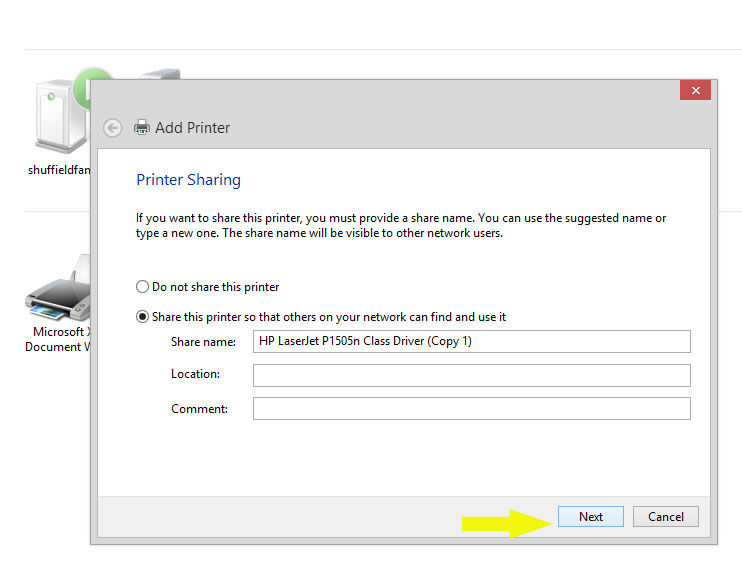
Step 6: At this point choose if you want to share the printer or not. If you want to share this printer, you need to specify a Location and Share name. After that you just need to click the button named “Next.”
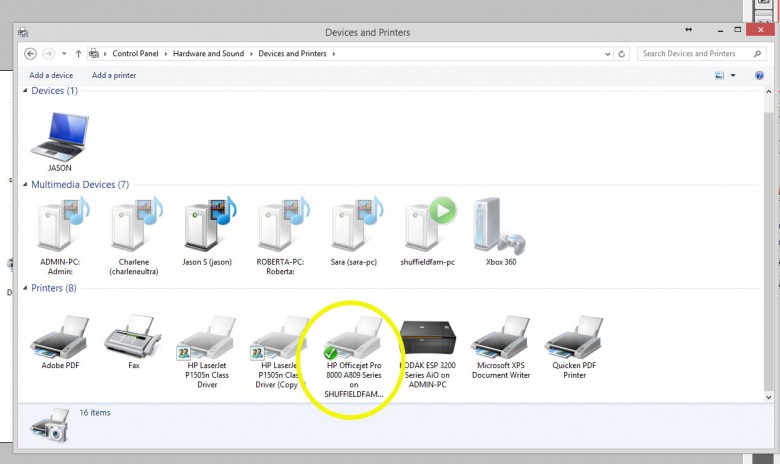
Now you have successfully installed your network printer (Congrats!!). If you are done doing your happy dance we can finish up here. There is one more thing we should check before I let you go. Now that you have installed your printer it is time to make sure it is set as your Default. You should see a green check next to your printer which indicates that it is your default printer. If you do not see the check then just right-click the printer icon and select Set as Default Printer from the menu.
You now can use your network printer. If you have any questions, please leave a comment below and let me know.


I just went through this the past week with a cannon printer. The driver would not install until it connected with my wifi, which I tried several times going by their documentation. Always set a restore point before installing any new drivers and peripherals. It saved my butt. Finally had to break down and call tech support which I cant say enough good things about. It was refreshing that canon uses American support personnel. he had me download an app on my iphone from cannon that set the network up to finally recognize the printer and from there the driver finally loaded. seemed a little backwards but, whatever. Learned a lot from that experience. I wish it would always could be as cut and dried as your article.
Yes Mark, I wish it was always cut a dry when working with printers too. But as we all know with technology it can throw you a curve ball. I find that printers are one of the top tech issues I deal with in my business. Glad that Canon had great tech support and fixed your printer issue.
Thanks for the tips! I’ve been having quite a bit of trouble connecting my printer to my computer. Recently, I bought a new laptop that runs on a different program, so the process of connecting the printer to my laptop has been pretty tricky. I’ve made it up to opening my control panel in step #2, so the information from step #3 onward should get me through the rest of the process. It helps to know that going to hardware and sound in my control panel will show all of my available printers. Now I should be able to connect my printer to my new laptop without any problems.