As you know, I have been on an Instagram-How-To article kick. If you missed last week’s article, you can find it here:
How To Hide Like Count On Instagram
I’m sticking with this social media platform this week and teaching you something new. ‘What are you teaching us this week?”, you might be asking. While working, I wondered if I could schedule my posts in advance. That way, I could save some time during the week. After some research, I found you can schedule your posts on the app itself. Since I now know how to do this, I want to teach you. I should mention before we start, this is only available to Business and Creator accounts and not personal accounts.
Businesses and creators can plan ahead by scheduling Reels, photos and carousel posts from the Instagram app. Scheduling posts can help you save time and stay organized when you create and schedule your posts. (Instagram)
Now that has been explained, make sure to check out these other articles I have written:
- How To Check Your TikTok Account Status
- How To Change Facebook Video Notifications
- How To Change Facebook Chat Settings
- How To Unblock People On Facebook
- How To Block People On Facebook
Guess it’s time to get the lesson going. Pull out those devices and start taking notes.
How To Schedule Posts On Instagram
I will be showing you how to do this on my Motorola Edge Android phone using the app.
Step 1: Find the Instagram app and tap it.
![]()
Step 2: On the home screen, look to the bottom right. Here you will see your Profile image. Tap it.

Step 3: Once on your Profile screen, tap the plus sign at the bottom middle.
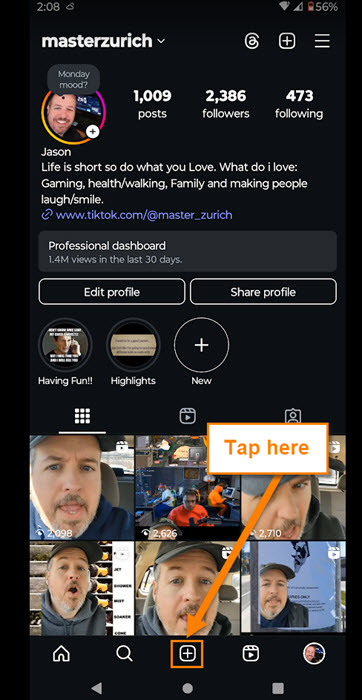
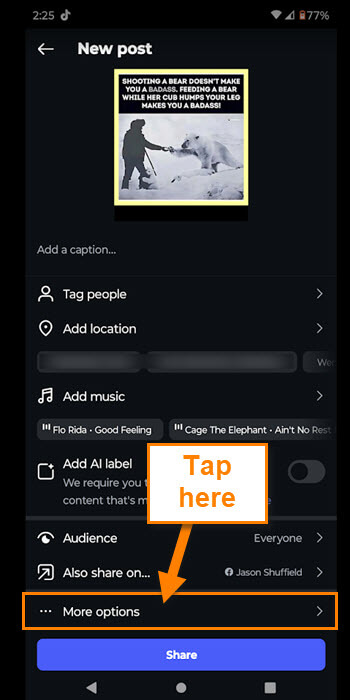
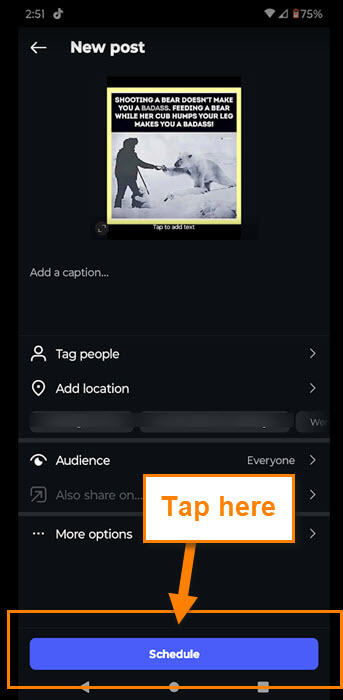
Step 4: Go through the steps of setting up your post. At the last screen, look to the bottom above the share button. There you will see the More options link. Tap that.
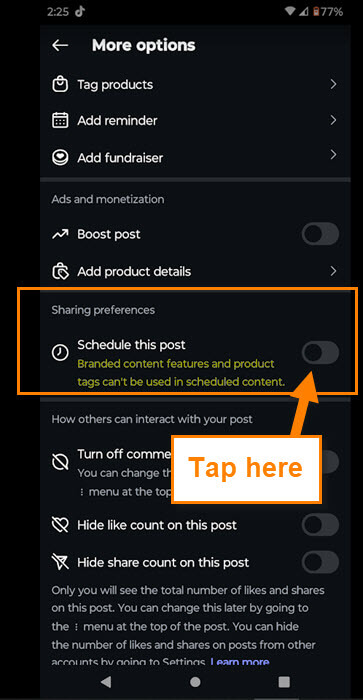
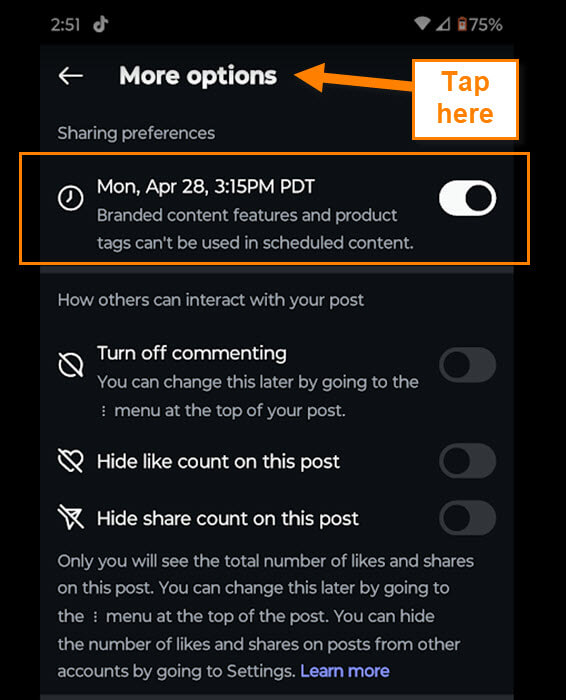
Step 5: On the More Options screen, look for the section called Sharing preferences. Under that, you will see Schedule this Post.
Branded content features and product tags can’t be used in scheduled content.
Tap the switch to the right of this option.
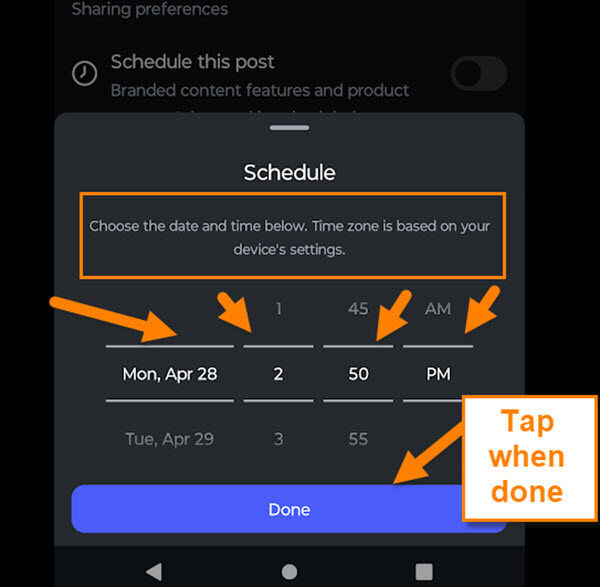
Step 6: The Schedule window will pop up from the bottom of the screen.
Choose the date and time below. Time zone is based on your device’s settings.
To change the date and time, swipe up or down on their places. Once you have set the time and date, tap the Done button.
Step 7: After that, at the top of the screen, it will show the scheduled settings. Tap the More Options (Back) arrow at the top.
Step 8: All you need to do now is tap the blue Schedule button at the bottom. Done.
Now you know how to schedule a post/reel through the Instagram app. Time to share your new knowledge with the world.
—