
Is it a brick?
It’s been a bit slack in the shop recently, which is an understatement, as during January and February, Buenos Aires resembles a ghost town, much like Paris in August. Fortunately for me, there are still a few souls left in town with broken down gadgets so, as I was pondering on the Great Windows 10 Conspiracy Theory, in walks an elderly lady with her two grand daughters in tow, looking very disgruntled and holding a Lenovo Tablet, which she points at saying that it’s not doing anything any more. She then goes on to tell me that it just stopped working and no, she hadn’t dropped it, but her son-in-law had decided to open it up, hence its rather disheveled state.
![]()
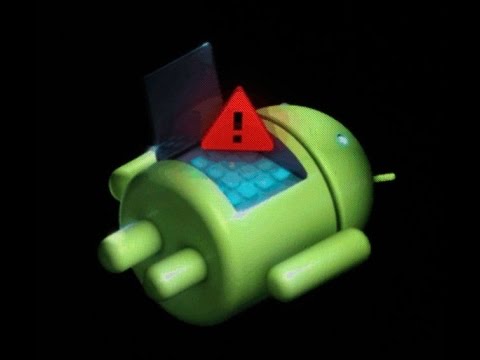
It occurred to me that since I’d already rooted my Samsung Galaxy S3 and this Lenovo Idea Tab A1000L-F was simply another Android device, surely the rescue procedure wouldn’t be that much different? The initial symptoms were similar to the picture above, in that the device was hanging on the Lenovo welcome screen and not doing anything else at all. Things weren’t helped by the mysterious efforts made to take the thing apart and having located the volume up/down rocker switch rattling around inside (essential for recovery purposes), I reassembled it, made a coffee and hit Google. I also noticed that one of the corners was dented and scratched, so clearly it had been dropped.

Fortunately, this device has a reset button hidden in the SD card bay which, when pressed with a thin paper clip is supposed to restart the tablet with no loss of data. A very useful function which in my case only took me back to the Lenovo welcome screen yet again. Further searches using How to fix a Lenovo Idea Tab A1000 came up with plenty of results, two of which I tried and which I will describe here.
Boot to recovery mode
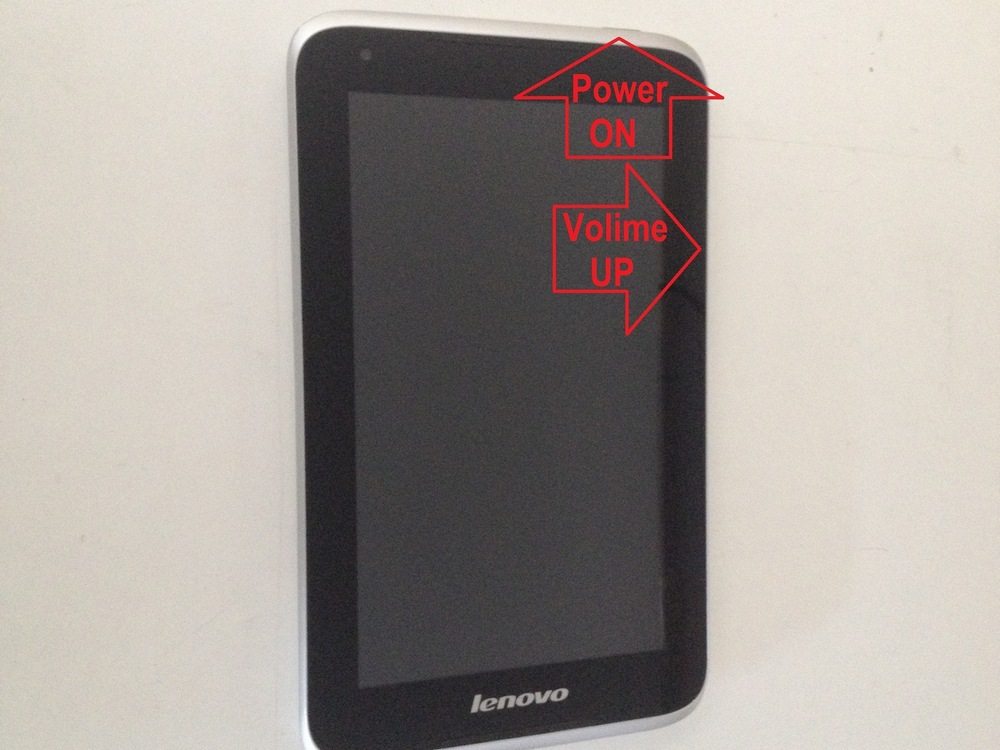
So with the reset option out the window and the knowledge that there was no data to back up fortunately, I went for the built in Android recovery option which can be accessed by pressing volume up and power simultaneously, although I found that by pressing the volume up rocker first, then power and keeping them both held down until the recovery screen appears, is the most foolproof way.
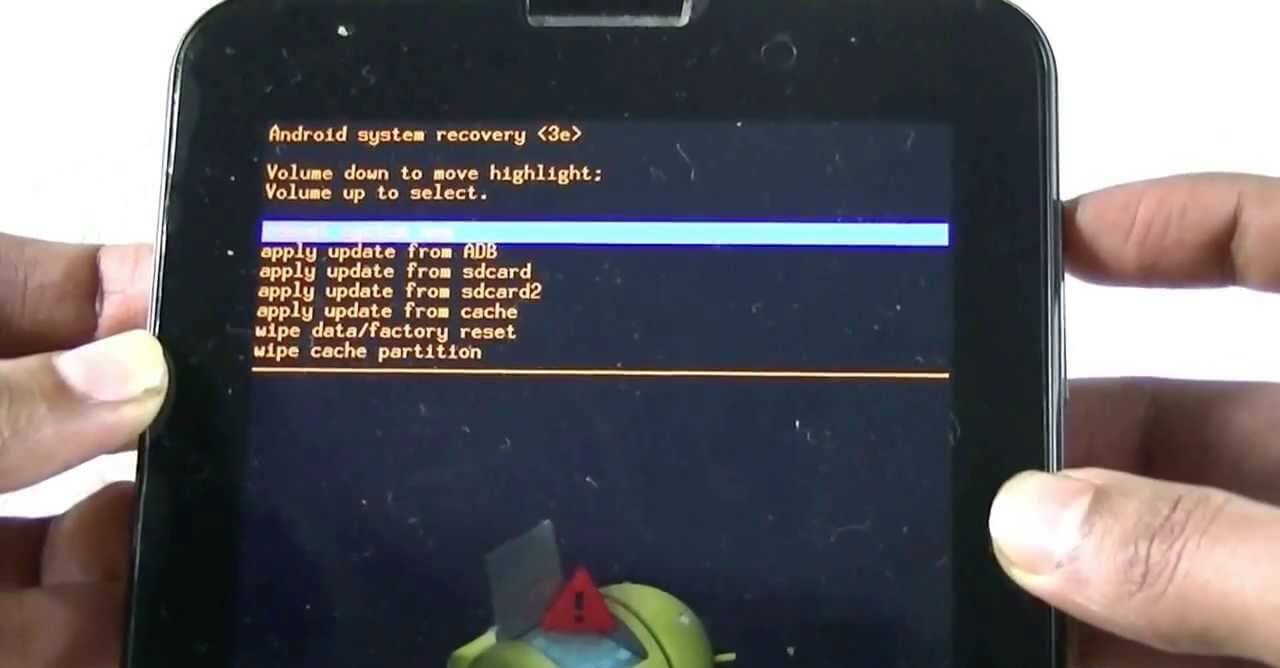
Using the volume down key to scroll through the recovery options as per the above picture, I selected (with the volume up button) wipe data/factory reset and once the screen asked me to confirm the factory reset, I hit the volume up key again to confirm YES and the process was completed within seconds. Using the power button to switch off and then back on, I waited with baited breath for some sexy chimes and perhaps a colourful logo, neither of which appeared, so I went back to square one.
Flashing the device
To be honest, I was about to give up on the tablet, call the customer and suggest they take it to a specialist when I came across a possible solution at XDA Developers, where a very helpful contributor outlined how he was able to revive his friend’s Lenovo Idea Tab A1000L-F by flashing it to the default factory settings. At this point, I must point out that it’s absolutely essential to use ONLY the flash software pertaining to the EXACT model of Android device that you wish to flash, at least that’s the warning I have always heeded when flashing devices in the past, for the simple reason that the firmware is specifically written for the device in question. This is very important.
Following the XDA forum member’s guide, I downloaded three zipped files containing the MTK5677 drivers, firmware and scatter file as well as the essential SP Flash Tool which you install on the PC. Initially I began the process with Windows 10 x64 since I had it running at the time, but rebooted to Windows 7 x64 since Windows 10 wouldn’t correctly load the drivers for the tablet.
Here’s a brief summary of how I went about the flashing procedure:
- Connect the tablet to the PC and Windows automatically loads the USB drivers. If not, install the drivers that came with the download package. However, you may be asked for the preloader drivers during the procedure.
- Unzip the folder A1000LF*****************.rar to a folder (Lenovo?) and delete the Checksum.ini file. Don’t forget this part.
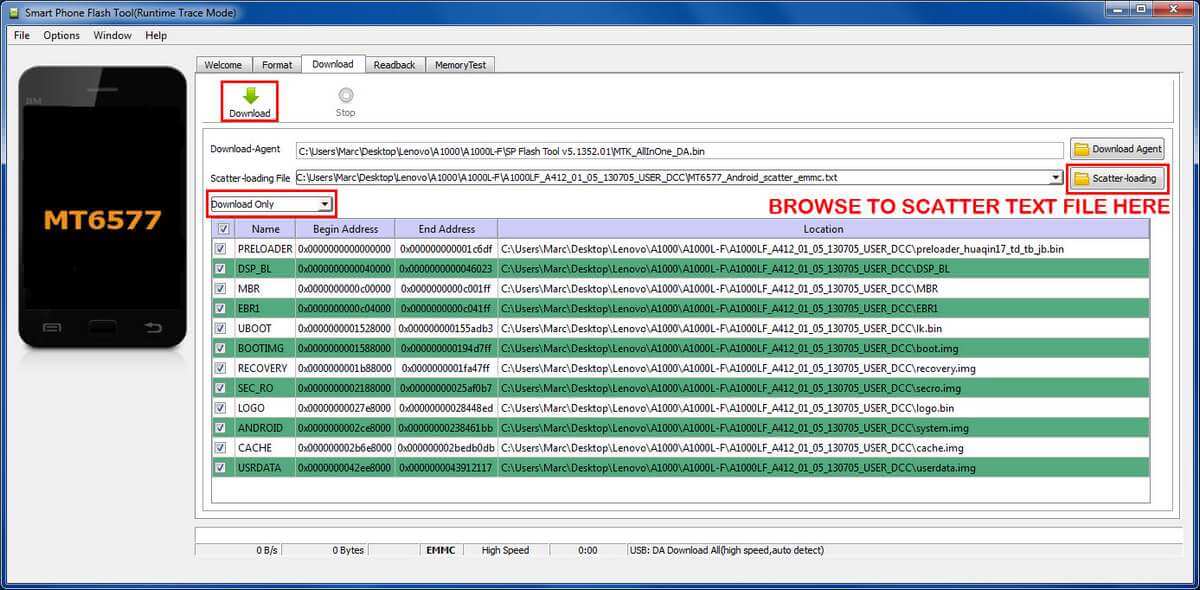
- Ensure the tablet is switched on and open SP Flash Tool. Browse to the extracted files in the Lenovo folder you created on your PC and locate the scatter file named “MT6577_Android_scatter_emmc.txt”. **MT 6577 appears to the MediaTek chip within the device itself.
- Click download and the process of flashing should begin.
- If you encounter a “PMT wrong address error” like I did, you need to run FORMAT from within SP Flash Tool format tab and select “Format whole flash” as per the image below.

- Once you’ve completed the format, return to the Download tab of SP Flash Tool and click download again.
- At this stage it may ask you for Preloader drivers for the device, as happened to me. Close SP Flash Tool and return to your Lenovo folder and either install PdaNet4150 drivers or MTK65xxx drivers. I installed both which seemed to cover all the bases.
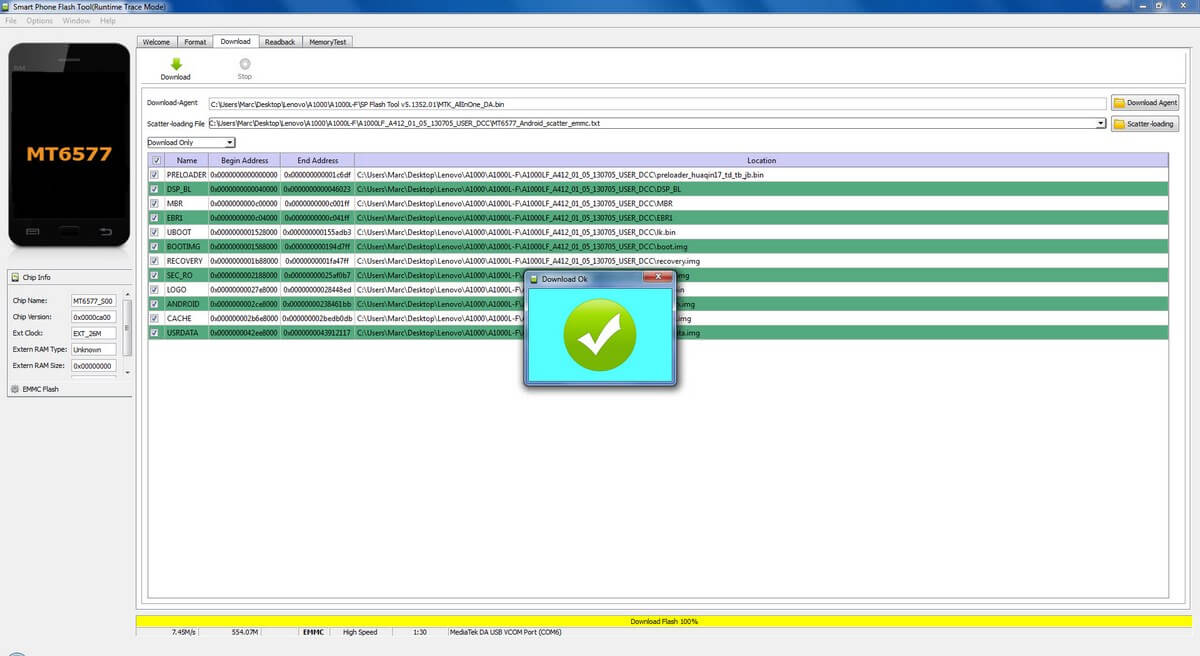
- Return to SP Flash Tool and the download tab, click download again and watch the magic happen. When all is complete, this is what you should see on your PC screen.
Congratulations if you’ve followed this guide and your tablet has come back to life! I know I was pretty chuffed when the pretty logo and chimes came, especially as this is a procedure which can seem very daunting at first. I had numerous failed attempts whilst on Windows 10 and was glad to still have Windows 7 at my disposal, simply to load the drivers and get SP Flash Tool to communicate with the device. However, if you’re not feeling confident and don’t feel that you have sufficient knowledge to complete this recovery process, I would suggest asking a specialist to help you.
Access to third party sites and links are at your own risk, although I found no problems in downloading from this link at Mega.
Drivers and firmware Lenovo Idea Tab A1000L-F (model 60041)
Very good Marc, and yet another reason why we users who try and fix gadgets and PC’s keep other OS’s installed to compensate for the OS that has compatibility issues. Very interesting story and procedure.
Link did not work using Internet Explorer but fine using Chrome. Any idea what would sort IE11?
Hi Stormy, I managed to get the Mega link opened in IE11.
It appears that initially, Mega would only load in Chrome but with updated versions of IE11, you can now access Mega.
Check this link for confirmation>
https://connect.microsoft.com/IE/feedback/details/791233/ie11-not-possible-to-connect-to-https-mega-co-nz
This is why guys like me need guys like you. I don’t have the slightest clue what you said. Keep up the good work! PS Consult a specialist? You mean like a translator?
Hi Geoff
Much of what we do with computers is a case of learning as we go along, which in many ways is the fun part.
I tend to specialise in building new gaming machines and generally fixing PC’s, but when a challenge comes along, it’s often too good a chance to resist.
Does this article apply only for Lenovo tablets?