


Insert Disk Error
If you insert a blank disk in your optical drive and receive the message, “Insert a disc”. 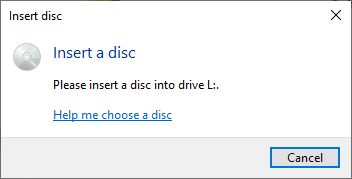
Desktops
The steps to repair it are shown below:
- Remove power from the PC
- Open the PC’s access panel
- Locate the optical player and disconnect the power and data cables
- Older optical drives are connected using a 40-pin data cable and a 4-pin power cable
- Newer computers have SATA data and power cable
- Remove the optical player
- Remove the four screws holding the back of the case in place

- Open the drawer by inserting a paper clip into the small hole below the drawer

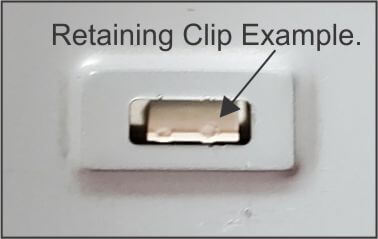
- Carefully remove the front plate (bezel) from the case by pressing down on any retaining tabs that are holding the bezel in place
- A case may have 3 or 4 visible latches and some hidden internal latches on the bottom that hold the bezel in place. The example below is white for easy viewing but most retaining clips that hold the bezel in place are black
- After all visible latches are pressed and released, carefully use a small flathead screwdriver and pry the bottom of the bezel from the case. Once the front bezel is free from the case, open the tray to its full length
- Remove the top and bottom from the case
- A case may have 3 or 4 visible latches and some hidden internal latches on the bottom that hold the bezel in place. The example below is white for easy viewing but most retaining clips that hold the bezel in place are black
- Open the drawer by inserting a paper clip into the small hole below the drawer
- Now you will have access to the lens and head, including the rail(s) that allow the head to transverse the width of the disk
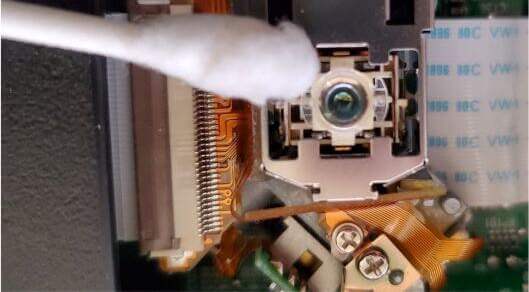
- Clean the lens using a Q-tip with a small amount of alcohol. Gently rub the lens to clean any accumulated haze
- Lubricate the rail(s) that allow the head to transverse the length of the disk. Use an artist’s brush to sparingly apply lubricant
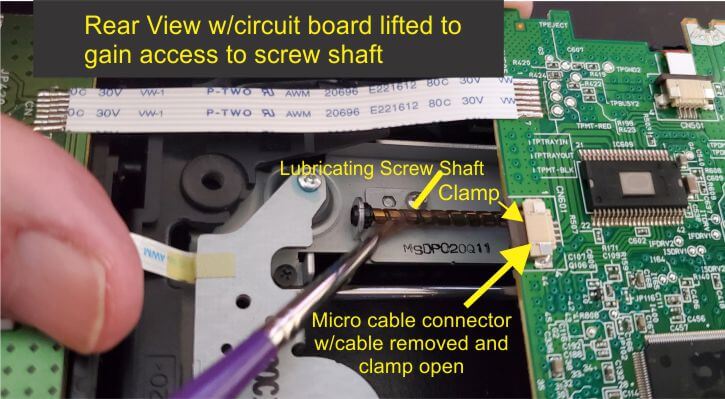
- Next, lubricate the long screw-like shaft coming from the servomotor. This might be dirty or dry from use. It is visible in some drives but may require you to gain access by releasing the tab that holds the circuit board in place located on the reverse side of the drive

- Disconnect the micro cable. The micro cable is held in place by a small clamp. Using your fingers or screwdriver, pull the clamp fully open and then remove the cable
- Gently lift the board just enough to gain access to the screw, clean, and lubricate with a small amount of lubricant
- Replace the micro cable in the slot and push the clamp back in place
- Clean the lens using a Q-tip with a small amount of alcohol. Gently rub the lens to clean any accumulated haze
- Reassemble the drive
-
- With the drawer fully open, put the larger part of the case in place
- Put the back of the case on and use the four screws to hold it in place
- Push the bezel back into place making sure that all the latch tabs are inside the case before applying pressure to close the bezel
- Close the drive door
- Push the drive into the bay and reattach the cables you removed in Step 3
-
Laptops
Most laptops do not require the removal of the drive from the laptop. They give you enough access just by opening the drive. On laptops, the drive and door are both ejected.
Cleaning the lens is straightforward. Open the optical drive door and use a Q-Tip with alcohol to softly remove any haze that might have accumulated on the lens. (see image above).
If you receive the “Insert Disk” error on a laptop, a repair can also be made with the drive still in the computer but opened.
- The back of the drive will have several retaining screws holding the cover in place
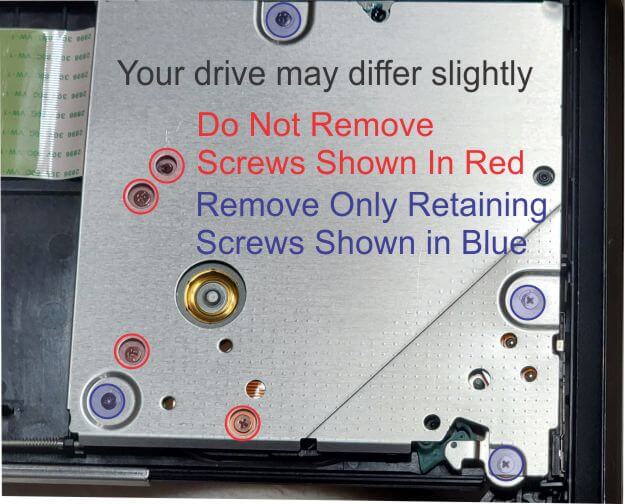
- Avoid unscrewing any screw where the hole is larger than the screw head. These screws are not holding the cover in place
- Remove the cover for full access to the lens head and the arm that needs lubricating
- Using an artist’s brush or similar tool, clean and lubricate the arm using a very small amount of lubricant

*You will need a few items to complete these tasks:
- A Q-Tip
- Paperclip
- Lubricant
- A set of small screwdrivers
Note: Attach a magnet to the shaft of the screwdriver. This will supply enough magnetism to hold the screw to the driver preventing it from accidentally falling into the computer and holding it in place when inserting the screw.
Summary
These fixes are fairly easy to perform for most home users. Removing the drive from the computer is an easy task but in some mini-towers, the cables can be difficult to reach. Using alcohol or a fast-drying cleaner is best. However, once the drive is free from the computer it only takes about 10 minutes to remove the covers and perform the repairs. Another thing worth mentioning is that with the low cost of these drives, $22 for a desktop and $30+ for a laptop, means a full replacement is always an option.
—


I really like the article as I never thought about trying to clean the drive itself. I always figured it was just bad. I would like to know what type of lubricant you are referring to. Is it sewing machine oil, light grease, etc.?
Good question Tom, sorry I didn’t reply sooner. Any thin non-food lubricant will work. I use the lubricant that came with my beard trimmer but gun oil or anything similar. Just avoid any kind of grease as it can catch dust. Thanks