


Recently I wrote an article on How To Set End Date on your Google Ad. This came up due to me promoting some of my YouTube videos. Here is the link to the article and to the DCT YouTube Channel. Make sure to Subscribe while you are there:
After writing that article I realized many of you might not know how to promote your own YouTube videos with Google ads. Some of you might be saying, “Why would I want to pay to promote my video?”, which is a good question. Well, I find that paying a little bit to get your video in front of more people is important to help your brand grow. Unless you have a large following already, or you are extremely good at organic growth, then paying a little bit can be a smart business move. With that being said, I thought I would show you all how you can promote those amazing YouTube videos you make using Google ads. I have had good luck using these and not spending a fortune. Get ready to learn how you can create that Google ad for that Video you spent all that time on.
Promote A YouTube Video With Google Ads
I will be using Dave’s Computer Tips YouTube channel for this example.
WARNING: They do not give you an option during your setup to add an end date for your promotion/ad. This is something I learned the hard way. To save you from spending way too much on your promotion check out the bonus tip at end of this article.
Step 1: Make sure you are logged in to the Gmail account that is attached to your YouTube channel. All mine are attached under my main Gmail. Once logged into your YouTube channel, click the top right profile image. Since I manage multiple channels, I will need to click on Switch Account to get to the correct account before going to Step 2.

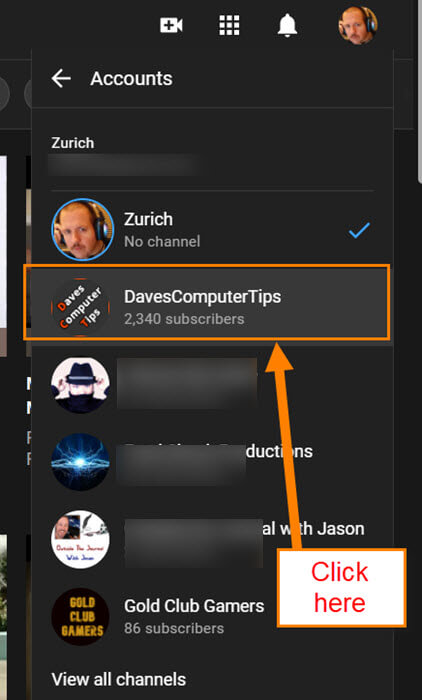
Step 2: This will give you a list of the channels/accounts you have on YouTube. We want to choose DavesComputerTips.
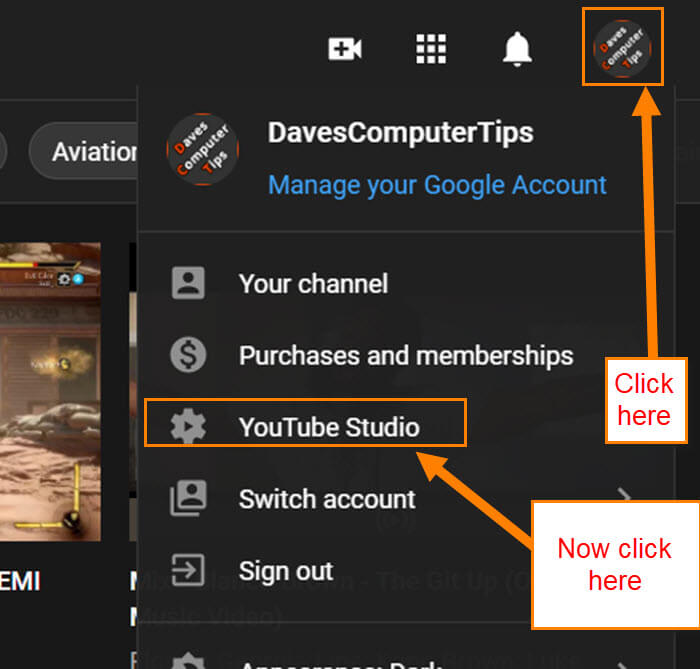
Step 3: Once on the correct account, click the Profile Image at the top right again. On this menu, click on YouTube Studio.
Step 4: On the Channel Dashboard, look to the left menu. Click on the Content option.

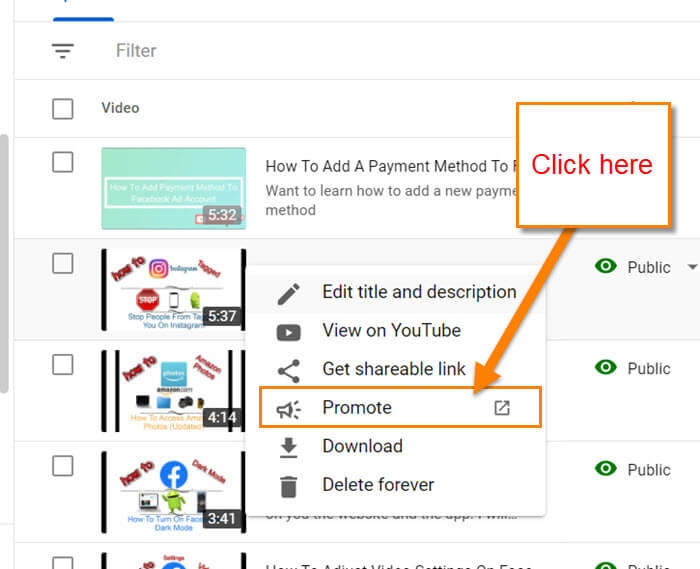
Step 5: This will take you to all the videos you have posted. Next, find the video you wish to promote. Now hover your mouse over that video and you should see some options. The one you want to click on is the three vertical dots.

Step 6: A menu will appear and you will want to click on Promote.
Step 7: Now you will be taken to the Google Ads site. On this screen, click the Get Started button near the bottom left.

Step 8: Here is where all the magic starts to happen. They start with two steps:
- How do you want your ad to show on YouTube?
You can have it Automatically play before videos or have them Place a thumbnail next to a related video. I usually choose the Thumbnail option but that is up to you. After choosing one, then we need to move on to the second step.
- How do you want your ad to appear?
This is the spot where you choose what Thumbnail it uses and the Headline and description to add. Fill in all the lines. Once done, you can see a preview to the right. You can view it on Mobile or Desktop to see how it looks. Now click the Next button when you are ready.


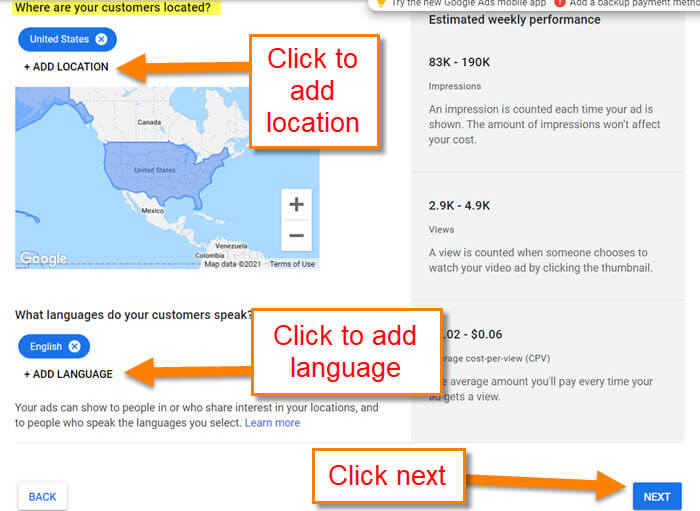
Step 9: The next screen is where you can Add Location (choose in which part of the world your ad will be seen) and Add Language so you can select viewers by language. Click the ADD link below each of these options to do so. Click next.
Step 10: Here you can Select the gender, age, and parental status of your customers. All boxes are checked by default, uncheck any if you want to remove some. On the right, they give you an Estimated weekly performance view. This is updated every time you change something. When done, click the Next button at the bottom.

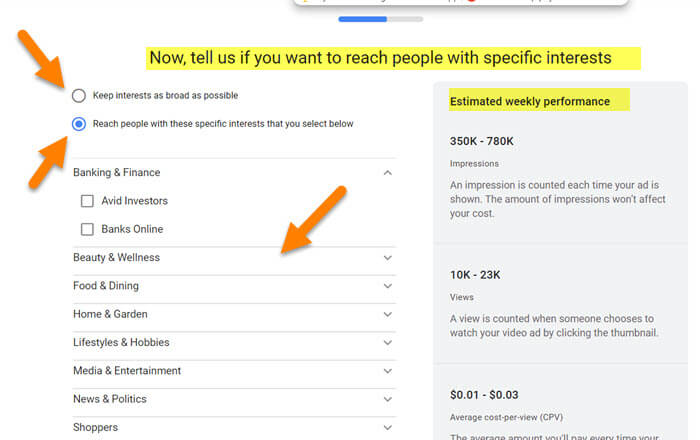
Step 11: If you wish to reach people with specific interests, this is where that happens. Sometimes I choose the option, “Keep Interests as broad as possible.” On my gaming videos, I make sure to choose the Entertainment category and then Gamers. Once you are done, click Next.
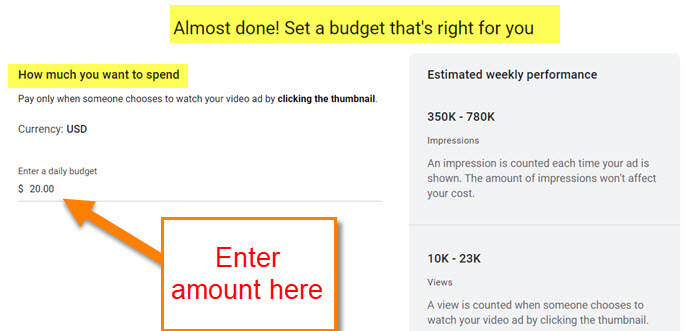
Step 12: I think this is the most important screen — the budget. Here you choose how much you are willing to spend. They do it on a daily budget so choose wisely. Click Next.
*Look to the bottom of the article for the link to how you can set an end date for this Ad.
Step 13: Here you Review your Campaign. If you need to edit anything, click the edit pencil next to that section. Now all you have to do is click the blue Next button at the bottom right. DONE!

This will start the review process for your ad. Google needs to look it over before letting it run. You now know how this is done so get out there and start promoting.
WARNING: They do not give you an option during your setup to add an end date for your promotion/ad. This is something I learned the hard way. To save you from spending way too much on your promotion check out the bonus tip below.
*Bonus Tip: If you did not notice, they had no end date for your ad. To learn how to do add an end date to your promotion, check out this article I wrote about it, How To Set End Date On Google Ads
—

