
Whenever you run a cleanup app like CCleaner it will, among other things, clean your ‘Temp’ folder… and to be honest, if you don’t clean the Temp folder in a long while, it can become very bloated. Cleaning it obviously frees up space on your C (or system) drive.
But wait! I have mentioned just one ‘Temp’ Folder. If you have just one user account on your PC then you have two ‘Temp’ folders and the more accounts you have on your machine, the more ‘Temp’ folders, as a temp folder is created for each user.
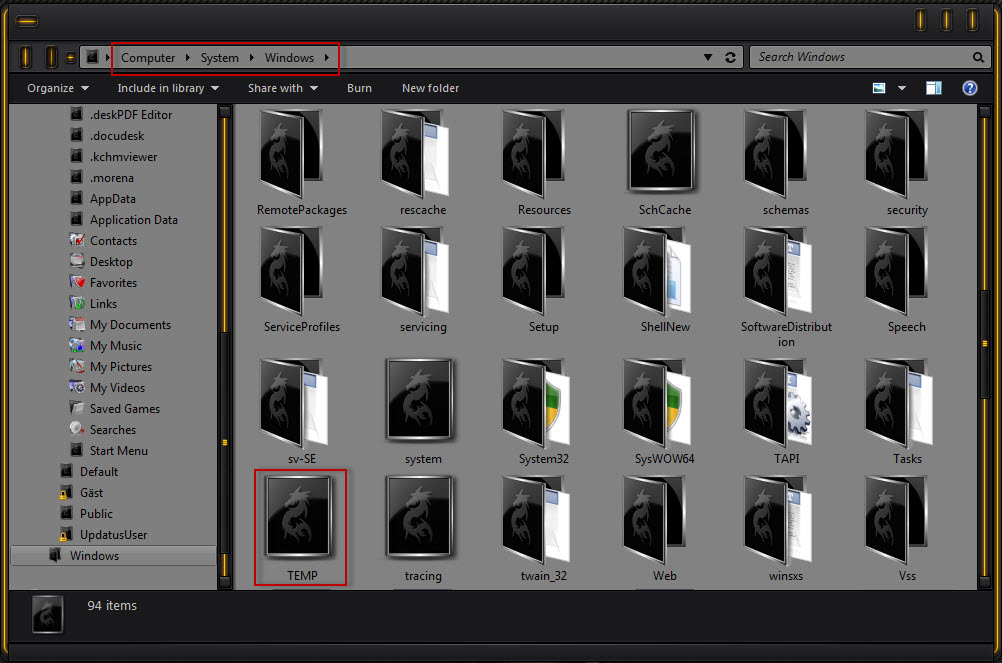
The first Temp folder is in your Windows directory and is a system folder.
The second temp folder can be found in your user profile AppData/Local folder in Vista, Win7 and Win8 and in your user profile Local Settings folder in XP.

To me, good housekeeping is having all of the temp folders together, in just one place, and if you have just a small SSD for your system drive then to move it to another partition will undoubtedly save space.
I am going to explain how to relocate the temp files folder as well as merge them together all in one. Should you just want to merge them then follow the tutorial, but remember to point one of the temp folders to the other’s location.
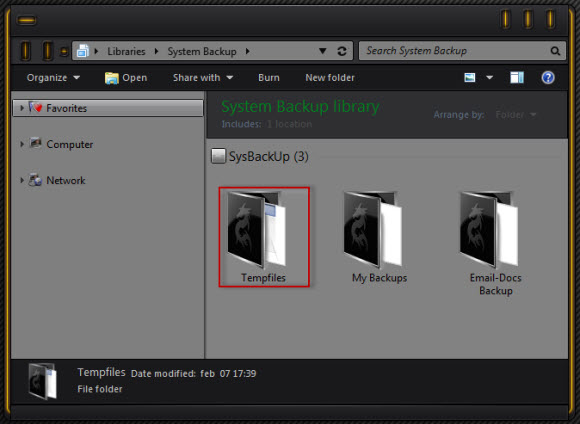
Create a folder for your temp files in a partition or drive of your choice, you can call it whatever you want.
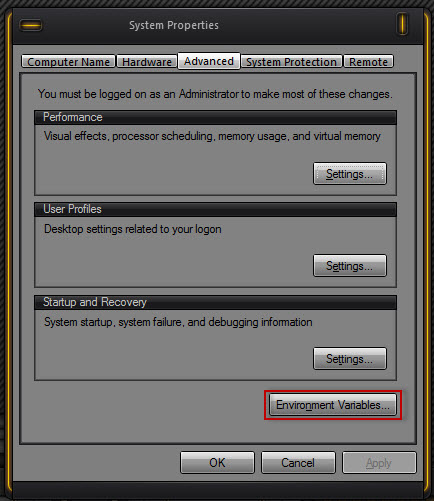
Open the System Properties window by pressing the Win + Pause/Break keys together then clicking on Advanced System Settings in the left hand pane…

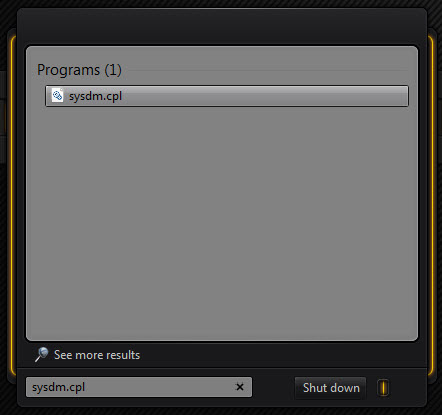
… or take the direct route by typing sysdm.cpl in the Run or Search box and press Enter.
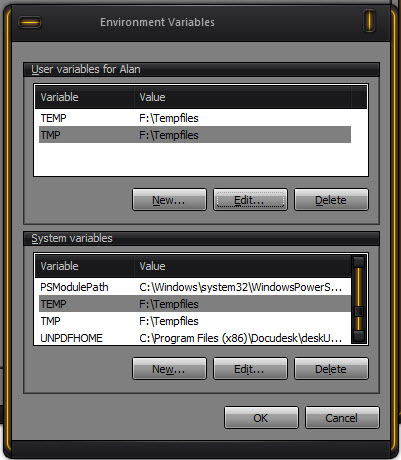
Under the ‘Advanced’ tab you will find an Environment Variables button, click on that.
In the ‘System Variables’ box scroll down to TEMP and TMP.

Double click on one of the variables or highlight one and select Edit and type in the Location of your new Temp Folder.
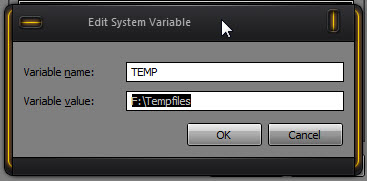
Do the same for the other variable. The Windows temp file location has now been changed, there are two ways to change the user temp file location.
In the top box called User Variables double click on the TEMP variable. Now either delete the variable value OR type in the new path and press OK.
Do the same for the the TMP variable.
If you have multiple accounts on your machine, you will need to log-in to each account to move the ‘User’ temp folder.
Windows will now store all temporary files and folders in the new location.
Restart your system for the changes to take effect.
I’d seen this “environment variables” thing before but it didn’t dawn on me to put all the temp files under one roof, thanks for the tip!
BTW how did you get your OS to look like that (black and grey windows) ? I do a lot of art and would love to tweak W7 to my own look and feel.
I used WindowBlinds to skin my Win7 Os. You can change the colour of many elements by right clicking on the desktop and then choosing Personalize. In the window that opens click on WindowColour then at the bottom is a link called Advanced Appearance or something to them words, (my Win7 machine is in Swedish and the translation is a little strange) its the only link in the window. From there you can choose which elements you want to re-colour.
Ok, I did this fine for the admin acct. However, when I went to the regular user acct (Win8) to do the ‘adv system settings’ it makes me log in as admin, which will ony change the root temp folders and not the one for this user. Any ideas on how to do it for this user? Thank you!