Keeping your computer organized is important. Not only does it make you more productive, but should disaster strike it allows you to know where to look to recover those files. I generally keep items I’m currently working with on the desktop. It is an immediate notification that something needs attention. If I’m done downloading a file, or have completed a project I move it to the appropriate location. I’ve set up folders for websites, work, books, music, videos, etc. Your organizational methods will vary greatly from mine (and probably be better). But that raises the question of how. How do I get those files where I want them?
A little background information
For those who aren’t familiar with the terms DOS and path, that Terry used, let’s have a quick definition:
- Path – The actual location of a file. The path to a file called myfile.txt which is currently on my desktop is c:\user\dave\desktop\myfile.txt. This is a relatively short path. They can be much longer. A file path leads you to a location, which in this case is a file. As you can see it is not something you would easily remember if you had to memorize the path to each file on your computer.
- DOS – Disk Operating System. DOS is actually an operating system that pre-dates Windows 3.1, 95, 98, ME, 2000, XP, and Vista. DOS is very powerful, but it isn’t pretty to look at. It resembles the command prompt often referred to in the Windows version you are familiar with. In fact everything was done with text commands and paths. So now you have to remember a command and the path to the file. Sounds great, doesn’t it? A simple move required a command followed by the complete path of the file followed by the complete path to the location where you would like the file to end up. If you weren’t good with a keyboard simply moving a small files could take a few minutes.
DOS looked very similar to the Windows command prompt you may be familiar with!
Windows 3.1 introduced the GUI (Graphical User Interface), which adds a nice colorful screen with pictures. The most important aspect of the GUI is it replaces text commands and paths with icons and pictures, which are easier for the average user to work with. Basically, when you manipulate files and folders Windows is doing the grunt work entering text commands and file paths for you behind the scenes. That is way over simplified, but you get the idea!
The point is, though for some typing commands may be quicker, Windows is a point, click, and drag operating system. To work within Windows the user points, clicks, and drags. You do it every time you use Windows. Manipulating and moving files works the same way. A few important terms you should know are:
- Clipboard – A section of memory that Windows uses to temporarily store information for the user.
- Cut – Removes the file or object from the original location and places it in the Clipboard.
- Copy – Copies the file or object to the Clipboard, but leaves the original in the current location.
- Paste – Removes the file or object from the clipboard and places it where you choose.
These functions work in almost every program you have, so take a moment and reread and understand them.
Removable drives
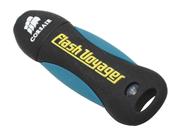
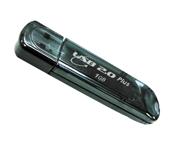
The computer world was ruled by floppy drives in the 1980s and early 90s. Flash memory has changed that. You will hear words like flash drives, usb drives, and thumb drives. All refer to small, reusable, removable (not permanently connected to your computer) usb devices for storing and transporting files. These devices can take on almost any shape, but are often small devices that are similar in size to your thumb. Many of today’s digital cameras and mp3 players can also function in this fashion.
A few pointers to keep in mind while using usb storage devices:
- Upon connecting a USB drive for the first time Windows will load a driver for the device, which may take a moment to complete.
- Try to use the Safely Remove Hardware feature to eject the device before removal, which is available by right clicking on the device in My Computer.
- Never (Never Ever) remove the device while it is being written to or read from. This will likely result in a loss of data on the device.
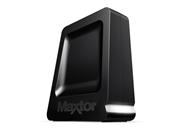
Here are some examples of common USB removable drives:

A Quick Refresher
We discussed how Windows handles three common commands: Copy, Cut, and Paste. There was also a brief explanation of the Windows Clipboard. Here they are again.
- Clipboard – A section of memory that Windows uses to temporarily store information for the user.
- Cut – Removes the file or object from the original location and places it in the Clipboard.
- Copy – Copies the file or object to the Clipboard, but leaves the original in the current location.
- Paste – Removes the file or object from the clipboard and places it where you choose.
These four items are important because three of the four items are used in combination every single time you move a file or folder. It doesn’t matter how you perform the move, as it is always true.
Windows Default File Actions
By default Windows takes into account the location you are moving the file from and to. If the file resides on your hard drive and you are moving it to another location on the hard drive Windows will perform a Cut – the file will not remain in the original location, but will be in the destination location. If either the original location or destination location are on a removable drive Windows will perform a Copy – the file will remain in the original location and will also be in the destination location.
- Both original and destination are an internal hard drive – the file will not remain in the original location, but will be in the destination location.
- Either original or destination are a removable storage device – the file will remain in the original location and will also be in the destination location.
To move a file using Window’s default methods navigate to the original location of the file. Open My Computer or My Documents again so you have two folders open and navigate to the location or folder where you would like the file to end up. If one of the locations is the desktop you will only need one folder.
Place your cursor over the file you would like to move. Press down on the left mouse button and hold it down. While holding the button down move your mouse to the location where you would like the file to be. Release the mouse button. This is called “dragging and dropping”. That sure is a lot easier than typing a text command and the path. Isn’t Windows wonderful?
Note: An external hard drive (one that connects with a USB or Firewire cable) is considered removable storage by Windows and will, by default, perform the copy function.
Here is an example of a file being moved from one location on the internal hard drive (desktop) to another (Documents).
Click here for Move a File video
Here is an example of a file being copied from the internal hard drive (desktop) to a removable storage device (USB Drive).
Click here for Copy a File video
Hey! That’s just great! Now you know that Windows will perform a copy if one of the locations is removable storage, so your original file will still be in the same place. You also know that if you both locations are on an internal hard drive that Windows will perform a cut and the original location won’t have the file anymore
But what if you want to perform a cut when copying to/from a removable drive? What if you want to perform a copy when moving files around on your internal hard drive? Microsoft thought of that too!
Windows has a hidden menu for each file. If you hover your cursor over a file and click the right mouse button you will find a plethora of options that appear in the menu. It will look similar to the picture below:
AH HA! Do you see Cut and Copy? These do exactly what is described above. Clicking Copy will place a copy of the file in the clipboard. Clicking Cut will place the original file in the clipboard. I bet you want to know how to get your file back from the clipboard? Don’t worry it isn’t gone!
Navigate to the location where you would like the file placed. Right click again to see the hidden menu. Notice anything different?
Clicking Paste will remove the file from the clipboard and place it in the location you right clicked!
Here is an example of the file being moved from a removable USB drive to an internal hard drive, which is not Windows default option.
Click here for Cut a File example
Here is example using the copy function to place a duplicate file in another location on your internal hard drive.
Click here for Copy a File example
There you have it! That is a basic overview of how files are moved are in the Windows operating system.
Renaming a single file
Often pictures, programs, and files we download have a strange and cryptic name. One of the best things you can do is rename them and be as descriptive as possible. I often run into this with software updates. A program will tell me there is an update available and ask if I want to download it. Of course I do! I go through the motions and end with a file on my desktop with a name such as dss3405.exe. I always keep a copy of all my software on an external hard drive, but when I need to reinstall what will that name mean to me? The name is cryptic, which is why I would rename it to better describe the file.
Renaming a file is easy. A filename is broken down into two parts – the name and the extension, separated by a period. My song.mp3 is a filename, My song is the name and mp3 is the extension. The file extension tells Windows and any other operating system what to do with the file and how to do it. Common extensions include: mp3, wma, wmv, exe, doc, ppt, jpg, gif, png, and pdf. When renaming a file it is important NOT to change the file extension. If you change the extension Windows won’t know what type of file it is, or what program to use with the file. The good news is if you do accidentally change the extension Windows will warn you before it makes the change.
Renaming a file can be accomplished in two ways:
- Select the file by clicking with the left mouse button, then press the F2 key at the top of your keyboard.
- Hover your mouse over the file and click the right mouse button. A menu will open and you can scroll down to “Rename”.
In versions of Windows prior to Vista the entire filename and extension will be highlighted and you can type the name you desire. Remember the extension must remain the same. Your best bet is to click at the beginning of the highlighted area, type your desired name, and use the delete key to remove the old name (leaving the “period” and extension). Another option is to move your cursor to the beginning of the name, click and hold your left mouse button, and move the cursor to the right until you have highlighted just the name. You can then type the name you desire without disturbing the extension. Pressing the Enter key on your keyboard will finish the process and make the change. If you make a mistake press (and hold) the ctrl key on your keyboard while pressing the Z key and your change will be undone.
Selecting multiple files
We have discussed working with single files, but what do you do if you have a large number of files? Do you have to work with each file individually? Nope! Windows has a solution!
To select every file in a folder press and hold the Ctrl key on your keyboard and then press the A key. This will add all files in the folder to your selection.
To select a continuous group of files select the first file by moving your mouse over the file and clicking with your left mouse button. Hold down the Shift key on your keyboard and move your mouse the the last file you want to group and click with your left mouse button. You have just selected multiple files! Notice that all files between the first first and last clicked files are selected.
OK, that works well, but what if you don’t want a continuous group. What if you want to pick and choose multiple files?
Move your mouse to the first file you wish to select. Hold down the Ctrl key on your keyboard while clicking the file with your left mouse button. Keep holding the Ctrl key and move your mouse to each additional file you wish to select and click with your left mouse button. As long as you keep the Ctrl key pressed each additional click on a file will add that file to your selection.
You can also use combinations of the above three methods, which will give you even more control and save you time!
If you wanted the majority of files in a folder, less a few, you could use the Ctrl-A method to select every file in the folder and continue to hold down the Ctrl key. As long as the Ctrl key is pressed any file you click with your left mouse button will be deselected!
If you wanted to select a group of files in the middle you would use the Shift-Click method above to select the group. Opps, you don’t want one file in the middle? Release the Shift key and press and hold the Ctrl key. Every file you click will be deselected. If you click on a file outside the group it will be added.
It’s pretty neat and a great time saver!
Renaming multiple files
Just like building blocks we can now add the previous two steps together and rename multiple files at the same time. This is really great for digital pictures!
Using the above instructions select the files you wish to rename. Press F2 on your keyboard or click the right mouse button to open the menu and move your mouse to Rename and click with your left mouse button. What you will find is that Windows highlights the upper most selection only. If you type a new name and press Enter Windows will rename the first file with the new name and each additional file in the selection with a number. It sure beats doing each one separately!
One thing to remember is that Windows treats two files with the same name, but different extensions as two completely different files. If you use this method to and your selection contains files with different extensions you will get results like below:
Original Files:
coolsong.mp3
neatsong.mp3
loudsong.mp3
shortreport.doc
neatreport.doc
longreport.doc
All files selected and renamed to DavesSong will give the following:
Results:
DavesSong.doc
DavesSong (2).doc
DavesSong (3).doc
DavesSong.mp3
DavesSong (2).mp3
DavesSong (3).mp3
Notice that now both the songs and documents have the same name, which isn’t necessarily bad, but you should be aware.
Organizing those renamed files
Folders are the building block of organizations. Your hard drive is a huge warehouse. If you stored your belongings in a warehouse you would not just throw them anywhere. You would use boxes and labels. This is what folders are, boxes that are available for storage!
I can not tell you how to organize your files, they aren’t mine. I can show you how to create folders. Using what you learned above you are on your way to organization!
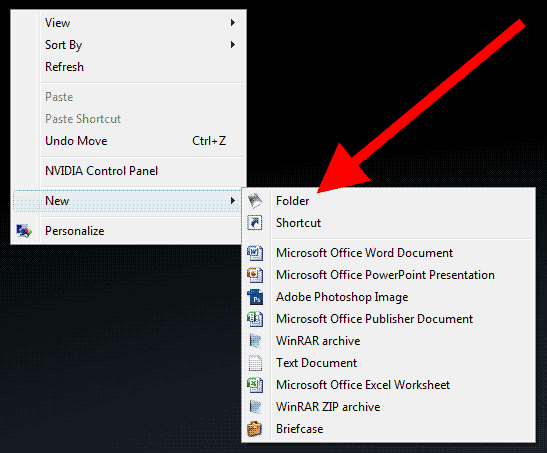
Creating a folder is so easy you will wonder how you missed it! You can create a folder anywhere such as your desktop, My Documents, etc. You can create folders inside folder. An example would be music. You can have a folder for all music. Inside that folder you can have a folder for each artist. Inside that folder you can have a folder for each record. So how? That right click menu comes to the rescue! Right click on an empty area and scroll down to New (it will have an arrow beside it) and click with your left mouse button (or pause for a moment over it).
A new sub menu will open and the first item you will see Folder. Slide your mouse over to Folder and click with your left mouse button.
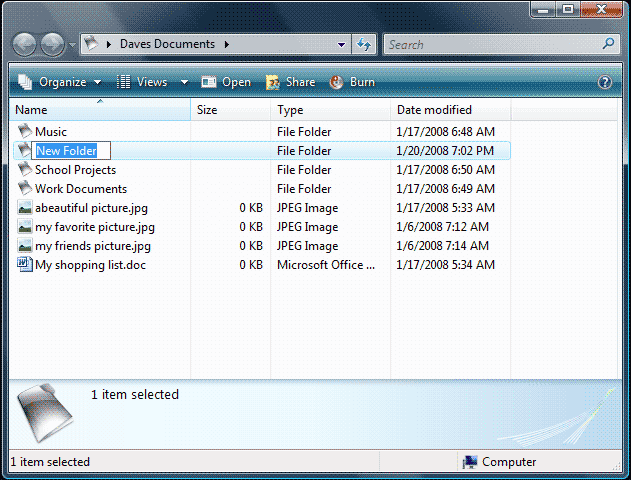
Windows will create a New Folder and highlight the folder name so you can immediately start typing a new name for your new folder. Once you are finished typing the name press the Enter key on your keyboard and Wholla! You have created a folder and are ready to put what you have learned to work!


Just joined up so forgive me for replying to this a few years late !
I found David’s post here to be simple and so easy to comprehend.
Having just moved to W7 (!) it’s great to have this info and I have found many things I was not aware of.
Probably a bit basic for most of the members here but not for me..Many, many thanks.