Windows 10’s Ease of Access settings provides a number of useful options for the disabled, particularly for those who might be sight or hearing impaired. One of those options is to increase the size of text when navigating through Windows. I am well into my 70s now and my eyesight sure isn’t what it used to be so increasing the size of text assists me no end. Most browsers include options to increase the size of text displayed across websites but these settings are per browser. Using a simple option in Window 10’s Ease of Access settings we can increase the size of text across most browsers (tested working with Edge, Chrome, and Opera but not working with Firefox), as well as most File Explorer windows.
Increase The Size of Text In Windows 10
Access Settings in Windows 10 either by clicking on the cog icon included in the left-hand panel of the Start Menu or by pressing the Windows + I keys.
- Next, you need to click on Ease of Access and then click Display in the left-hand panel
- TIP: You can go directly to Settings > Ease of Access > Display using the keyboard shortcut Windows key + U
Here you will see an option to Make text bigger along with a slider that adjusts text size between the default 100% all the way to 225% and a Sample text that changes size as you move the slider:
Once you are satisfied with the size of the text, click the Apply button. You can experiment with different sizes without hurting anything– just change the position of the slider and click Apply each time. To give you some idea, here are a couple of examples:
Start Menu with text at default 100%
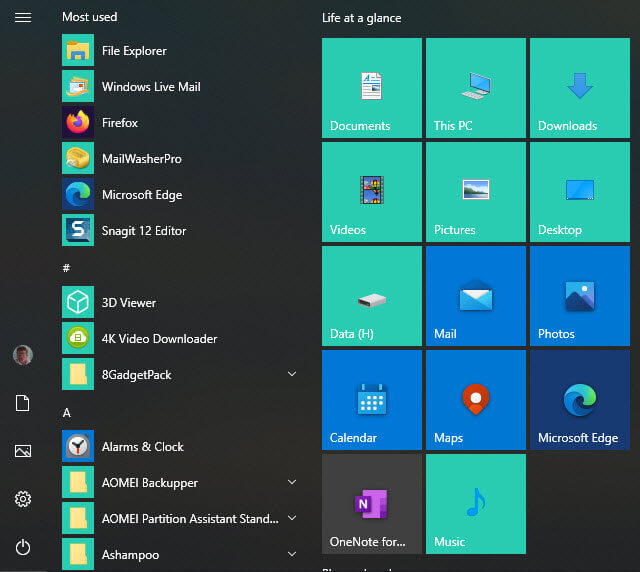
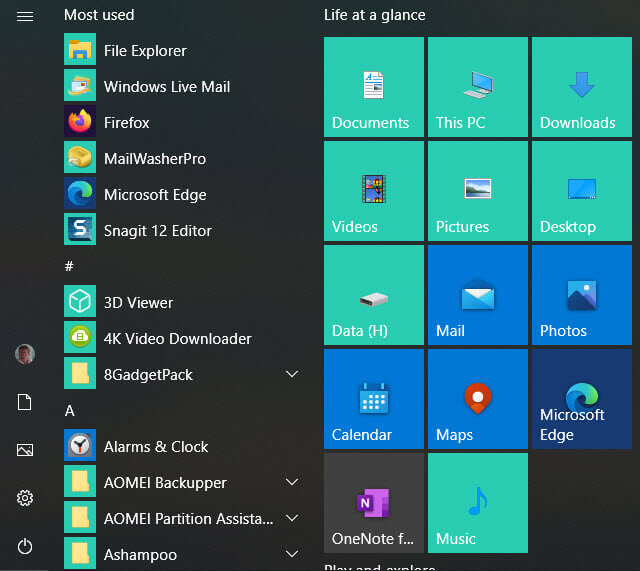
Start Menu with text increased to 130%
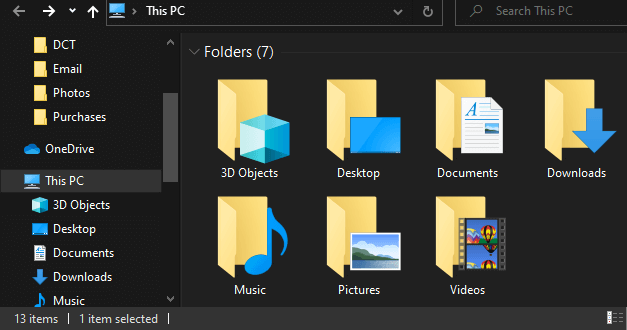
This PC open in File Explorer with text at default 100%
This PC open in File Explorer with text increased to 140%
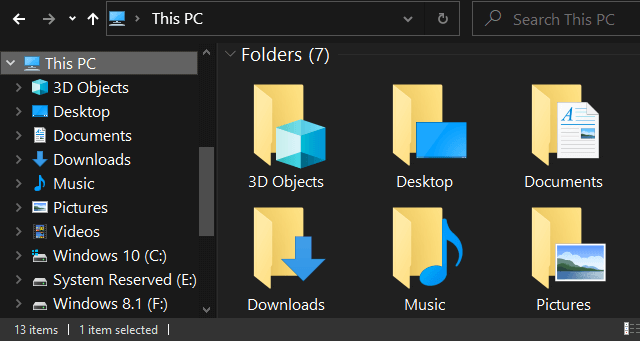
As you can see, increasing the text size in this manner does make quite a difference. This is especially handy for laptops which generally come with much smaller displays than the monitors used with desktops.
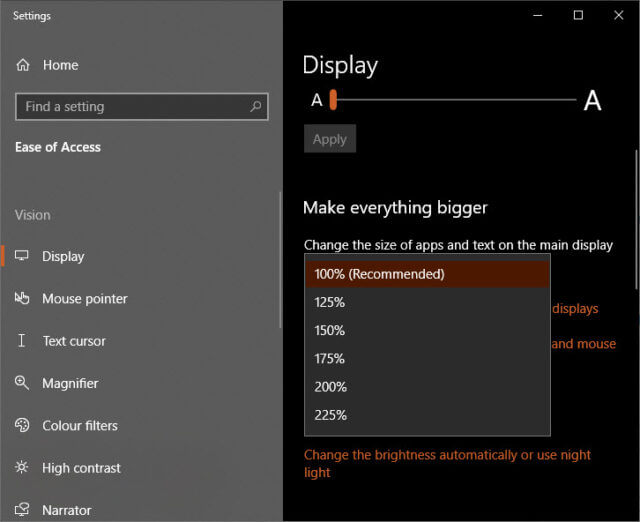
Just below the setting to Make text bigger, you’ll see Make everything bigger with an option to Change the size of apps and text on the main display. As well as increasing the size of text this also applies the changes to other elements, such as images and apps. The default is set at 100%. Open the associated drop-down menu to choose a larger size. I think you’ll find the 100% default (recommended) setting is fine for most displays so, for the majority, I would suggest leaving this setting as is.
Turn On The Night Light In Windows 10
While you’re there, if you tend to use the computer during night hours, I suggest you turn on the Night Light option which will automatically display warmer colors and mitigate the effects of blue light emissions. I work at the computer quite a bit at night and have found turning on the Night light setting to be a very useful option.
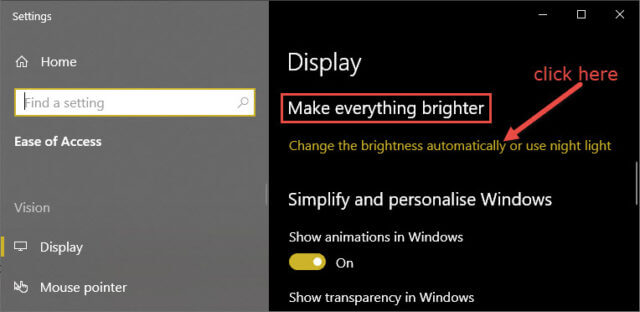
Scroll down the Display options until you see Make everything brighter. Click on the option to Change the brightness automatically or use night light.
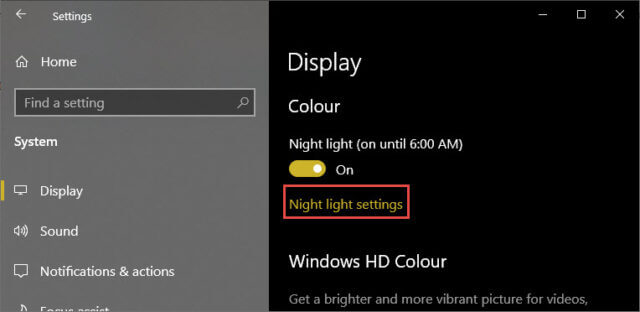
Next, set Light night to On and then click Night light settings:
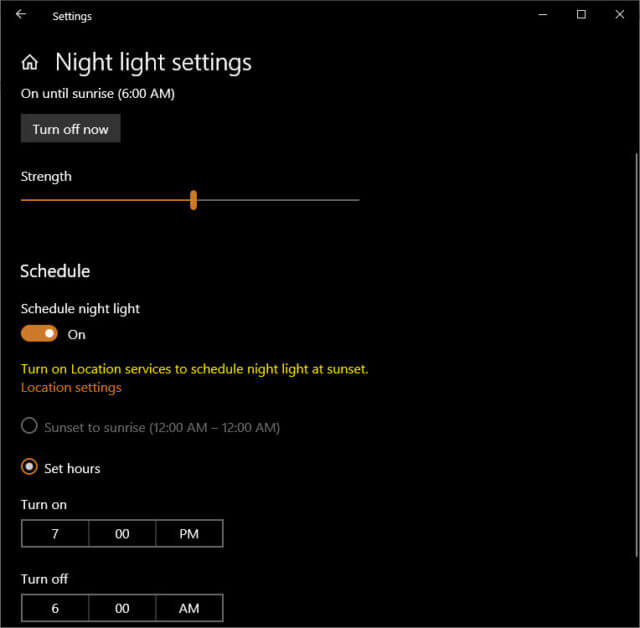
Here you can use the slider to set Night light strength (I’ve found around 50% suits me), plus set the hours for Night light to be active.
Moving the Strength slider adjusts the display in real-time so you can immediately see the effect and choose the right strength for you.
BOTTOM LINE:
These are just two of a number of useful features/options available via Ease of Access. Well worth checking out.
—


Just using CTRL + the + (plus) or _ (minus) keys will do this much quicker and is handier for a quick change, but nevertheless this is also a very useful way and more detailed.
No, that doesn’t work system-wide. Please read the article before commenting.