
How to make a System Image Backup using the latest version of AOMEI Backupper.
First download and install “AOMEI Backupper” from here.
The first time you run the program the “Home” screen will look like this.
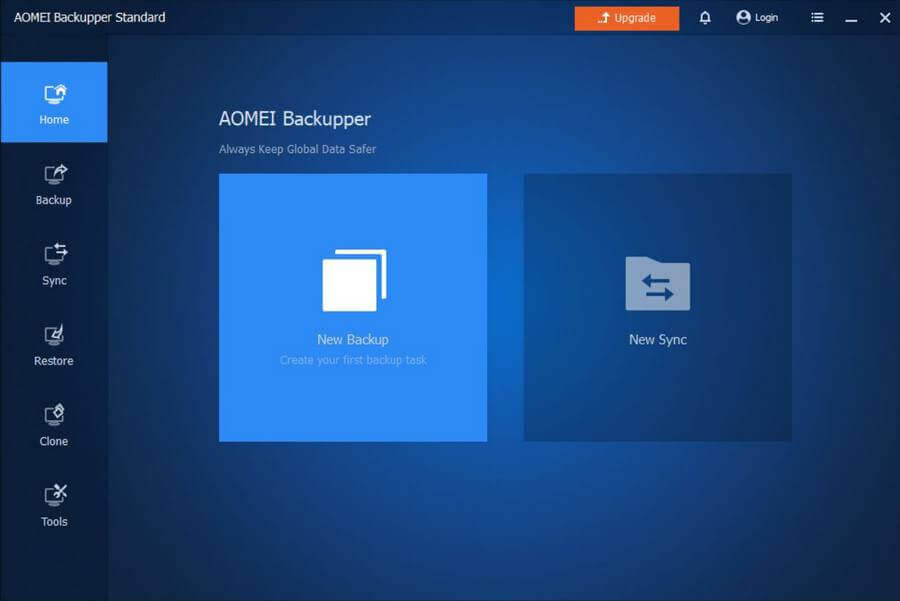
Click on the First big square icon labeled “New backup“.
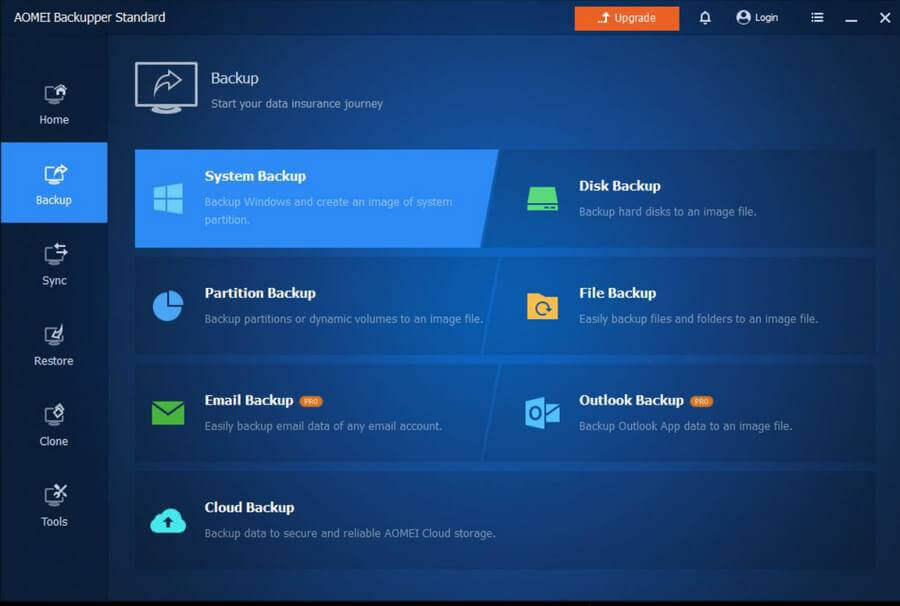
On the next screen select your backup type. Note: Some options are only available in the premium version. I selected “System Backup”.
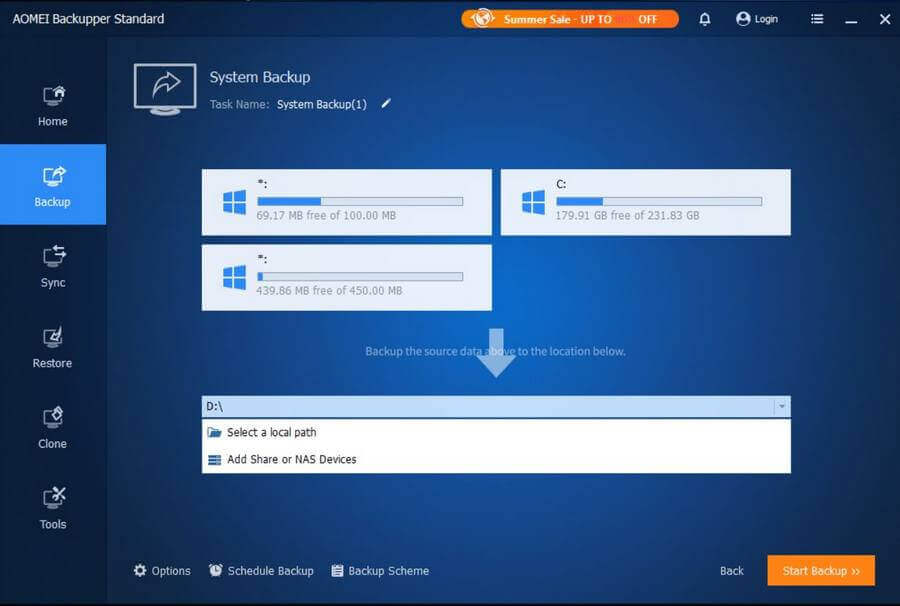
Then select where you want to save your image backup. I had an external drive plugged in with the drive letter (F:). I clicked on the D:\ and in the menu, I clicked on “Select a local path”. Then I navigated and chose my (F:) drive. Then click on “Start Backup”.
Let it run. It took only 8 minutes to make a full system image. Your time may vary depending on hard drive size, amount of data, computer specs, and so on.
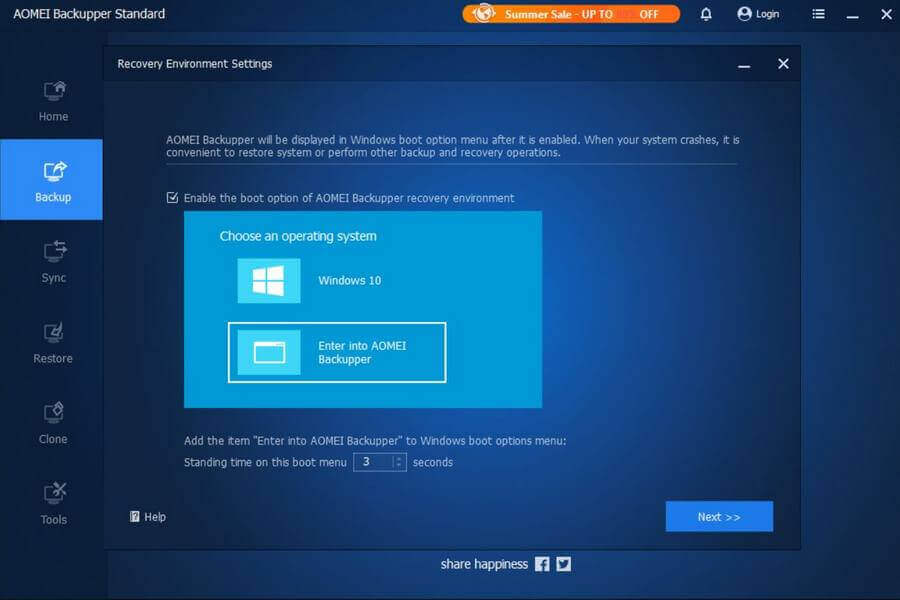
Once the backup is completed it will prompt you to make a “recovery environment”. This can be a CD/DVD/USB Flash drive that you can boot from to restore your drive image. Note: It only prompts you for this during your first backup.
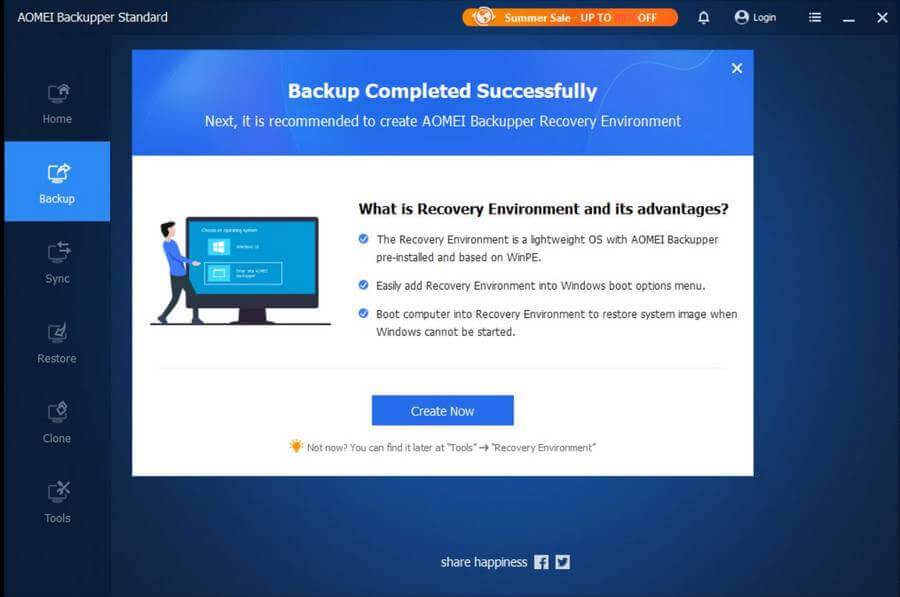
Close out this window because if you click on “Create Now” you’ll get an option to add an entry into the Windows boot option menu and clicking on Next there only sends you to an ad if you are using the Free version. There is no option on the ad screen to continue with the process of making your boot medium.
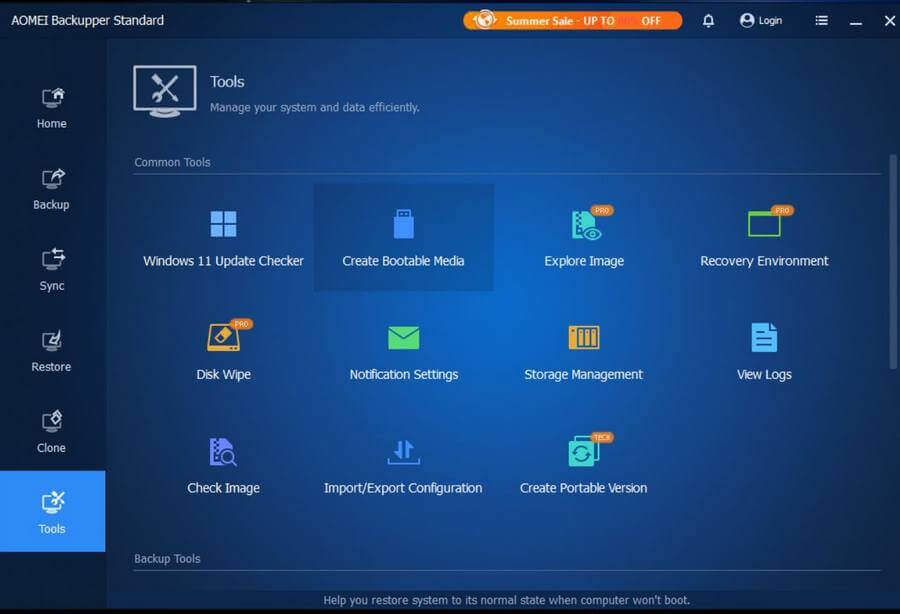
So instead, close these screens. Go back to the Home Screen and click on “Tools” down the left-hand menu. Then click on “Create Bootable Media”.
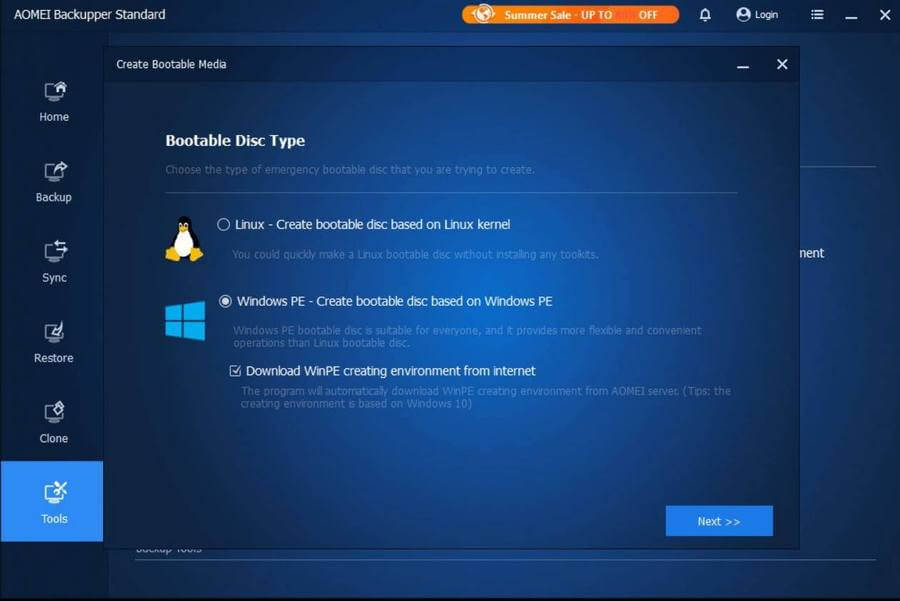
You can select a “Linux” or “Windows PE” disc. I selected Windows PE and checked the “Download WinPE creating environment from internet”.
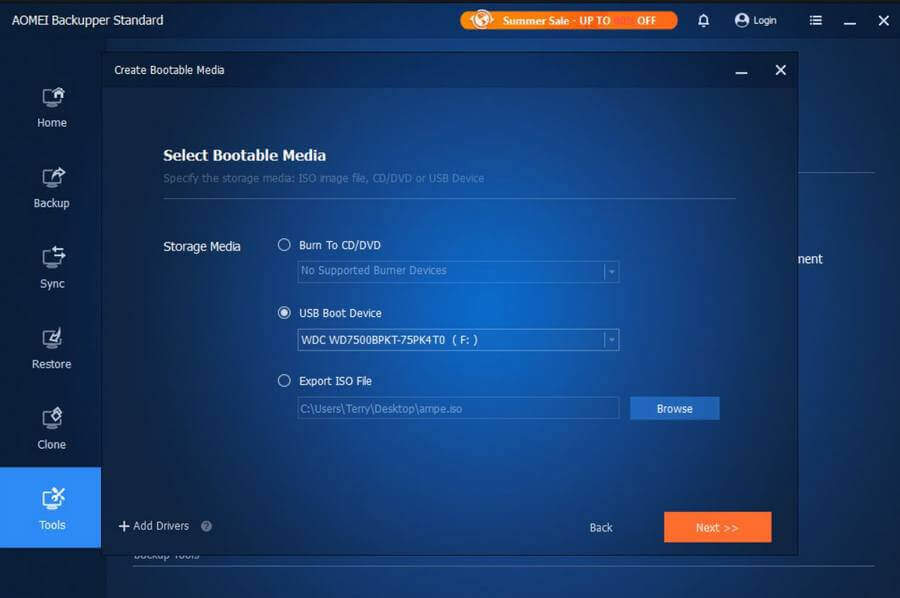
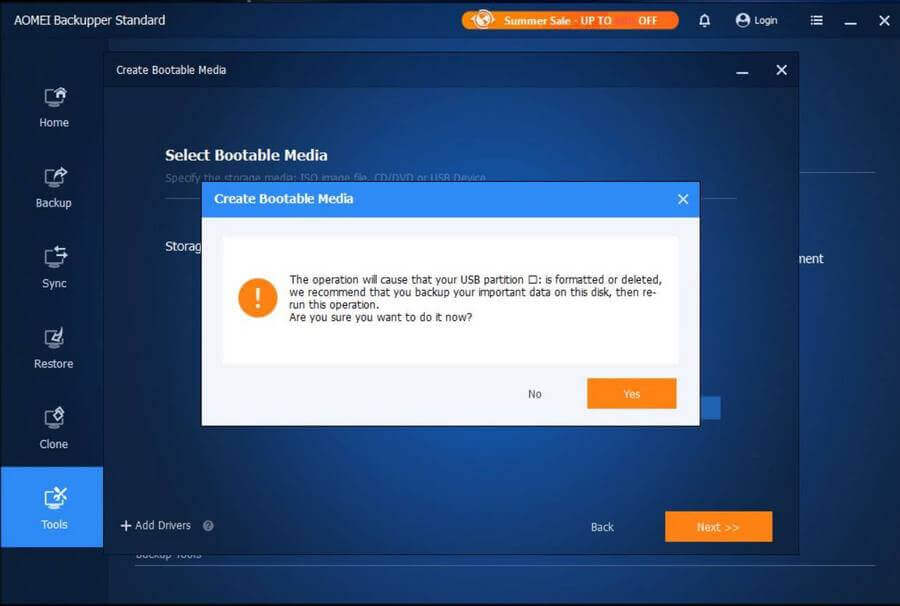
Then select your medium: CD/DVD, USB Boot Device, or Export ISO. I selected “USB Boot Device” and inserted my flash drive. Then click on Next.
You’ll get a standard warning about all contents on the flash drive to be deleted. Click on “Yes” and wait until it’s finished.
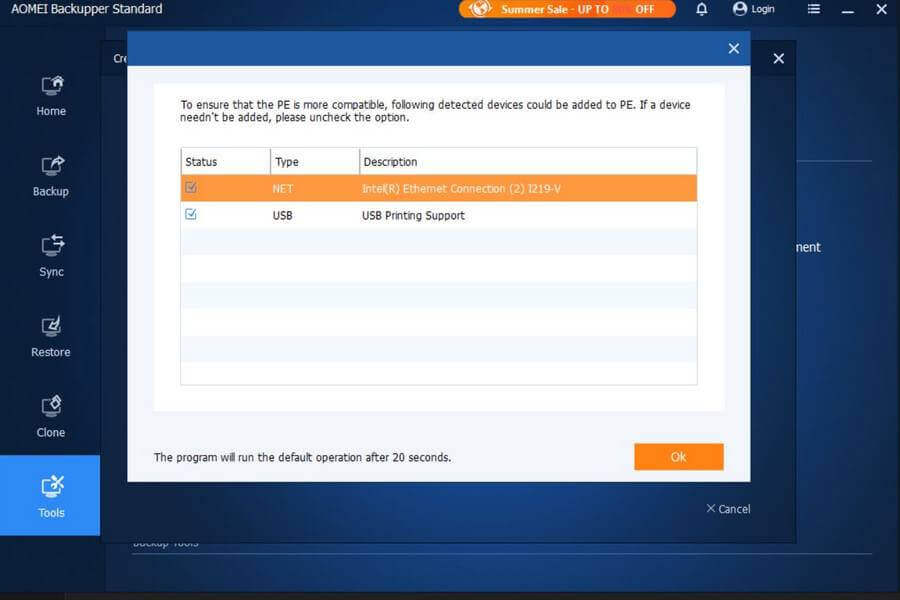
You may get a prompt to include other device drivers. Uncheck if you don’t think it’s needed. I left them both checked and clicked on OK.
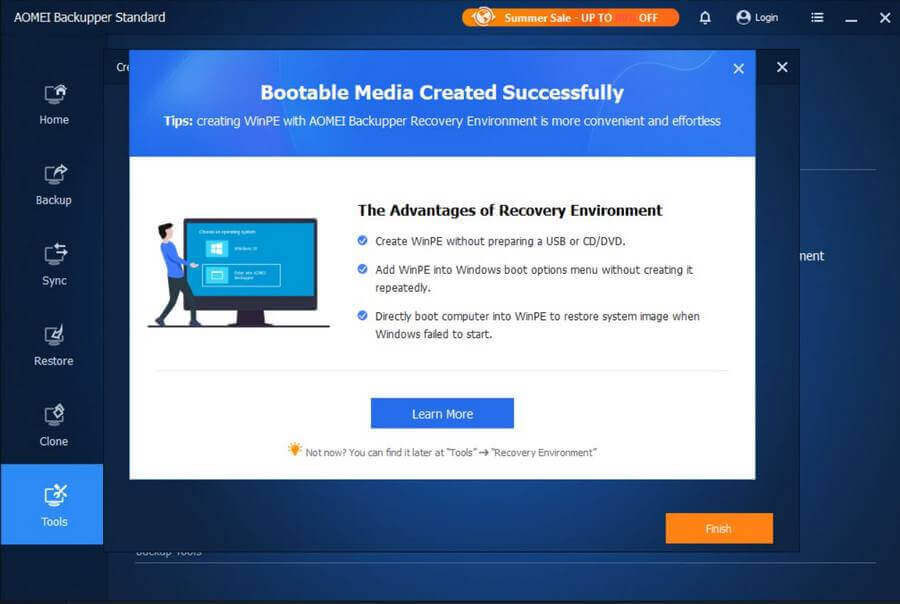
You’ll get a message “Bootable Media Created Successfully”. Click on the “X” in the top right-hand corner to close that out and then click on “Finish”
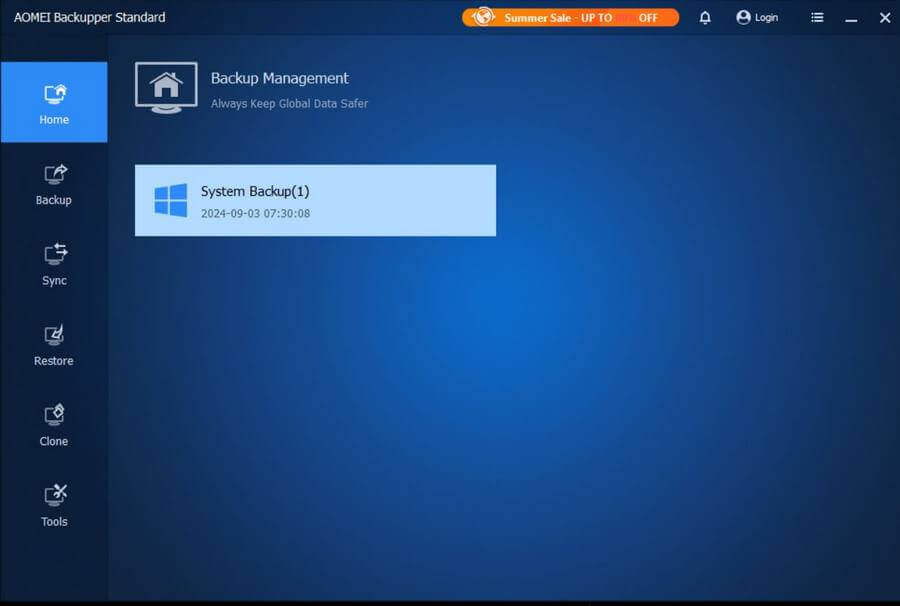
Now click back on your “Home” icon to see your backups. Note: The next time you open the program to make a backup, you’ll see your home screen with a list of previous backups. Click the “Backup” icon under the “Home” icon to see your backup options.
So that’s the basics of getting started with AOMEI Backupper Standard.
For more about backups click here.
—