
Sending a postcard seems to be a thing of the past. I remember when we used to go away on vacation and send postcards to those back home with pictures depicting the places we were. We would buy them off a rack in a local store and add something like “Having a great time. Wish you were here!”
Back then there was little time to write a letter and there was no cell phone to send a text, or social media to post an item with pictures, or email even. I know, I am ancient by today’s standards. Even today, the postage to send an email is zero compared to what it cost to send a letter. It is fifty-five cents for a one-ounce letter and only thirty-five cents for a postcard.
In this time of staying home, why not create some individual postcards to send to friends and family? Think about it. You can find some pictures specific to that person from their Facebook page or from your own collection. Use it for the front side and handwrite a quick message on the back. Add thirty-five cents postage and put it out for the mail carrier to pick up. When your friend gets the postcard it will surely put a smile on their face.
We could use any word processor but I thought I would use Google Docs this time. Page 1 will be the front and Page 2 the backside. For printing, I use inexpensive white 8.5×11 card stock. I print the first page and then flip the paper over and print the second page. I get two cards to one piece of paper. Then all I have to do is cut out the postcards and mail them.
To make a template ready to create my postcards, I created two centered tables on page 1. I made them postcard size, 6 x 4 inches. Then I copied that page to create page 2. The centering allows for the “boxes” to line up when printing on both sides.
In Google Docs create a new document.

Move the left margin to 1.25 and the right to 6.00
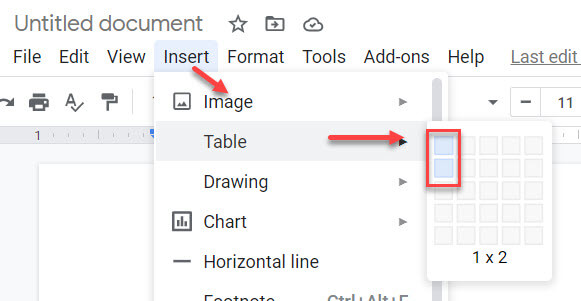
Create the table by clicking Insert > Table > 1×2.
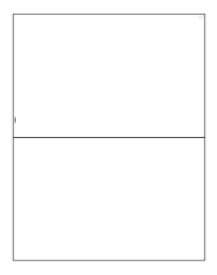
Click to place the cursor in the first cell, then press the Enter key 20 times to make the first postcard area or as many times as are needed to bring the bottom of the table to four inches. Then do the same in the second cell.
With the cursor still in the second table, Ctrl+A > Ctrl+C to copy the first page to the clipboard.
Click once beneath the second table to place the cursor on a new line and then Ctrl+Enter to force a page break.
Then Ctrl+V to copy the first page to the new second page.

Add then the words “Post Card” centered in the tables on page 2 and perhaps a “stamp” image you can locate on the Internet.
When you want to print a postcard, open this template. Then click File > Make a copy.
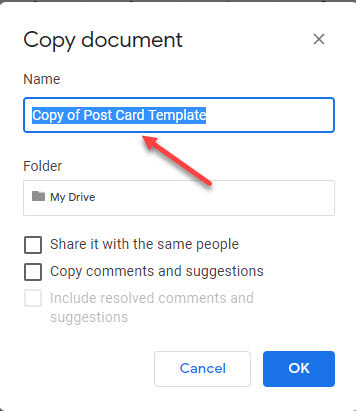
Change the Name to something meaningful and click OK. Then locate the pictures you want to include and paste them into the cells on page 1.
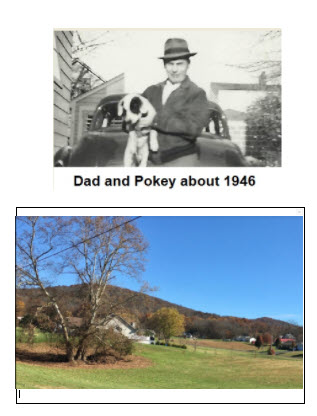
When pasting the images, right-click on the image and choose Image options > Text Wrapping > Wrap text and arrange so the bottom of the first table is still at four inches and the second at eight inches.
Now place a sheet of card stock in your printer and print Page 1. Then turn the printed card over and insert it back into the printer. Then print Page 2 and cut the postcards out with scissors. Add your handwritten words and their address. Remember to add a real postage stamp.
Perhaps these could make great Christmas Cards or Invitations to a party, or …
I hope you can use this idea. Let me know how it works for you.
Dick
—