Setting Things Up
Microsoft, in a grand publicity stunt, “Accidentally” released a version of Windows 11 to the public. They now apparently have blocked most downloads but at the time of this writing, it is still possible to get a copy from UUP dump.
Not a Microsoft site so use so at your own discretion. This is a Dev[eloper] channel build, not recommended to use on your main computer. I downloaded the Home version which identifies as Version 21H2 (OS Build 22000.51).
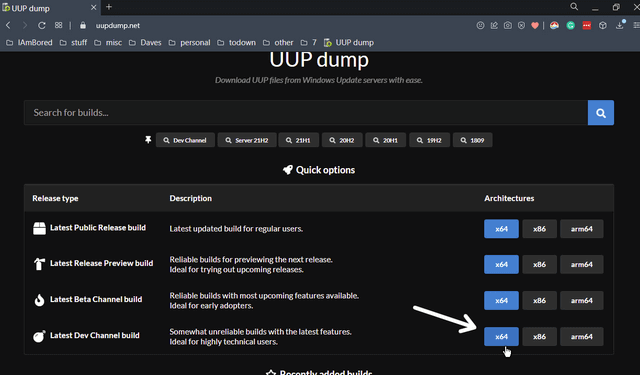
So if you decide to give it a test run, here is how to get it. Go to their website and click on the Latest Dev Channel, the x64 in the blue square.
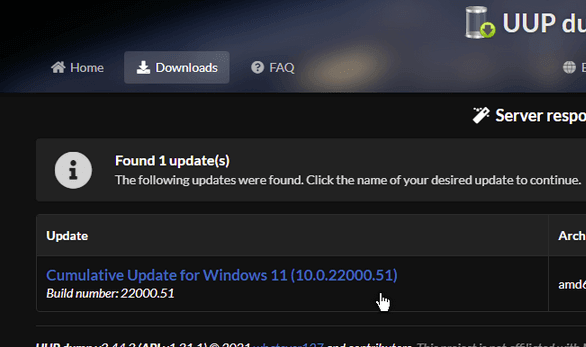
Then on the next page, click on the blue letters Cumulative Update for Windows 11 (10.0.22000.51)
Then choose your language and click on Next.
Then Choose your version, I stuck with Windows Home. Then click on Next.
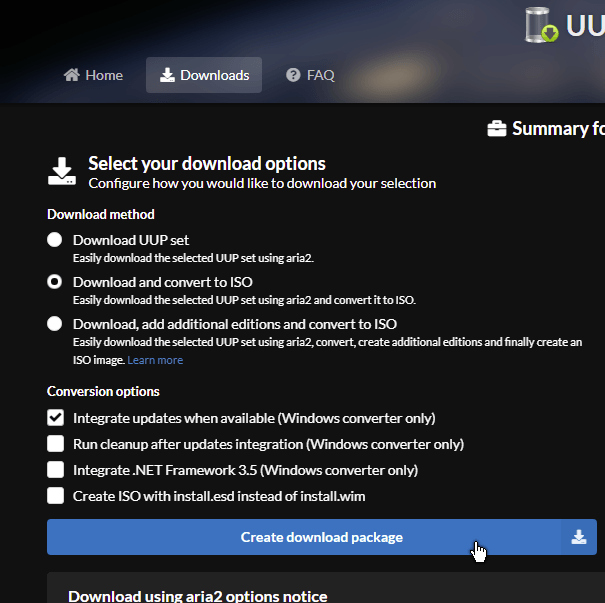
Then I just left the last options on Download and convert to ISO and Integrate updates when available. And click on Create download package.
Creating The ISO
This doesn’t actually download the ISO but downloads a zip file, in my case named 22000.51_amd64_en-us_core_bfe6f0bd_convert.zip. Decompress the contents to a folder of your choice and then in that folder look for a file called uup_download_windows.cmd.
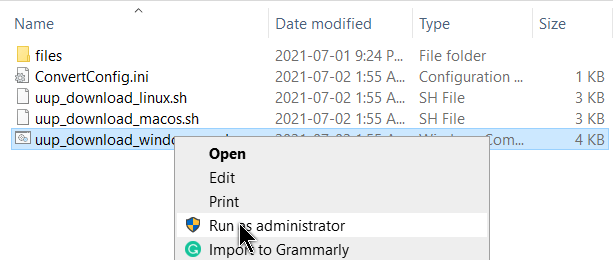
Right-click and Run as administrator… and then you do nothing but wait. This is all done through the Command Prompt. It will download the files and automatically create the Win 11 ISO. Warning this could take over an hour depending on your Internet speed and your computer. In the end, I had an ISO called 22000.51.210619-2323.CO_RELEASE_SVC_PROD2_CLIENTCORE_OEMRET_X64FRE_EN-US.ISO.
About 4.85 GB in size. This is created in the same folder as the uup_download_windows.cmd file.
So I mounted the ISO with Virtual CloneDrive and ran a few scans for virus/malware. Scans came out clean. Then I copied the contents of the mounted ISO to a folder on my hard drive that I created called Win11.
Then you need a copy of Windows 10. Read Dick Evans’ article here: How To Create Windows 10 Installation Media
Windows 11 has been described as Windows 10 with a paint job. The biggest issue that users of old tech run into has to do with Trusted Platform Module 2.0 and Secure boot. If your system doesn’t support these two options, you can’t use Win 11… in theory.
Checking online, there are several ways to work around this issue. Microsoft, in their final release, might close up these loopholes. But for now, if you want to run Win 11 on your computer(s) that don’t support TPM or secure boot, like mine, you can try this. No warranties or guarantees implied!
Prepare Your Installation
Use a compression program like 7Zip, in my case, and decompress the files in your Windows 10 ISO into a folder (or just copy the files from your flash drive depending on which path you took). Do the same for Windows 11.
In Windows 10, look for a folder called Sources and highlight all the files in it except the one called install.wim. Copy them all to the Windows 11 folder of the same name. When prompted to overwrite files, say yes.
Now, you need a utility called Rufus
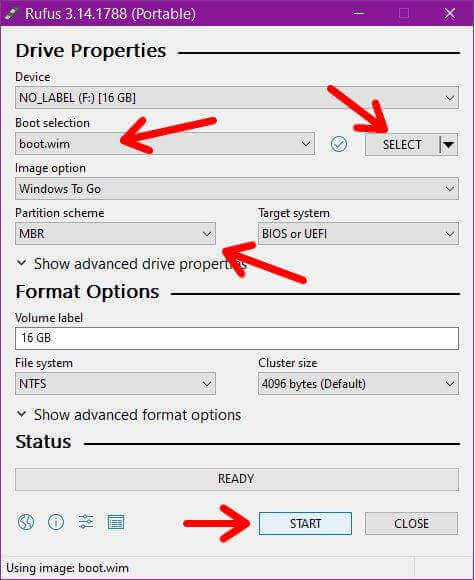
Plug in your flash drive and run the program. In the Boot selection section, click on the SELECT button towards the right and navigate to the boot.wim in the Sources folder of Win 11. Switch the Partition scheme to MBR.
Then just click on Start.
In the next window that opens click on Microsoft Windows Setup (x64) and click on OK.
You’ll be warned that all data on your flash will be erased. Click OK.
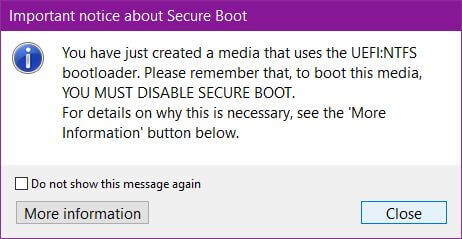
Then wait… you’ll see the green Status bar going across, and finally, when it finishes, you will get an Important notice about Secure Boot.
Click on Close. Now you should have a bootable version of Win 11 on your flash drive. In the next article, I’ll show the actual installation on my unsupported system. I’m going to use my Acer Windows 7 system as a guinea pig. Spoiler Alert – It Works.
—



Downloaded the ISO and popped it in a virtualbox VM and
after awhile I had W11 running. Did an activation with an old
W8 product key. Just wonder what may be the difference
between this ISO and media creation tool ISO.
This version is more aimed at testers and not the general public. If you’re talking about Microsoft’s Media Creation Tool, then that version will be the official version released to the public, when available.