


I have had my PS5 for a few months now and really enjoy it. The system comes with between 650 to 700 GB of storage. That is all great but these new games are much bigger than the older PS4 games, so at some point, this might not be enough. This got me thinking that I could add more storage to this system. So I went off and did my research and found out how to do it. Now that I know, it is time for me to share my new knowledge with all of you. Before we begin our new lesson, make sure you check out some of the other articles I have written about this console:
- How To Adjust PS5 Power Settings
- How To Manage PS5 Notifications
- How To Turn Off Voice Reading On PS5
- How To Manage PS5 Microphone Settings
Now that you are more knowledgeable on this subject, let’s turn on those consoles and begin class.
How To Install An Internal SSD On PS5
In this article, I will show you how you can install an Internal SSD on your PS5.
Important Information before starting:
You will need to make sure you have a few things before starting:
- A well-lit room with a hard surface to work on
- A #1 Phillips screwdriver
- Flashlight (if needed)
Before you start your installation process, touch a metal-grounded object to remove any static electricity from your body. If you don’t do this, you may cause damage to your M.2 SSD storage or the PS5 console.
Don’t power on or play on your PS5 when the cover is off.
Step 1: The first step is to choose an SSD storage that is compatible with your system. The one I chose is called, “Western Digital SN850 NVME 1 TB,” and I found it on Amazon.

Step 2: Once you have the SSD and before we turn off the console, you need to make sure your system software is up to date. To do this, head over to the Settings on your console and find the System option. Now select System Software Update and Setting. That will get you started on making sure you have the most up-to-date software.

Step 3: Time to turn off the console and remove the side cover of the PS5. To do this, place the PS5 with the corner Logo face down with the back of the console towards you. Lift very slightly on the bottom right corner of the case. Now slide the cover to the left. This will open the side we need to get into.

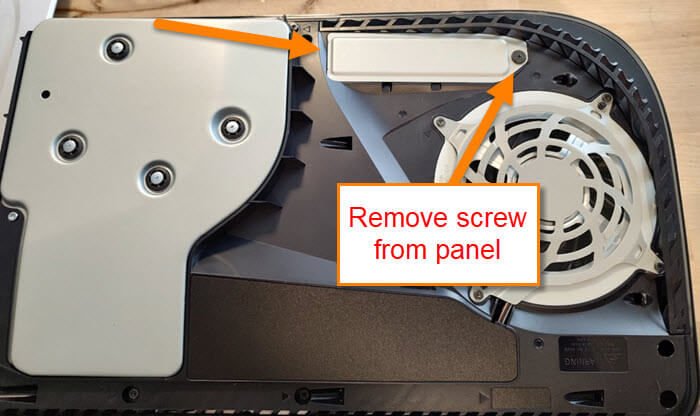
Step 4: Here you can see at the top, a plate we need to remove. Unscrew the plate and open it up. This is where we will be installing the new SSD.
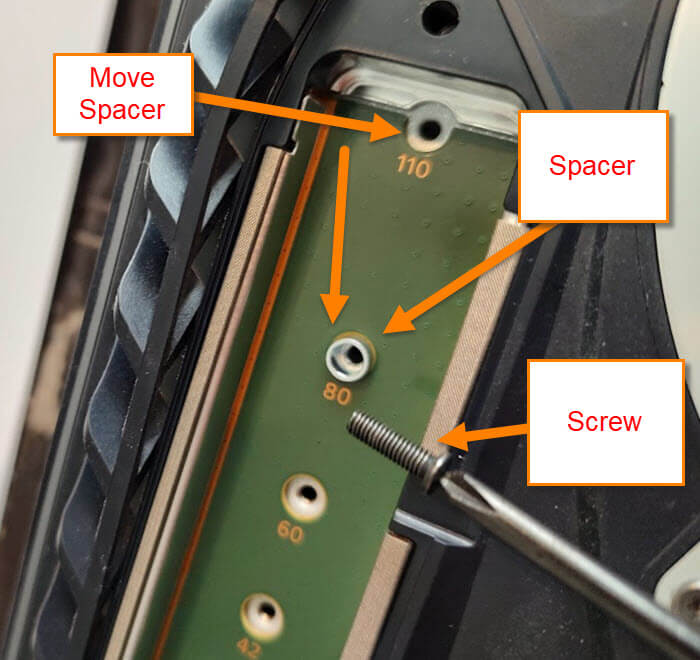
Step 5: Remove the screw and spacer at the top of the green board. Move the new spacer to the groove that matches the SSD storage length you are installing. The one I will be moving it to is the 80. Do not screw this back in yet.
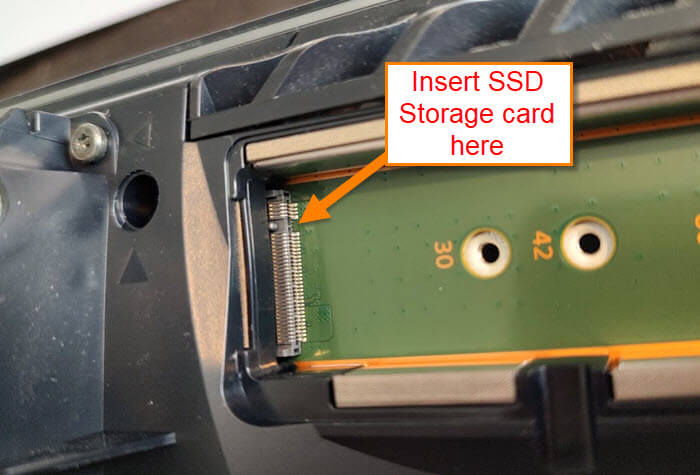
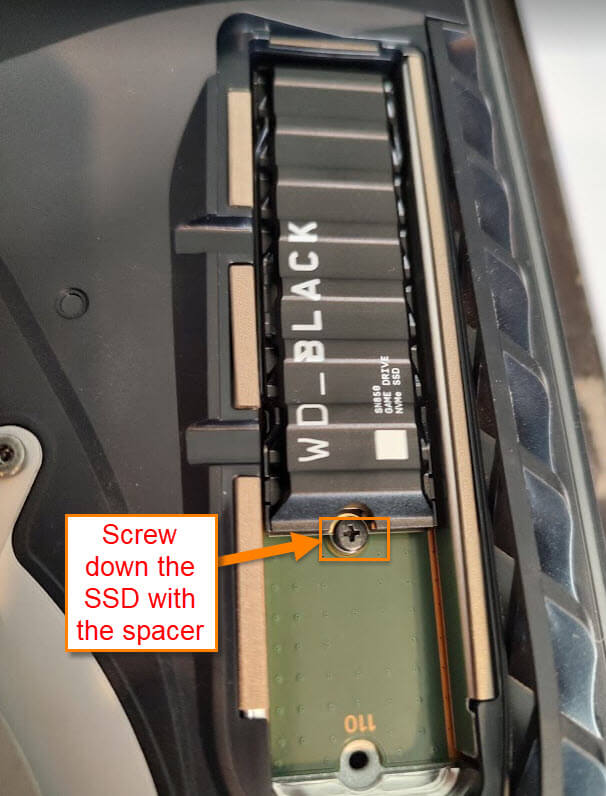
Step 6: Grab your SSD and insert it carefully into the connecting port at the end of the green board. Once that is installed, take the spacer screw and securely screw it back into the spacer. This will lock in the SSD to your system. Now put the plate back on and the back cover before moving forward.
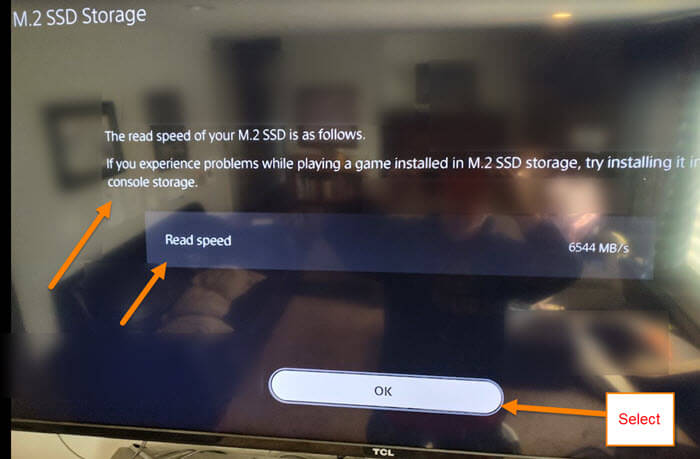
Step 7: Plug your system back in and turn on the console. You will get a screen asking you to format the M.2 SSD storage. Since this is new, you will need to choose Format M.2 SSD. Select it. You might get another screen talking about read speed. All you need to do is select OK.

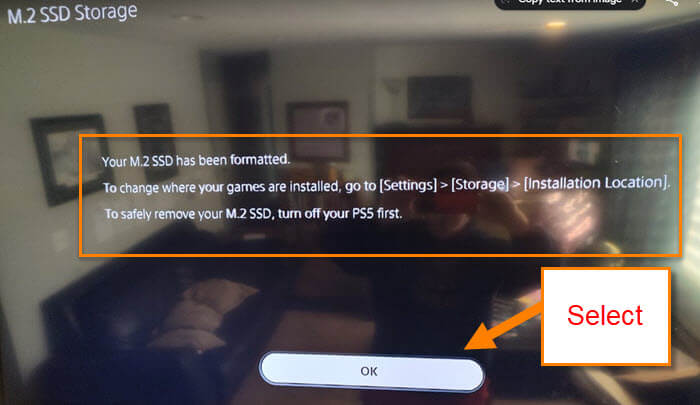
Step 8: After the formatting, you will see the completed screen. Click OK to finish up. You now have additional M.2 SSD storage which gives you more space to save those games.
That is how easy it is to install SSD Storage in your PS5. Make sure to share your new knowledge with all your gaming buddies.
—

