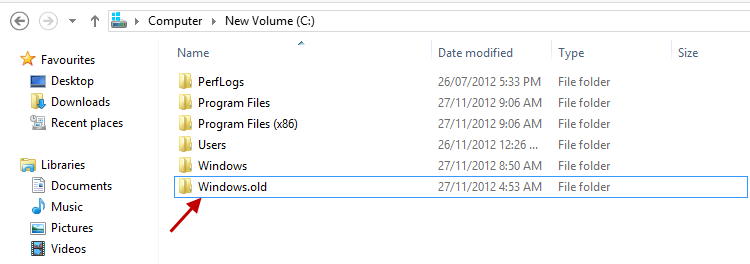
When you upgrade from a previous operating system to Windows 8 you will end up with a very large folder in the root of your main (C) drive called “Windows.old”:
This folder contains program and operating system data carried over from the old installation and is created as a safety net intended to keep users from losing important data.
I had no trouble deleting the Windows.old folder myself but there are reports across the net of many problems when attempting to delete Windows.old via the right click menu, including permission issues. So, for those of you who experience similar difficulties, here is an alternative method which utilizes the built-in Windows Disk Cleanup tool.
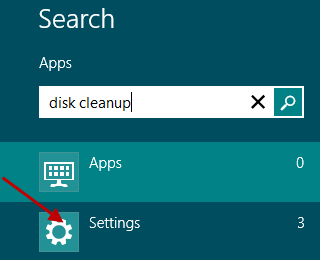
The easiest way to access the tool is simply by typing the words “disk cleanup” while in the Start screen and then clicking on Settings:
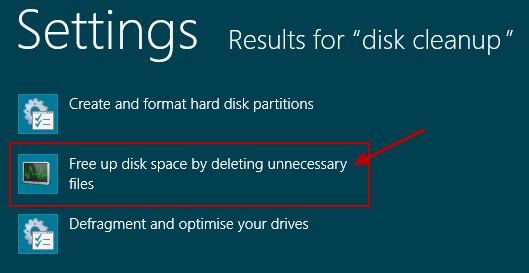
Now from the results listed on the left, select “Free up disk space by deleting unnecessary files’:
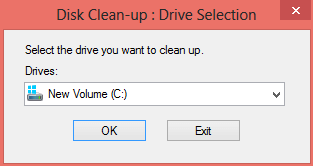
Select the drive where the Windows.old folder is located; will generally always be “C” – click OK
After a short period of ‘Analysing’, Disk Cleanup will open, providing access to a number of file types you can delete to regain some space on the drive. However, you won’t find previous Windows installation files here. For that, you’ll need to click on the Clean Up System Files button in the lower-left area of the window:
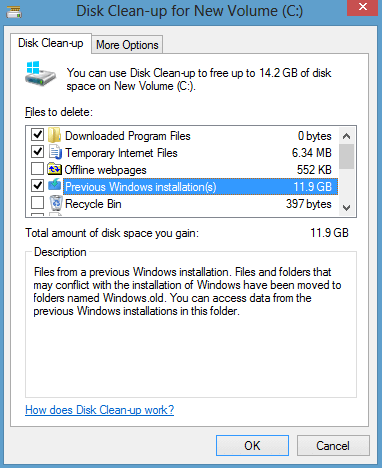
The Disk Cleanup tool will now restart and provide you with further options. What you are looking for is “Previous Windows Installations”. Place a checkmark in the box next to that option and then click OK.
That’s all there is to it. Of course, you’ll receive the usual final message…”Are you sure you want to do that?”… just answer in the affirmative.
**Make sure you’ve already grabbed any files you want to keep prior to deleting the Windows.old folder. There is no easy way to bring them back once they’ve been deleted via this process.

Can’t you already do this in Windows 7.
It’s a good idea to run a defrag after the disk clean-up as well, to optimize the drive with the new space available.
Good article. I’ve run across some posts suggesting that in Win8 and 8.1 WINDOWS.OLD is being deleted by windows without notification to users and before 30 days are up.
http://answers.microsoft.com/en-us/windows/forum/windows_8-files/windows-8-has-deleted-my-windowsoldprogramfiles/dbdf75c0-09d9-4992-b8eb-d9fac3efe9b8?page=2