If you were here for last week’s lesson, we covered how to stop Google Gemini from reading our screens. If you missed that one, you can find it here:
How To Stop Gemini From Reading Screen
This week, I want to stick with the Google subject. Today, I wanted to cover something a little more fun. ‘What could this be?’, you might be asking. I’m going to show you how you can customize the Search Widget on your phone. It is always nice to be able to customize when they (companies) let you. Then you can show a little of your personality. Before we start the lesson, make sure to check out these other articles I have written for you:
- How To Adjust Facebook Display Settings
- How To Create Collage In Google Photos
- How To Create Cinematic Photos On Google
- How To Create Highlight On Google Photos
- How To Remix Photos In Google Photos
Now that we are more knowledgeable, it is time to start class. Pull out those mobile devices and begin the lesson.
How To Customize Google Search Widget
I will be showing you how to do this using my Motorola Edge Android phone. It was also tested on my wife’s Samsung Galaxy S22 Android phone and worked the same way.
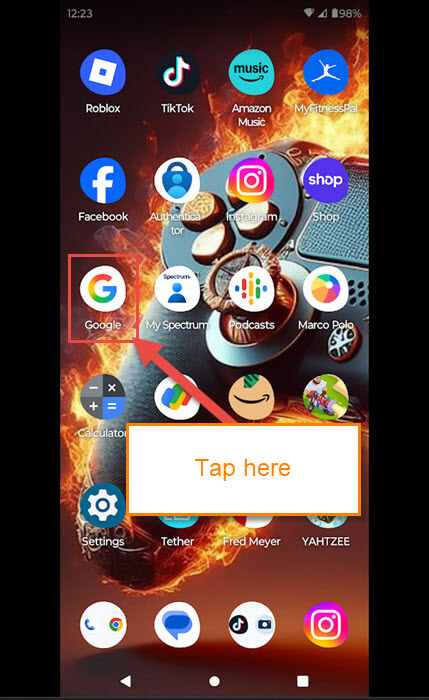
Step 1: Find the Google app on your device (the G, not the Chrome browser). Tap it.
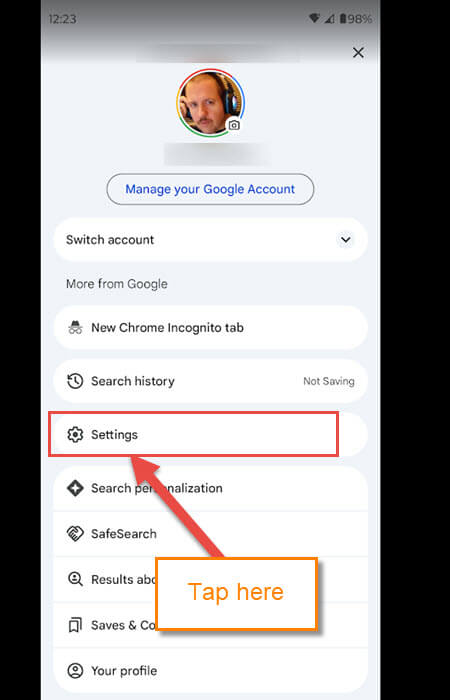
Step 2: Once it is opened, look to the top right. You will see your profile image. Tap it.

Step 3: Here, you will need to find Settings. Tap that.
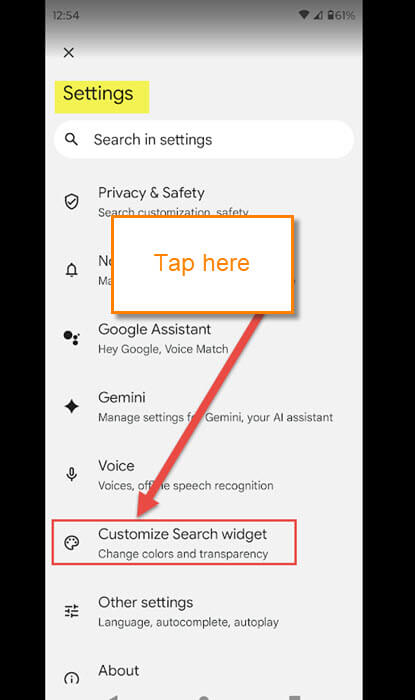
Step 4: On the Settings menu, look for Customize Search widget. Tap it.
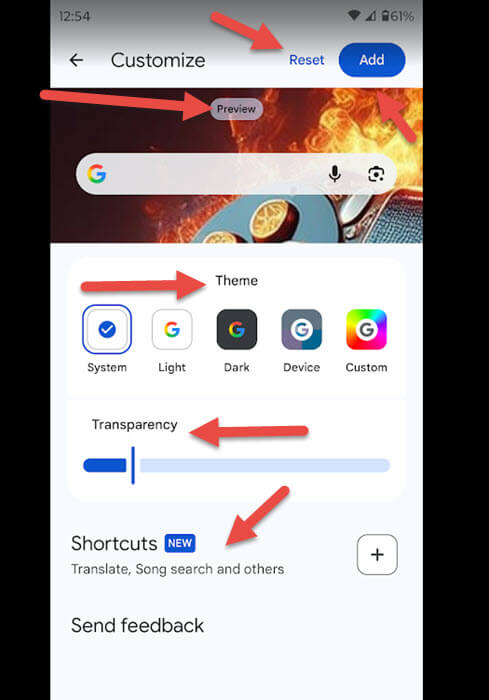
Step 5: We are now on the screen that has all the customizing options. Here are the options they offer:
- Reset/Add at the top right
- Preview Window (this will show you what it looks like before adding it)
- Theme (you are given the standard Light, Dark, and default theme. There is even the Custom one at the end)
- Transparency (here you can make your widget more transparent or not)
- Shortcuts (you can add a shortcut to the search widget)
The third option is what I would like to show you now. You know light and dark themes, but I want you to use the Custom option at the end. Tap it.
Step 6: After tapping that, you are taken to this screen. Here you are given some more options:
- Hue
- Saturation
- Transparency
- Shortcuts
All you have to do is drag the line left or right to adjust each one. If you do not like it, you have the Reset link at the top of the page. Before we are finished, let us try the Shortcuts. Tap it.

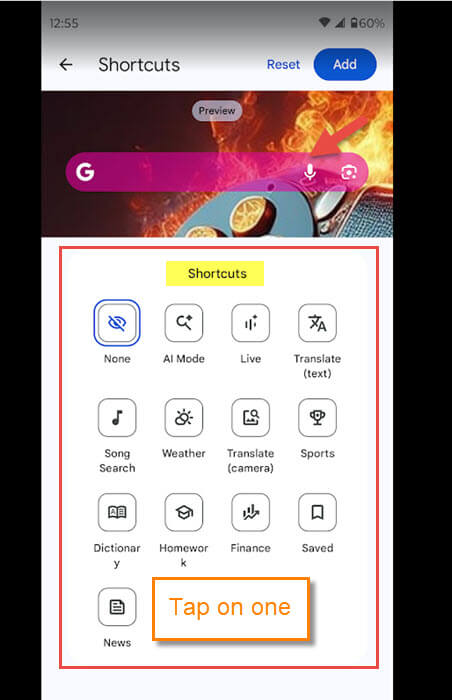
Step 7: Here are all the Shortcuts you can add to the Search Widget. You can only pick one, so choose wisely. After that, if you are happy with it, tap the Add button at the top right.
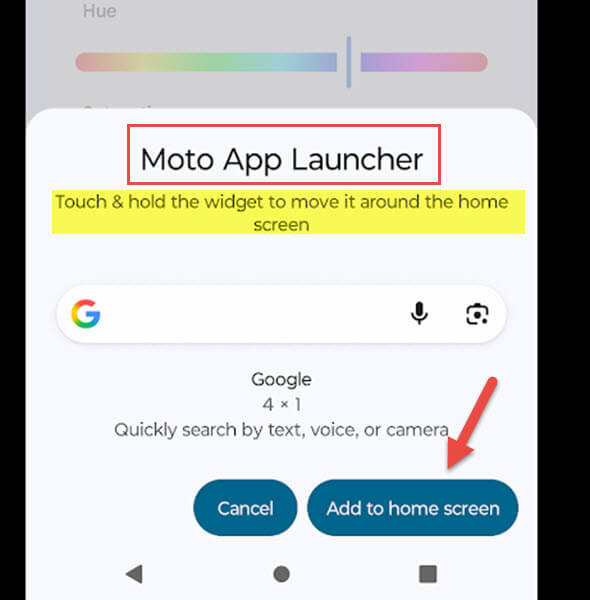
Step 8: On my Motorola, this notification pops up from the bottom.
Touch & hold the widget to move it around on the home screen
You might get something a little different, but you want to tap the Add to home screen button.
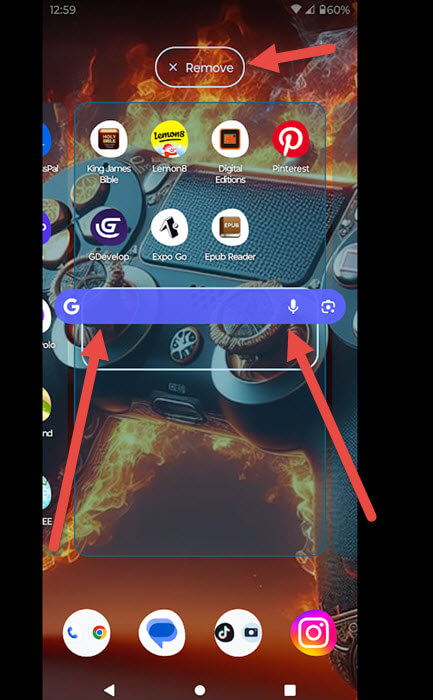
Step 9: You will be taken to the Home Screen to place your Search Widget. You can drag it to the place you want and resize it too. Drop it, and you are all good to go. You can tap the remove option at the top if you change your mind. DONE!
You have now learned how to customize and place your Google Search Widget. Time to share your new knowledge.
—