
How To Create An Outlook Template
Outlook gives users the ability to create templates that can be used repeatedly, they:
- Ensure consistency allowing you to maintain a professional repeating format
- Increase efficiency by not repeating previously created content
- Prevents starting from scratch each time
- Customize a template and strengthen your brand
- Reduce errors of omission
- Use voting buttons to get fast responses from group mailings
Templates are great for business and personal use, social meetings, football or sports pools, or neighborhood newsletters.
Creating Templates
Templates in Outlook are fast and easy to create. The instructions are slightly different when using the Classic or Simplified ribbon, but both will get the job done. This article will focus on standard Outlook with the classic ribbon but show the simplified version for clarity when needed.
To create the template simply click on “New Mail” from the Home screen and compose your email as you normally would. Include any special formatting you wish like fonts, color layout, etc. They can always be changed in the future.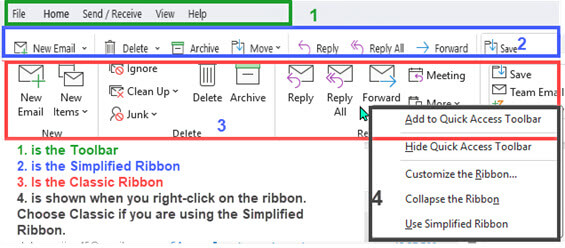
When finished with the email, choose File > Save As. In the “file type” ensure Outlook Template (*.oft) is selected.
Note: If you do make changes to the template, YOU MUST use “Save As” again, to save the changes, Using “Save” will not update a template.
Opening A Template
To use a template, do the following:
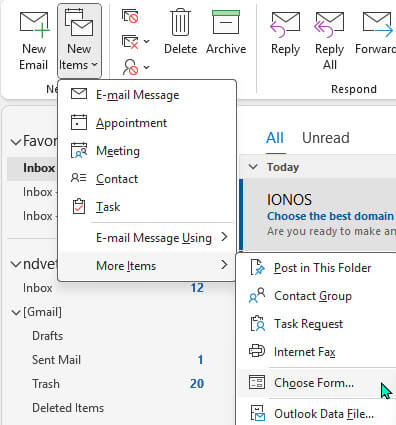
- On the home tab, click on the down arrow next to New Items in Classic View or New Email in Simplified View.

- Select More Items > Choose Form. This will open a window showing several locations where your template could be located.
- Click on the down arrow next to “look in” and choose “User Templates in File System” This is the default save location.

- All previously created Templates will be present. Select the Template name you wish to use.
- Outlook New does not yet have a template feature.

Email Groups
Once you have created a template you may “Save As” and “Open” it as many times as you wish. Normally, templates are created to allow you to send out one document to several people. If you want to create an Email Group, follow the step-by-step process below:
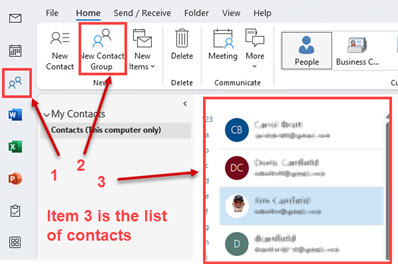
- Click on the People Icon on the left of Outlook.
- Choose a New Contact Group.
- A list of contacts will appear.

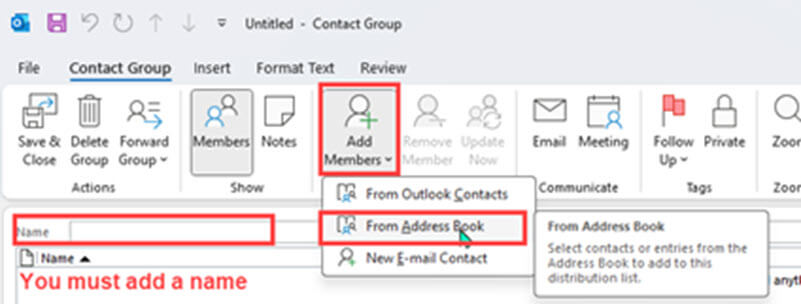
- In the new window that opens select “Add Members”.

- In the drop-down menu choose where the members are located. Use Address Book.
- Note: If you do not already have existing contacts you may import or create them.
- Open the Address Book and double-click on a name to add it to the group. Continue to add names until all are included.
- Give the Group a Name.
- Click on Save and Close.
- The next time you create an email to send to the group, enter the name you used for the group. i.e. “Team A”.
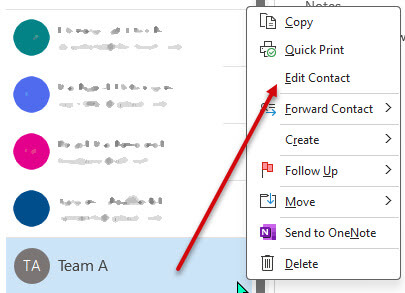
Adding New Members To An Existing Group
- In the home tab click on the People icon in the left column.
- Scroll down and locate the group’s name you wish to edit.
- Click on “Edit Contact” In the window that opens select “Add Members” use the address book and double click on the names of the member(s) you wish to add.

- Save and Close. Your group will now include the additional members.
- To delete a member from the group.
- Choose the member and select the Remove Member icon or hit the Delete Key on the keyboard.
Voting Buttons
When templates are used for large groups the person sending out the template might want a quick Yes or No answer and having the ability to Insert Voting Buttons allows you to do that.
- Open your previously created template. Select “Options” from the Classic menu or “Use Voting Buttons” from the Simplified ribbon.

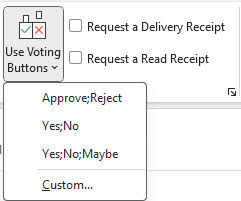
- Click on the arrow near “Use Voting Buttons”.
- Create the Voting options you want. Your choices are:
- Yes, No
- Approve, Reject
- Yes, No, Maybe
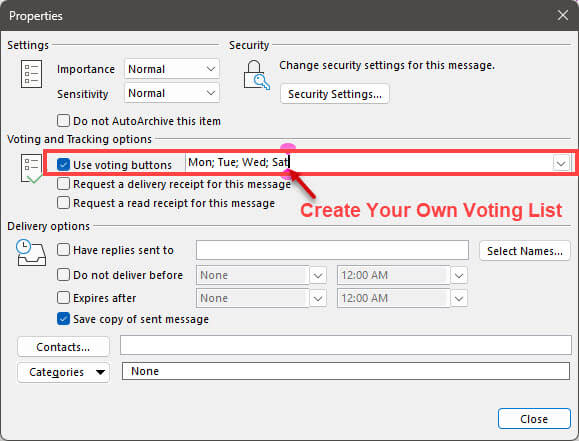
- Custom – Clicking on Custom will open the Properties window where you may create a custom vote by adding any items separated by a semicolon.

- Once sent, the recipient(s) only have to click one option and the reply will automatically be sent to you or a contact you designate.
- If you wish, you can request a delivery or read notification to ensure all members see the notice.
Summary
Email Templates with Groups and Vote Buttons are a great way to have members respond effortlessly and ensure you of dependable formatting for each template.
—