Last week, we covered how to remix in Google Photos. If you missed that one, you can find it here:
How To Remix Photos In Google Photos
I’m thinking that I want to continue on the Google Photos subject this week. Since I have been working on the program for the last two lessons, I found some other features you might not know about. This time, I want to teach you how to create a Highlight video from your images. Yep, you can do even more creative works with Google Photos. Now that I have done the research, it is time to share that knowledge with my readers. Before we jump into our new lesson, make sure to check out my other articles:
- How To Disable Google Photos Suggestions
- How To Create Animation In Google Photos
- How To Manage Screen Time On Roblox
- How To Change Roblox Maturity Settings
- How To Change Display Name On Roblox
Time to start our lesson for today.
How To Create Highlight On Google Photos
This will be shown on my laptop using the Google browser.
Step 1: Find your Chrome browser and open it.
![]()
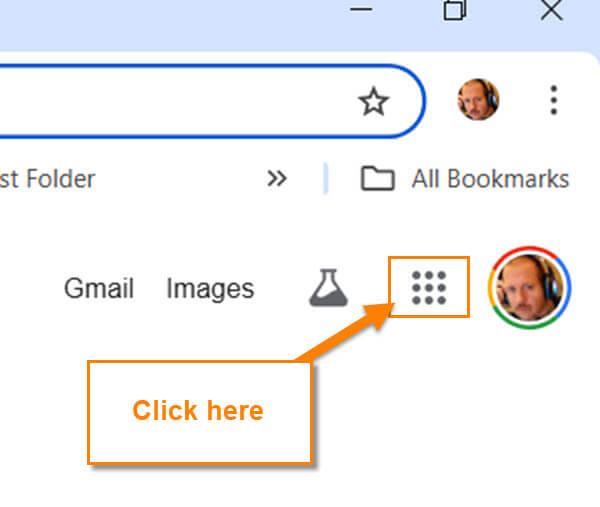
Step 2: Once in your browser, look to the top right. You should see your Profile image and to the left of that the Google Apps link. Click on the square.
Step 3: The app window will appear, and you want to find the Google Photos App. Click it.
![]()
Step 4: Once on the Photos screen, look to the top right for the Plus sign. Click it, and a menu will appear. On the menu, click on Highlight video link.

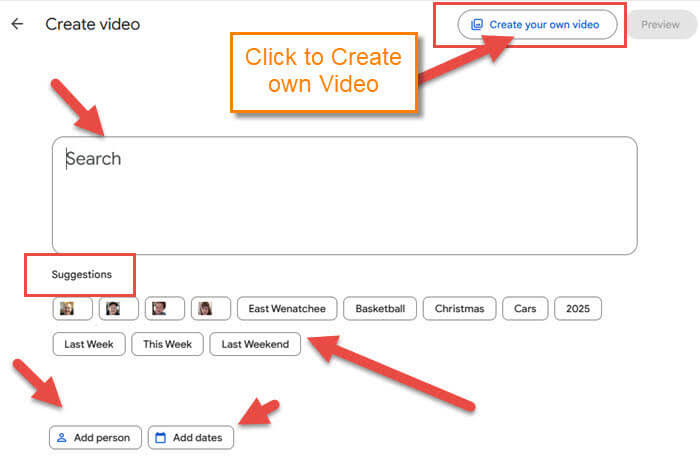
Step 5: The Create Video screen will appear. This is where all the options are to create your highlight video.
Here are some of the options they offer you:
- Search box
- Suggestions (From location to Last week)
- Add person
- Add dates
- Create your own video
For this article, we will create our own video. So click on Create your own video at the top right.
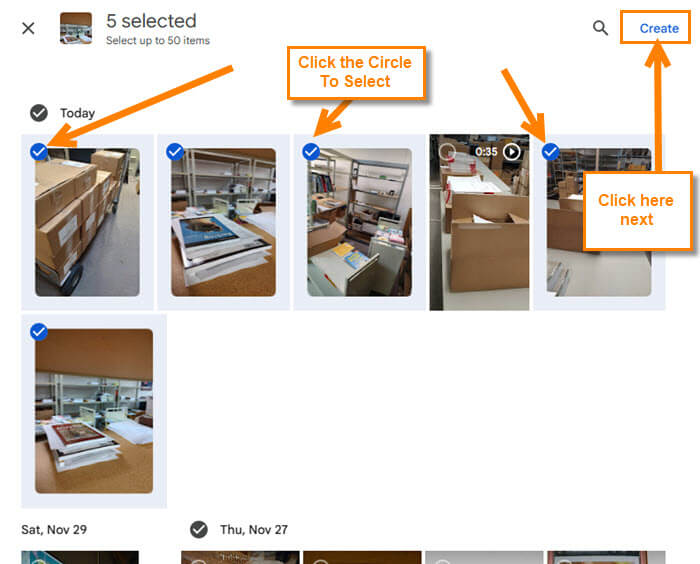
Step 6: You will now be on the screen with all your images and videos you have saved. To select the ones you want to be part of this, click the circle at the top left of each image/video. You can add up to 50 to this highlight. After you have chosen all the images, click the Create link at the top right.
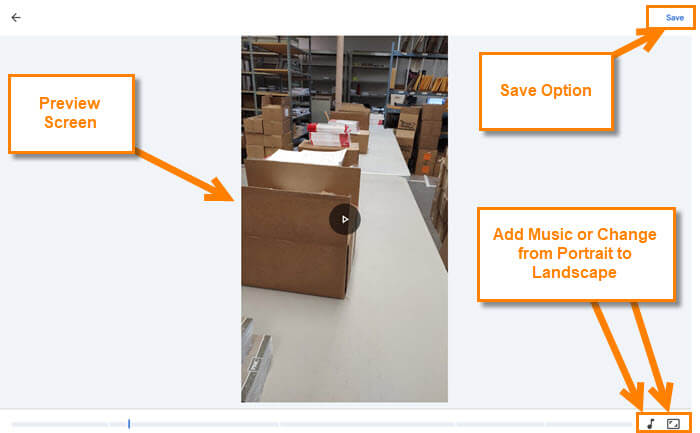
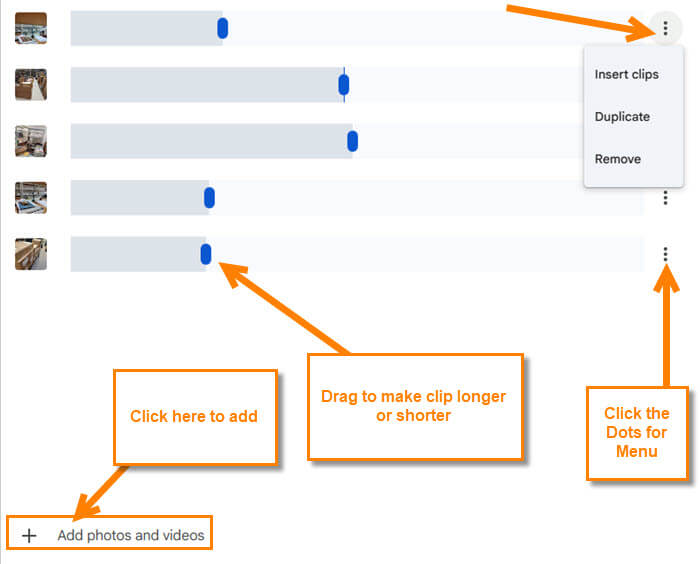
Step 7: This screen will appear, and you have two sections to work with:
First Section: This is at the center left and gives you a preview of your video. The other options they offer here:
- Add music option (that is, the music note at the bottom)
- Change the aspect ratio from Portrait and Landscape (Next to the music note)
- Save
Second section: This is on the right of the screen where you can adjust how long the image or video plays. There are 3 dots to the right of each one. Click that, and you will get this menu:
- Insert Clips
- Duplicate
- Remove
Let’s move back and select the add music option at the bottom (Music Note). Click it.
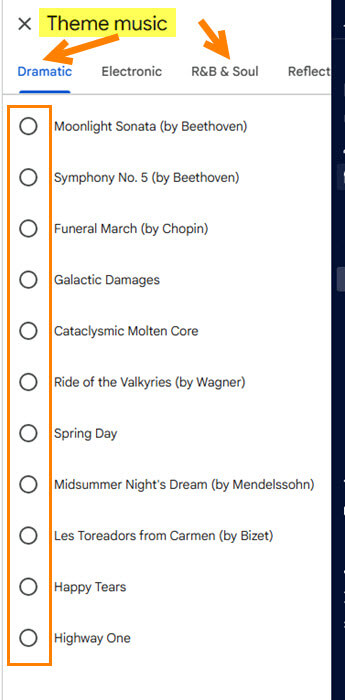
Step 8: This will give you options for Theme Music you can add to your Highlight video. They have a few categories to choose from. Click the circle to select one. Then you can preview your video to see if you like it. If you are happy, click on Save at the top.
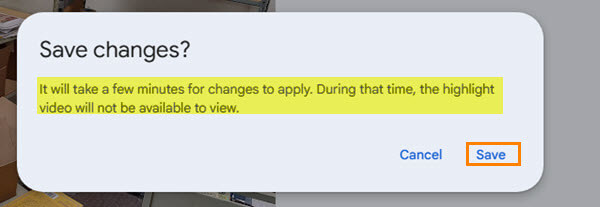
Step 9: You will now get a confirmation screen.
Save Changes? It will take a few minutes for the changes to apply. During that time, the highlight video will not be available to view.
Click Save again. DONE!
You will need to mess around with this to get the hang of it. Time to share your new knowledge with everyone.
—
Jason, This is the most useless Google function I have come across. I have played with this for hours and could never get the images I uploaded to an album (standard 1920×1080 pixels) to load into Highlight Video without clipping. I would rearrange images only to find they had moved back later.
It is a good concept, just poorly executed.