For the past four weeks, I have been teaching you about Google Photos. If you missed last week’s lesson, you can find it here:
How To Create Cinematic Photos On Google
We are going to continue on this subject and teach you another cool feature. ‘What could it be this time?‘ Good question. I’m going to show you how to create a photo collage. That is right, you can take your pictures and create a fun collage from them. Before we jump into the new lesson, make sure to check out these other articles I have written:
- How To Create Highlight On Google Photos
- How To Remix Photos In Google Photos
- How To Disable Google Photos Suggestions
- How To Create Animation In Google Photos
- How To Manage Screen Time On Roblox
Grab your notebook and get ready to start class.
How To Create Collage In Google Photos
This will be shown on my Windows laptop using the Google Chrome browser.
Step 1: Open up your Google Chrome browser.
![]()
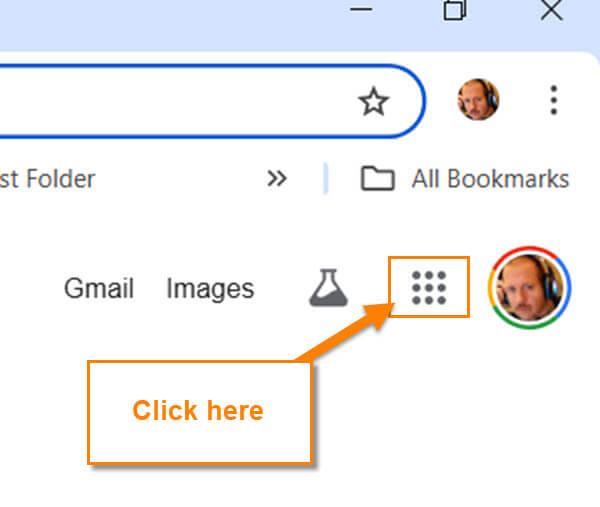
Step 2: Once that is open, look to the top right for the Google Apps link (box with nine dots in it). This will be next to your profile image. Click on it. If you do not see that, open a new tab, and it should now be there.
Step 3: A menu will appear, and you want to find the Photos app. Click it.
![]()
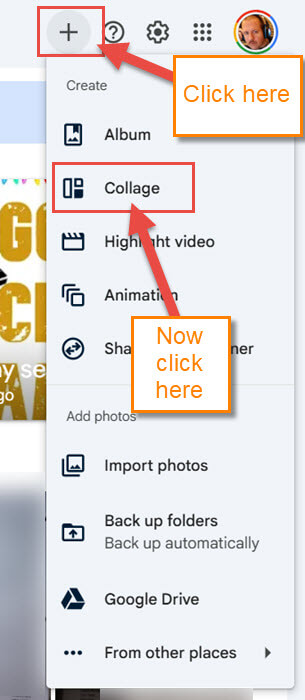
Step 4: You will now be on your Photos screen. Look to the top right for the plus sign. Click it, and a menu will drop down. On this menu, find the option called Collage. Click it.
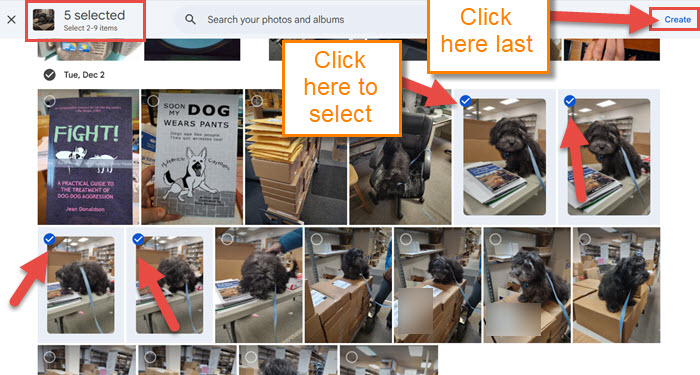
Step 5: We are now on the Collage screen with all your photos. You can choose from 2- 9 photos to create your collage. To select the image, click the circle on the top left of each picture. After you have selected them, click the Create link at the top right.
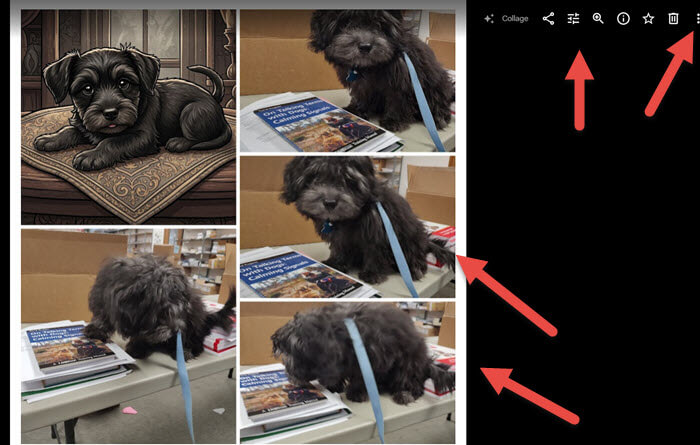
Step 6: The collage will be created, and you will end up on the preview screen. Here you can see the amazing collage of all the images you chose. There are some options you are offered to edit to share this masterpiece:
- Share Icon
- Edit
- Zoom (You can also zoom using the Scroll wheel on the mouse)
- Info
- Favorite
- Move to Trash
- More Options (3 dots)
For this article, click on the Edit option, which is the second choice.
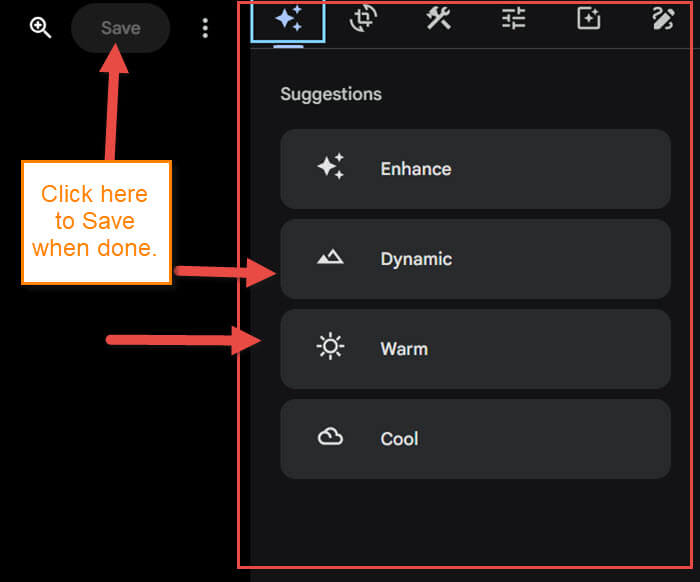
Step 7: The Edit menu will appear to the right of your images. You will need to mess around with this, but the main Edit options they give you are these:
- Suggestions
- Crop
- Tools
- Adjust (colors and more)
- Filters
- Markup
Have fun with this and see if you can make it even better. Once you are done, click on the Save option at the top of the image. The last one I wanted to mention from the previous step is Menu. Click it.
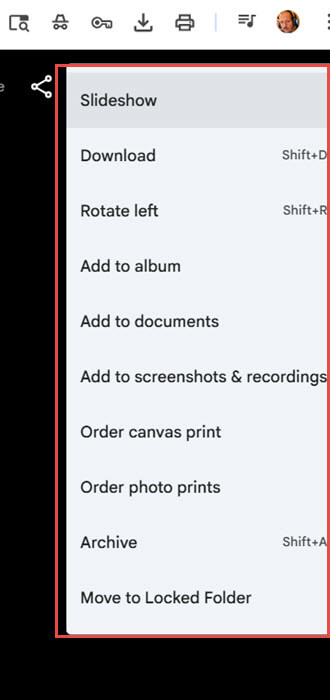
Step 8: On the Menu, you are given everything from Slideshow to Download. Thought I would touch on this menu so you know it is here. DONE.
You have now learned how to create a collage and edit it. Time to share this knowledge with your friends.
—