In our Create a Windows 7 system image article we created a system image, using the built in Backup and Restore function of Windows 7, to create a backup of your computer that will allow you to completely recover your files, pictures, email, and settings should you experience a computer “disaster”. Seems all well and good, but what do you do with this image when disaster strikes? Well, let’s get down to the nitty gritty and see how we can restore your computer to the exact state it was in when the image was created!
Restoring a Windows 7 System Image
There are two scenarios that you might find yourself in: 1) Windows boots, but something is way wrong. 2) Windows won’t boot and something is really way wrong. Both can be restored, but the methods are a tad bit different.
Restoring a system image to a bootable computer
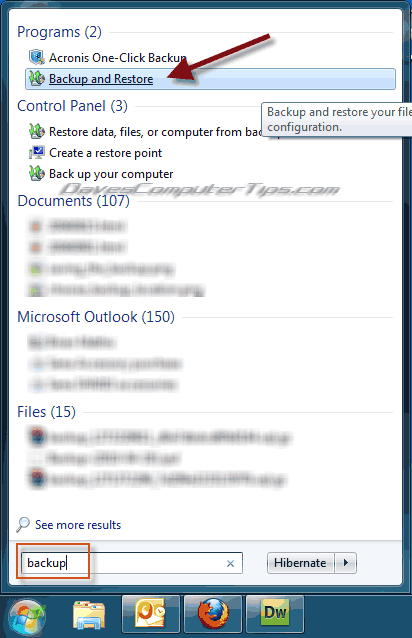
- Click the Windows Orb to open the Start Menu. Type Backup in the search box and press Enter.
- You will find Backup and Restore listed near the top. Click Backup and Restore to open Backup and Restore control panel window.
- Clicking Recover system settings or your computer will change the window to show recovery options, including system restore.
- Since we are restoring a system image we need to use Advanced recovery methods. Click Advanced recovery methods and you will be presented with the advanced options.
- The first option is the one we want so click Use a system image you created earlier to recover your computer to open the Backup window.
- Click Backup now and Windows with automatically start the backup program in a new window.
- Choose a backup location, which can be an internal hard drive, external hard drive, DVD burner, USB drive, or network location. This location can be the same as the system image if there is enough room. Click Next.
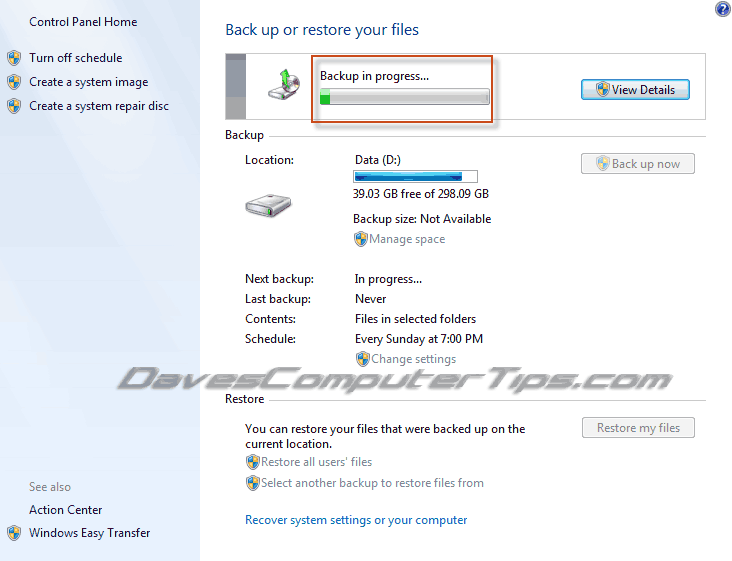
- Click Next and Windows will begin the backup process and change the window to show the progress of the operation.
- When the backup operation is complete close the backup window and return to the original window we were working with. This window will now prompt you to “Restart your computer and continue the recovery”. Click Restart.


Wait, don’t you already have a backup? Isn’t this redundant? Well, Windows wants to backup critical files that may have changed since your system image was created. This is to ensure you don’t lose any important documents or files. It’s a wise decision to perform this backup!

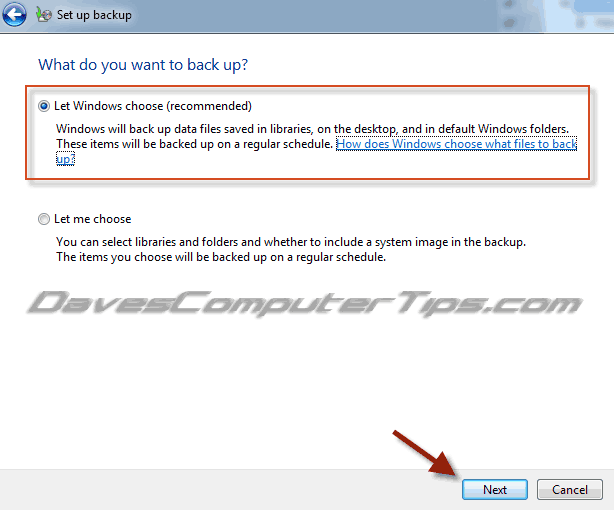
The window will change to allow you to choose what to backup. I suggest leaving the setting as the default “Let Windows Choose”.

At this point your computer will begin rebooting. If your system image is stored on an external hard drive make sure it is connected to the computer at this point. It will not start normally, but will appear as a black screen with white lettering as it loads a special recovery program instead of the normal Windows.
This is also the point where restoring a bootable and not bootable computer become the same, so you’re probably wondering why you didn’t just follow the instructions below in the first place! Well, by completing the above you have created a fresh backup of just your important files and documents, so there is less chance anything will be lost.
Continue to Step #2 below to complete the recovery.
Restoring a system image to a computer that won’t boot
- Insert the recovery CD/DVD you made earlier into your CD/DVD drive and turn the computer power on. If you need a refresher or haven’t created one you can find instructions in the Create a Windows 7 System Image article.
- A dialog will open asking you to choose keyboard input method. If the default is not your correct language change it and click Next.
- Your hard drive will be scanned and any Windows installations currently on the drive will show in this box (useful if the top option were chosen). We want to click the bottom button to restore a system image and click Next.
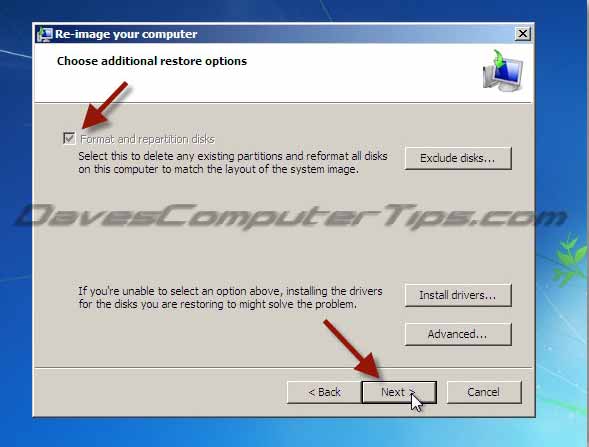
- Click Next and you will be presented with additional options. If you have multiple drives you can use the Exclude disks option to choose which drives you want to restore.
- The default options are correct. Click Next to view the summary page containing the date the system image was created, the computer it was created on, and the drive(s) to be restored.
- If everything appears correct click Finish. You will receive the following warning. It is important to note that preceding will erase everything on the drive(s) selected and replace that data with the data from the system image, effectively restoring your computer to its’ exact state at the time the image was created.
- If you are sure you want to proceed click Yes.
- After recovery has completed you will also be asked to restore your user files. If you created the backup earlier choose Restore my files. If you did not, choose Cancel.
- Once complete remove the restore CD/DVD from the drive and reboot!
As the computer boots you will see a black screen and the words Windows is loading files along with a progress meter.



Your computer and any connected drives will be scanned for system image files. Once the scan is complete you will see a window with the newest system image selected.



A progress window will show how much of the process is complete.

Be patient. This will take a while.
If you haven’t already, you should read the article explaining how to create a system image in Windows 7. You may also be interested in the article explaining how to mount your image as a virtual hard drive allowing you to restore one or many files without returning the computer to an earlier state.

You didn’t show how to recover your computer using a system image that was stored on dvd’s,you showed how to restore only from an
image stored on external hard drive. I need to know how to recover from a system image that was saved on dvd’s
David It’s nice to have the info for restoring image with plenty of images. It is clear and easy to follow. Unfornately, in step 3, I could not locate the the system image with the check box of “Select a system image” checked . That is I could not locate my 2TB portable hard drive where the system image was stored. Would you kindly tell me how to locate it? Thank you.
Have a good day.