
Disk Clone Versus System Clone
You will notice that most of the popular free imaging programs available — including Aomei Backupper Standard, Easeus Todo Free, and Macrium Reflect Free — only include a Disk Clone option, no System Clone option. Disk Clone will clone the entire contents of one hard drive to another, including any non-system partitions (such as a data partition, for example). Whereas a System Clone will clone only the system partition and system-related partitions. Read more on Disk Clone versus System Clone
The primary consideration here is the capacity of the new drive. In many cases, due to affordability, the user will opt for a comparatively smaller capacity new SSD and then, to save space on the new system drive, utilize the older, larger capacity HDD as a data drive (on which to save all personal data).
Remember, you cannot clone the entire contents of one drive to another if the total data on the old drive is greater than the capacity of the new drive… makes sense. In fact, you should not use Disk Clone if the total data on the old drive is anywhere near the capacity of the new drive.
In instances such as these, you will need to clone the system only.
What you will need – Desktop
- A USB external hard drive
- Imaging software – I recommend Aomei Backupper Standard (free)
- A spare (empty) hard drive bay plus spare SATA connection on the motherboard, or…
- SATA to USB adapter
What you will need – Laptop
- An external USB hard drive
- Imaging software – I recommend Aomei Backupper Standard (free)
- SATA to USB adapter
- Possibly a USB hub – depending on the number of USB slots available
Clone System Without A System Cloning Option
For desktop with spare hard drive bay and spare motherboard SATA connection
- With the tower completely powered down, install the new drive and connect same to the motherboard
- Once the new drive is in place, boot up the machine and you’ll likely need to “initialise” the new drive
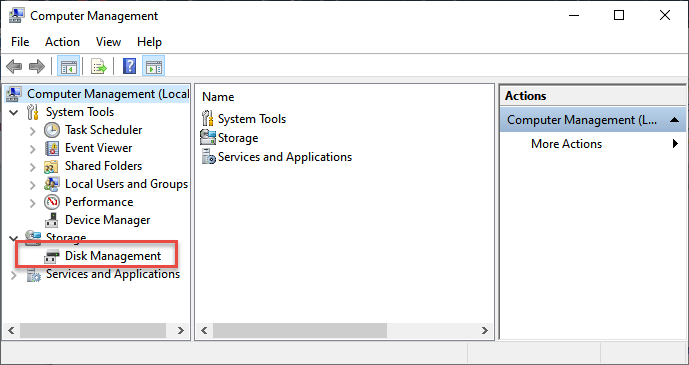
- Right-click “This PC” and select Manage
- When the “Computer Management” console opens, click Disk Management:
- You should then see a popup prompting you to initialise the disk:
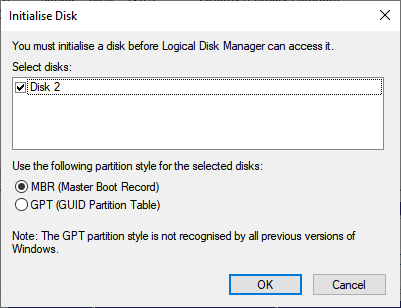
- MBR partition style is for older machines. GPT is for newer machines with UEFI. If in doubt, select the MBR partitioning style
- Click OK
- Connect the external USB hard drive and run your imaging software
- Create a full system image of the existing (old) hard drive and save it to the external hard drive
- Restore that image to the new drive. Select the image previously saved on the external USB drive as the source, and select the new drive as the destination
- For a new SSD, your imaging software should include an option to “Optimise for SSD”, or something very similar. Make sure to locate and enable that option. In Aomei Backupper Standard, that option appears toward the bottom of the screen and is called “SSD Alignment”:

- Once the restore has completed, shut down the system and power the machine off. Remove both drives and connect the new drive where the old hard drive used to be
Power the machine up and, if everything goes according to plan, your operating system should now boot from the new drive.
For Laptop or Desktop using SATA to USB Adapter
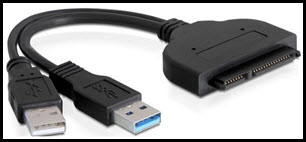
If your desktop does not have a spare drive bay and/or spare motherboard SATA connection, or if working with a laptop, you’ll need to use the alternative SATA to USB adapter which will do the same job but connects externally via USB port.
Connect the new drive via the SATA to USB adapter to any USB port. Again, you’ll likely need to initialise the new drive, as per steps 3- 6 above.
The rest of the steps are exactly the same, including, finally, removing the old drive and replacing it with the new one.
NOTES
- Obviously, for best results, your old hard drive should be in good condition running a healthy system
- There are occasions when an initial boot from a restored image might not load properly. In that case, simply restart the system and all should be tickety-boo
- I would recommend using a safe, free disk cleaning tool, such as CCleaner, prior to starting the process. Plus, possibly, running a malware scanner. And running the command sfc/ scannow in an elevated command prompt will check for possible file corruptions
If you follow all these steps precisely, it’s highly unlikely your new drive will not boot. However, if for some reason that’s the case, you can simply put your old hard drive back, and, if you’re the determined type, start over again.
Of course, if your new drive has a large enough capacity to comfortably fit all data from your old drive, the process is quite a bit simpler. No need to create or restore an image, so no external hard drive required. Simply connect the new drive (either internally or via SATA to USB adapter), initialise the new drive, run your imaging software, select Disk Clone, and follow the prompts (don’t forget to optimise for SSD).
Any questions? Please ask via the comments and I’ll do my very best to provide an answer.
—
After moving W10 to a larger 1tb SSD I had a larger home for my Linux Mint OS. For that clone I booted the PC with Clonezilla, for the clone and then booted the PC with Gparted to move and resize the Linux partitions. W10 and Linux will run on an HDD but put either one on an SSD and most PC’s will respond. Welcome back Mr. Jim.
Hey Daniel,
Cheers mate.
Is it possible to upgrade a laptop (disk image and Win 10 restore) without using an SSD caddy?
I want to upgrade from 128GB (SATA) SSD to 1TB (PCI-E NVME) SSD.
Vendor (Dell) confirms NVME is supported on laptop.
Current plan is
1. create Win 10 boot USB (128GB) using a free tool or if necessary Dell utility
2. create image backup (free tool) if possible on same USB, but if not on HDD
3. remove old SSD and install new SSD, reboot from USB and format SDD (if necessary)
4. restore data to new SSD.
Any thoughts?
Some of the free tools you recommend say they do disk image backups, which should mean step 1 backs up OS and data, just not sure it’ll create a boot USB.
And whether a restore from USB to SDD would be seamless.
thanks in advance
Keenan