If you have children like I do, then you have probably bought them some sort of mobile device, mainly to keep them from taking yours all the time. Each of my three boys have their very own Kindle Fire. Since my boys are like me, they wanted to change the name of their Kindle from the default to something that reflects their personality. I did teach them my number one rule, “If you can customize it, then do it.”
I have decided to share that knowledge with all of you. As always, grab a notepad and get ready to learn. I will be showing you how to do this with the Kindle Fire and through your Amazon account.
How to Change Kindle Fire Device Name
First I will show you on the device itself…
Kindle Fire 7
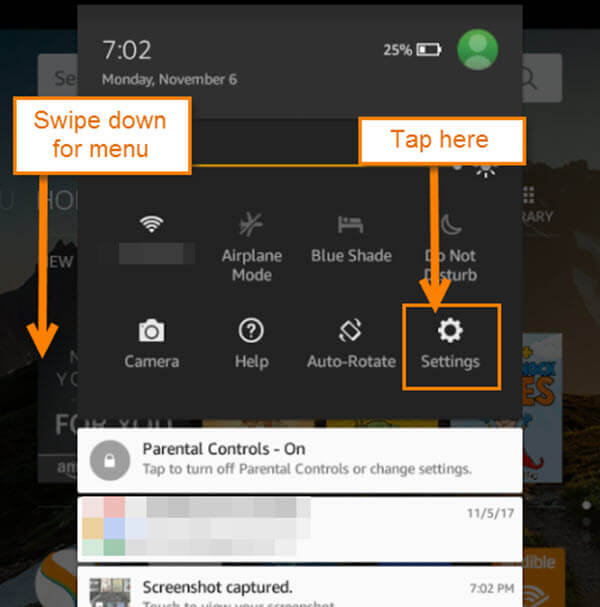
Step 1: Swipe down with your finger from the top of the device. This will bring up a menu where you will want to tap on the gear icon (Settings).
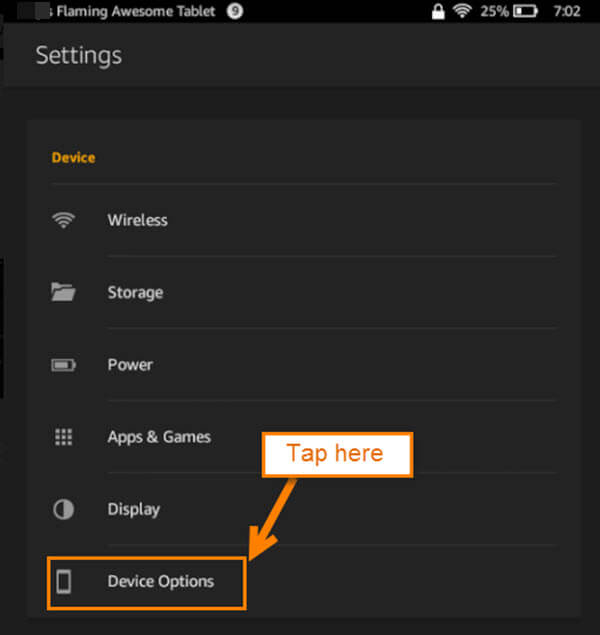
Step 2: On the Settings screen you will need to tap on the Device Options link.
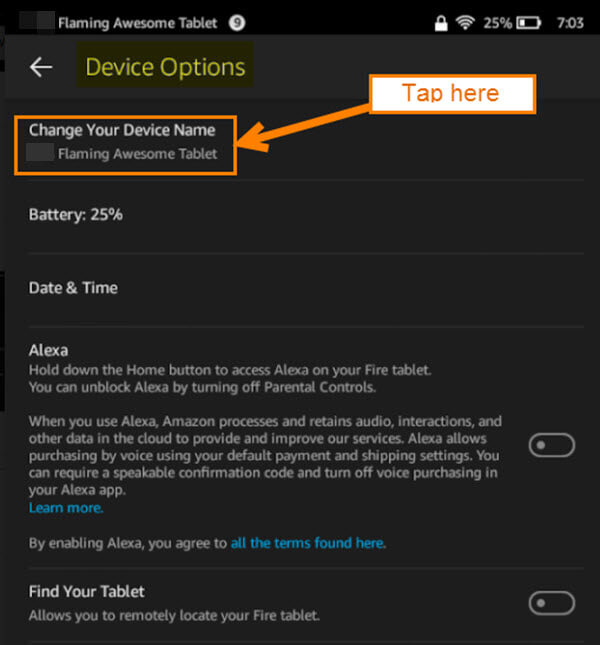
Step 3: You will be taken to the Device Option screen. From here, tap on the top option– Change Your Device Name.
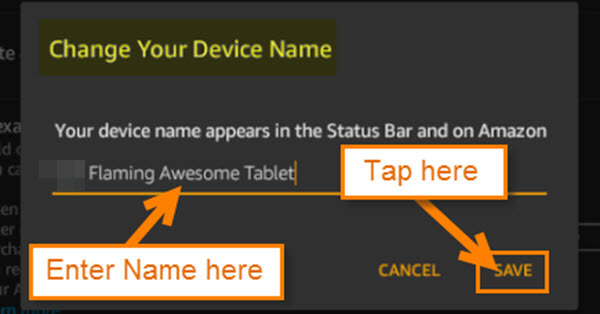
Step 4: Here you will be able to rename your device. Once you change the name, tap “Save.”
That’s the way you or the kids will be able to change the name on the device. Now, if you want to mess with your children, I’m going to show you how to change it from your Amazon Account.
Amazon Account (Showing you this on my PC)
Step 1: Log in to your Amazon account then hover your mouse over Hello (Name Here). This will bring up a drop-down menu. You can click one of these options: Your Android Apps & Devices, Your Account or click on the your Hello (Name).
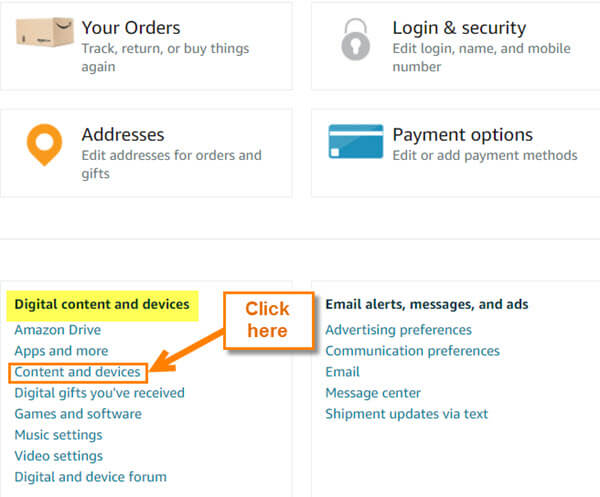
Step 2: If you choose to click on Your Account or Hello (Name), then you will end up on your account Home page. From here you want to look in the Digital Content and Devices box and click on Content and Devices.
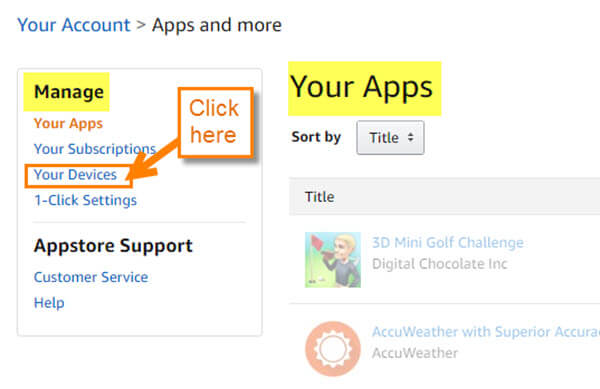
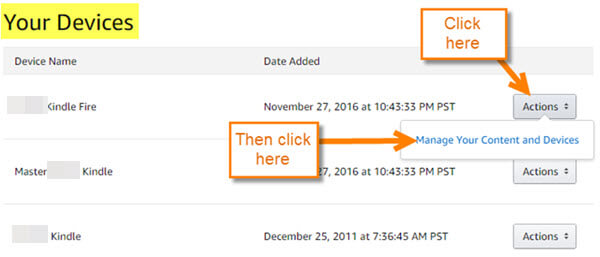
Step 2.1: If you decided to click on Your Android Apps & Devices, then you will end up on the Your Apps page and from here look to the left and click on the link labeled Your Devices under Manage. On the next page you will see all the Kindle devices you have registered. Click on the Actions button to the right of the device. It does not matter which one you choose, it will bring up a link called Manage Your Content and Devices. Click it.
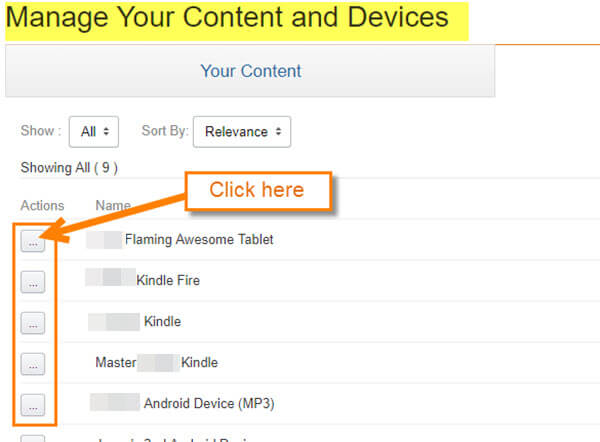
Step 3: Now you will end up on the Manage Your Content Devices screen which is where both options we covered above would have taken you. Here you will want to click on the middle tab called Your Devices.
Step 4: Here you will see the devices that you have registered with Amazon. To the left of the device you would like to change the name of you will see a square with three dots. Click on the square.
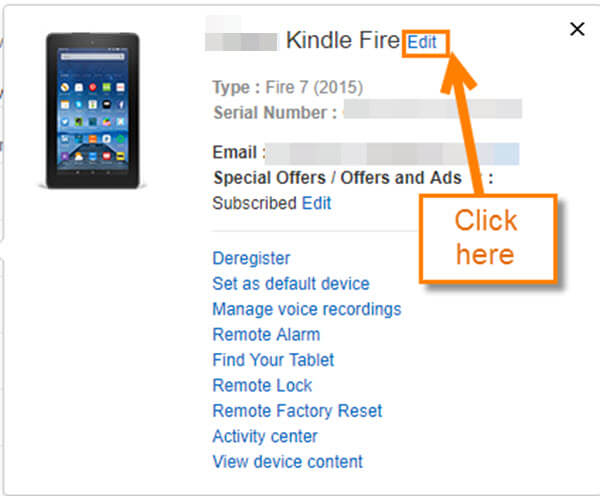
Step 5: A window will pop up and from here you need to click on the Edit option next to the device name. Click Edit
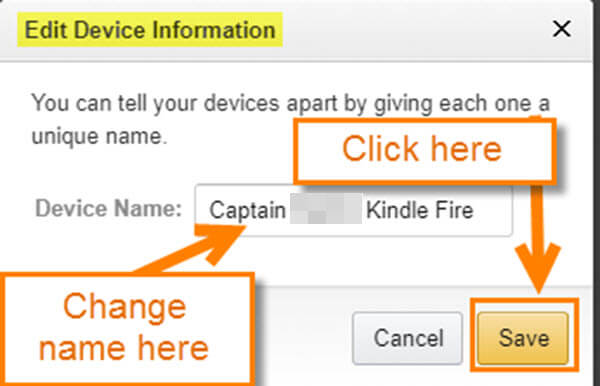
Step 6: The Edit Device Information window will pop up. Here you can change the name to whatever you like. I’m changing my son’s to Captain (name here) Kindle Fire. Once finished, click on the Save button.
That is all you have to do to change the device name on your PC or the device itself.
What name did you pick?
—

