Last week I went over how to show the reading pane in Gmail. If you missed that you can find it right here:
How To Show Reading Pane In Gmail
This week I wanted to stay on the topic of Gmail and give you another tip. Today I will talk to you about how you can change the layout of your Gmail inbox. If you know me, I like to find different ways to change things up. You might be wondering how can you change the layout. Glad you asked but before I teach you all about that, make sure to check out these articles I have written about Google:
- How To Change Google Chrome Icon
- How To Add Task To Google Calendar
- How To Manage Google Bookmarks
- How To Set Up Auto-Delete On Google
- How To Insert A Table In Google Docs
- How To Change Google Docs Cell Color
Now it is time to show you how it is done.
How To Change Gmail Layout
I will be using my Windows 10 laptop with the Google Chrome browser.
Step 1: Head on over and log into your Gmail account.
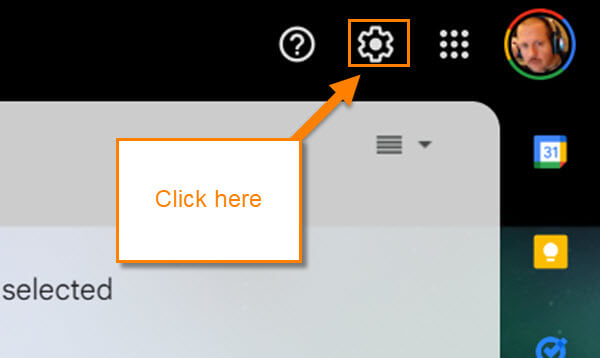
Step 2: Once on your account look to the top right for the gear icon. That would be the Settings link. Click it.
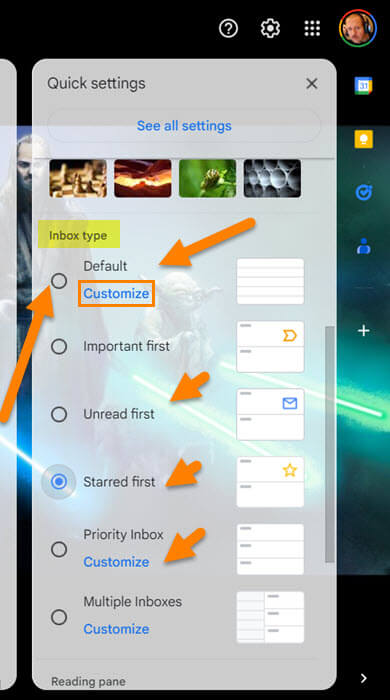
Step 3: The Quick Settings side menu will appear. On this menu, look for the section called Inbox type. Here is where you can change the layout of your Gmail inbox. They give you a few choices to work with:
- Default (This is what most of us have set. Under that name is Customize)
- Important first (This makes all the important email appear at the top)
- Unread first (As it says, if you have not yet read the email, it will show at the top)
- Starred first (If you Starred the email, it will appear at the top. This is like pinning the email)
- Priority Inbox
- Multiple Inboxes (This will break up the inbox into drafts, starred, and Inbox. Might be a little different depending on your account)
To choose one of these options, click the circle to the left of the option you want. Play around with these and see what works best for you. Like I said in the list above, some of these have a customize option. For this article’s example let us click on Customize for the top one, Default.
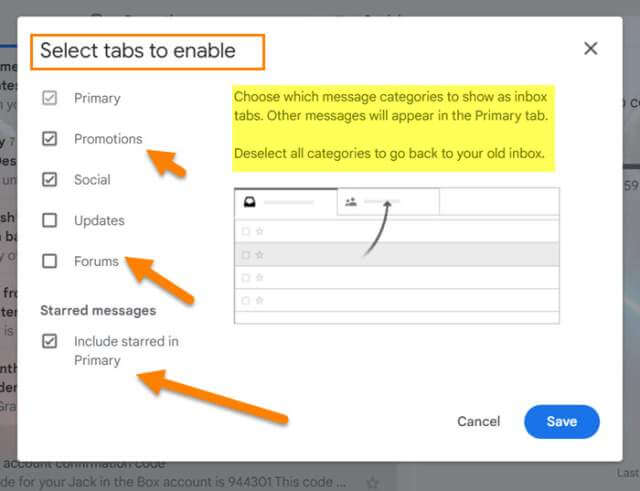
Step 4: Once you click on Customize, you will have this window pop up. This is called, “Select tabs to enable,” where you can select which tabs show at the top of the inbox.
Choose which message categories to show as inbox tabs. Other message will appear in the primary tab. Deselect all categories to go back to your old Inbox.
Click the boxes to the left of the options and after you are done click the Save button. I like this one because it helps organize the mess. DONE!
You will need to mess around with this to get it the way you like it but now you know where to go to change the layout. It is always a good idea to be organized with email. Time to share this with your friends and family.
—


Nice article, Jason. My usual preference is Priority Inbox, customized to Important & Unread, Starred, and Everything Else.
My least preferred option is Default with the Category tabs enabled.
Hi Tony,
Thanks! After writing this I decided the default with Category tabs was not my first choice either. I like to know what is most important at the top 🙂