Last week, we talked about ChatGPT and how you can stop notifications. If you missed that one, you can find it here:
How To Stop ChatGPT Notifications
I would like to stay on this subject and teach you something new. That is right, I’m going to teach you how to you can change the personality of ChatGPT. Yep, there is a way to adjust the way it interacts with you. The other day, I noticed that the AI was really being nice to me, and I thought that was how it was supposed to act. Then I did some digging and found out there are settings for that. Before I start our new lesson, make sure to check out some of these other articles I have written:
- How To Stop ChatGPT Using My Data
- How To Create Shortcut On Android
- How To Customize Google Search Widget
- How To Stop Gemini From Reading Screen
- How To Adjust Facebook Display Settings
Time to start learning a little more about this system.
How To Change ChatGPT Personality
I will show you how to do this on my computer using Google Chrome.
Step 1: Hop on your computer and head over to ChatGPT.com.
![]()
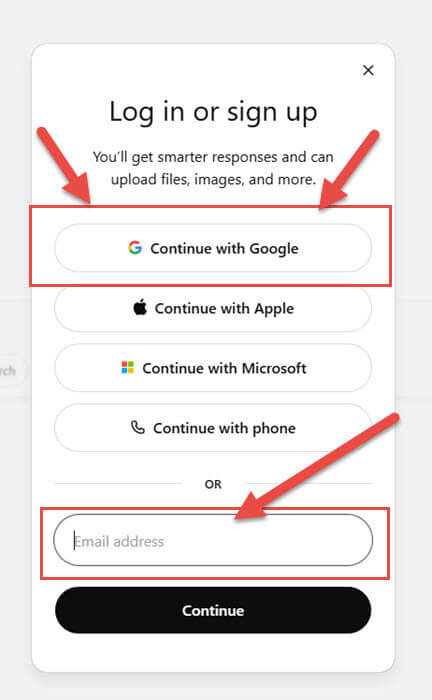
Step 2: Log in to your account by choosing one of the options. I use Gmail, so that is the one I will click on.
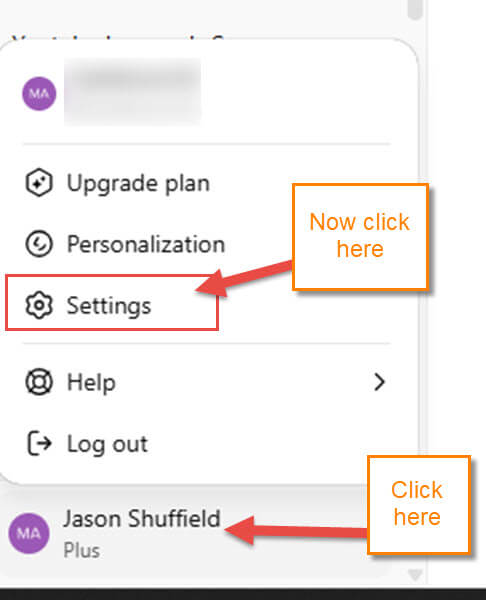
Step 3: Once it is opened, look to the bottom left. Click on your profile name, and a menu will pop up. On that menu, click on Settings.
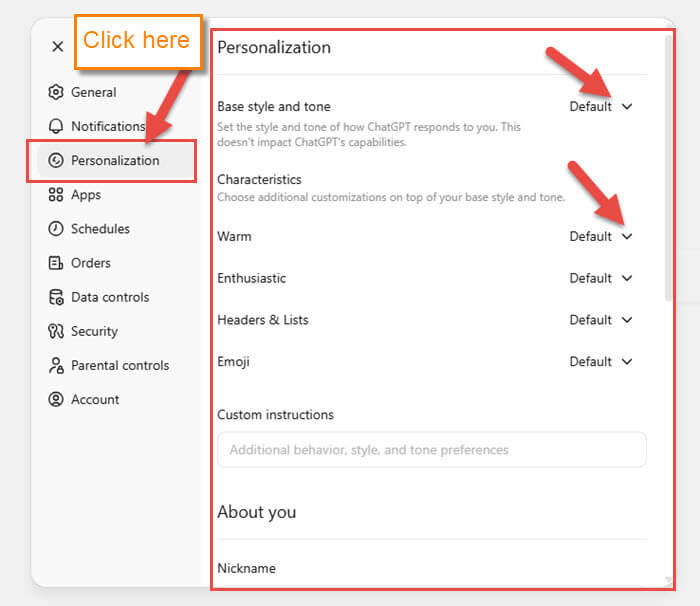
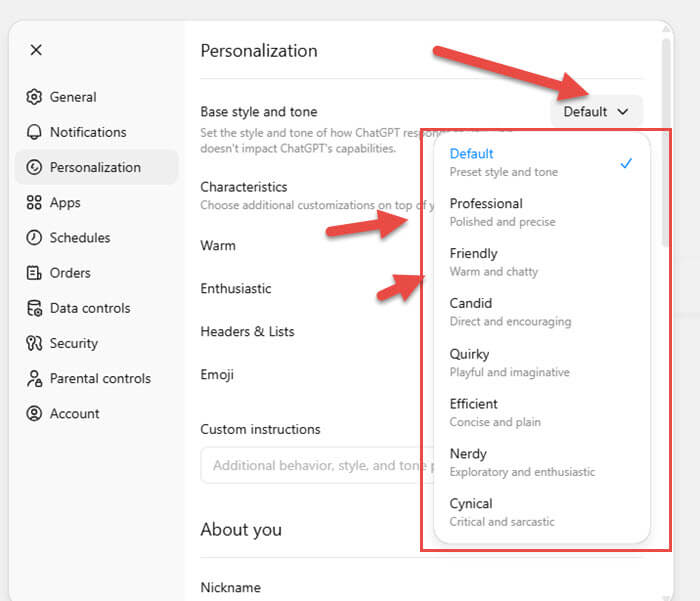
Step 4: Look to the left menu and click on Personalization right under the Notification option. This will bring up all the Settings that will help you change the personality of your ChatGPT AI. At the top, you are given some options to work with:
- Base style and tone (Set the style and tone of how ChatGPT responds to you. This doesn’t impact ChatGPT’s capabilities.)
- Characteristics (Warm, Enthusiastic, Headers & Lists, and Emoji)
- Custom instructions
For this article, I want to show you how the top option works.
Step 5: Click on the down arrow to the right of Base style and tone. This will bring up a menu where you can adjust it:
- Default
- Professional
- Friendly
- Candid
- Quirky
- Efficient
- Nerdy
- Cynical
Select the one you want. Now move down to Characteristics.
Step 6: Here, look to the right of each option and click the down arrow:
- More
- Default
- Less
This adjusts how More or Less the option is done. Time to move on down and look at a few more Settings.

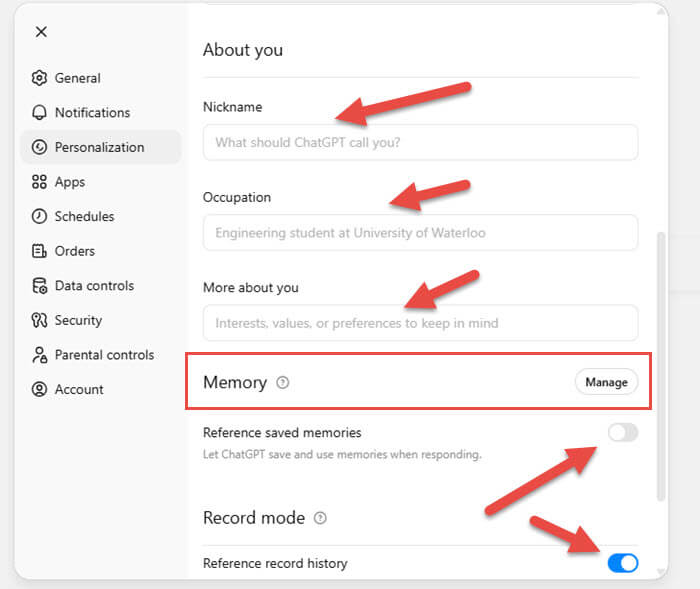
Step 7: A little further down, you can tell the AI a little about you:
- Nickname
- Occupation
- More about you
You do not have to give it any information if you do not want to. I’m going to skip to the Advanced option now.
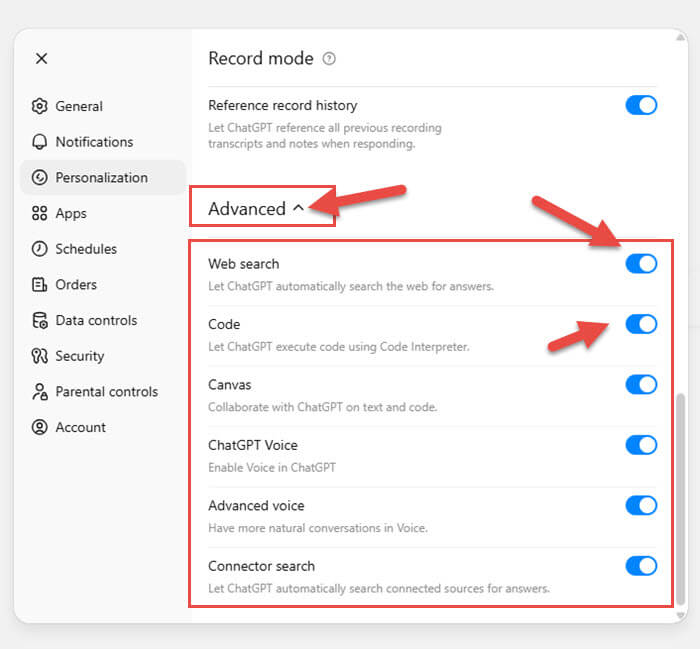
Step 8: Click the arrow next to the Advanced option. Here you can adjust many other parts of this AI:
- Web Search (Let ChatGPT automatically search the web for answers)
- Code
- Canvas
- ChatGPT Voice
- Advanced Voice
- Connector search
Click the switches to enable or disable. You will need to mess around in here to get it the way you want. DONE!
Now you know how to adjust the ChatGPT AI. Time to share your new knowledge with your friends.
—