
I get a lot of questions about SmartArt. Everyone wants to know what it is and how do they use it.
SmartArt is simply one of the graphics features that Microsoft really worked on in version 2007 and they have expanded it even further in version 2010.
The best way to learn is by doing, so follow along in this exercise and amaze yourself! You will find the images I have used below in Documents | Sample Pictures.
- Launch Word 2010.
- Open a new document or go to an empty paragraph in an existing document. You can do most of this in version 2007 too but the shapes that are available to you are more limited and some of the steps may be a bit different.
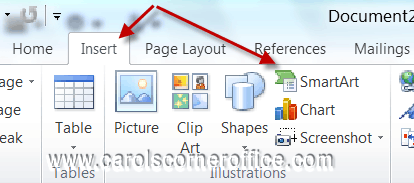
- On your Insert tab, click the SmartArt button.
- On the Choose a SmartArt Graphic window, click Picture on the left and select Accented Picture – the first one in that group.
Note that even though you select one of the SmartArt shapes here, your selection is not set in stone. You can change it to another shape later on.
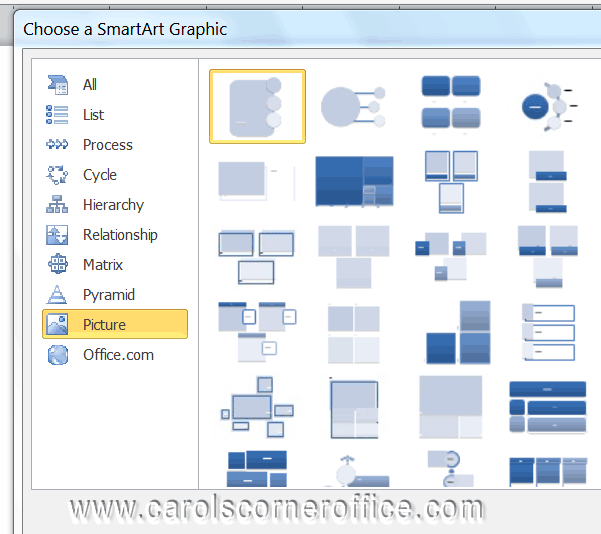
- Click OK.
The SmartArt object is added to your document.
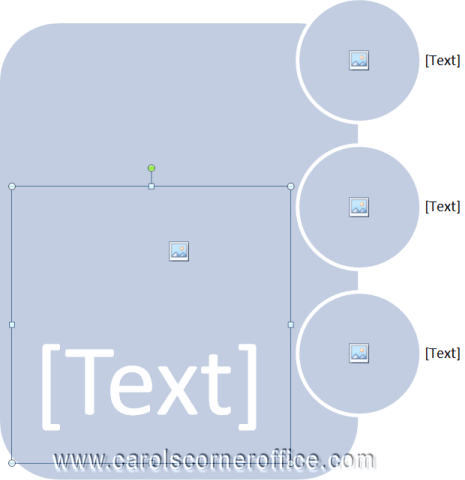
- In our example, we do not want any text for the main image, the tulips, so click away from the large text box into the blue rectangular area. The handles should be around the rectangle.

- Click the image icon in the middle of the large rectangle to open the Insert Picture window.
- Navigate to the image you want, select it and click Insert. Don’t worry about the text. We will take care of that later.
- Now click on one of the circles and click the image icon in the middle of it and select an image. Repeat for the other two images.
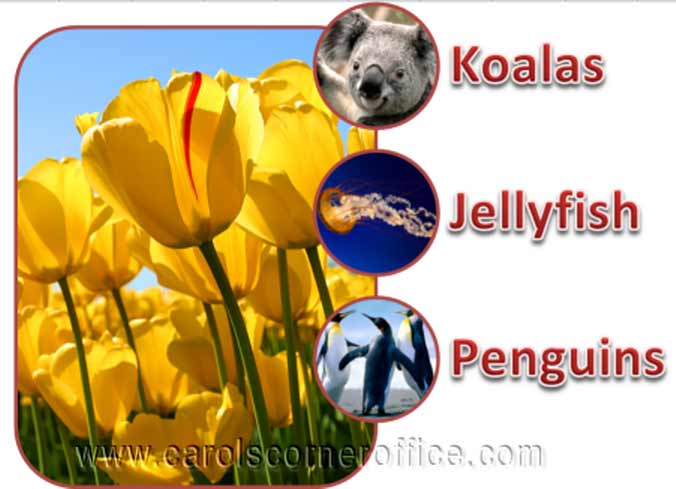
After adding your images, your SmartArt object should look something like the image below.
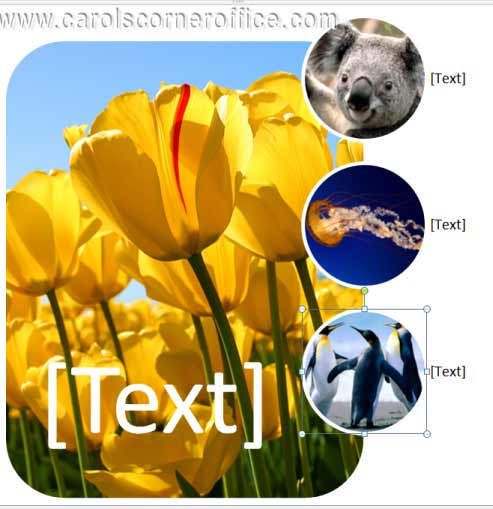
Now you will add your text for the images. There are various ways to do this. You can add one object at a time by clicking [Text] and adding your own words or you can use the Text Pane window to add them all at once. Either click the Text Pane button on the toolbar or click the blue Left/Right arrows on the middle left of the SmartArt object’s canvas.
In my example, I entered the words Koalas, Jellyfish and Penguins. I entered a space instead of text for the large tulip image. Be careful though! If you delete the text box for the large image the image will be deleted as well.
You can now add color and effects:
You may now be satisfied with your results but there is much more you can do with your SmartArt object.
I would like you to experiment with at least the ones below on the Tools Ribbon | Design tab.
- SmartArt Styles group: Hover over the thumbnail options to see how different effects will look.
- Layouts group: Hover over the thumbnail options to change the layout of the objects.
- Right to Left button in the Create Graphic group: Switches the small images in the circles on the right to the left side of the large image. Click again to go back.
- Add Shape button in the Create Graphic group: Adds an extra circle to the default set of three. Keep clicking to add even more! To delete a circle, select its text box and click your Delete key.
On the SmartArt Tools ribbon | Format tab, try these:
- Shape Fill: Changes the background color of the SmartArt object.WordArt Styles group: Allows you to change the style of the font, its outline and inner color, and add text effects.
- WordArt Styles group: Allows you to change the style of the font, its outline and inner color, and add text effects.
To change the font size for all text on the SmartArt object, select the entire object and go to the Home tab and select a font size and family as you normally would for text in the body of your document. To change the font size for just one text object, select just that text object and change the font size and family as you normally would.
Keep in mind that if you use SmartArt objects that are available in versions 2007 and 2010 documents, it is very unlikely that they will be backwards compatible with version 2003. So if anyone is going to open your fancy version 2010 document in version 2003, it is likely all your SmartArt will revert to plain text.
Your final point is very good. A work-a-round for that is to do a screen capture of the smartart and paste it back into the document. At least that way users of “classic” Office will not lose the smartart.
I like to describe SmartArt as an automated way of graphically augmenting related information like lists. SmartArt generates the graphical portion, you simply enter the required text.
Good intro article to smartart. For users who want to go “to the next level” here are some links:
If you don’t see a SmartArt that looks or acts exactly as you want, you have 2 options. One is to download a new SmartArt and the other is to write you own.
Here are some places where you can download smartart:
LOKIZ DIGRAMS – ADDONS TO SMARTART
http://diagrams.loki3.com/index.html
http://office.microsoft.com/en-us/word-help/where-can-i-find-microsoft-office-organization-chart-HA010377203.aspx?CTT=1 – Organization Chart feature is not installed by default
List type SmartArt graphics descriptions – Office 2013
http://office.microsoft.com/en-us/word-help/list-type-smartart-graphics-descriptions-HA102850276.aspx
DECISION TREES
http://www.treeplan.com/treeplan-for-decision-trees.htm
I recently learned of about this site that provides psuedo-smartart powerpoint templates. They have over 4000 variations on templates that look like smart art but are not. But they do have some interesting diagrams that may be useful
Introducing the new Diagrammer (from Slidedocs)
http://www.duarte.com/slidedocs/#learn
Communicate ideas visually with 4,096+ customizable, PowerPoint-ready diagrams.
Professionals have been using diagrams to explain abstract concepts for hundreds of years. Diagrams use proximity, scale and links to clarify hierarchy and relationships between information, making your message easily understood.
TRAVEL AWAY WITH NEW SMARTART GRAPHICS
http://blogs.office.com/b/microsoft-powerpoint/archive/2011/07/18/travel-away-with-new-smartart-graphics.aspx
by Erik Jensen on July 18 2011
This is the fourth in our series of blog posts discussing 10 new SmartArt graphics that are now available, for free.
8 MS WORD TEMPLATES THAT HELP YOU BRAINSTORM & MIND MAP YOUR IDEAS QUICKLY
http://www.makeuseof.com/tag/8-ms-word-templates-brainstorm-mind-map-ideas-quickly/
FISHBONE DIAGRAM TEMPLATE
http://office.microsoft.com/en-us/templates/results.aspx?qu=business&av=zpp#pg:9|ai:TC102809154|
******************
This page introduces writing your own XML code to create custom Smartart
CREATE CUSTOM SMARTART GRAPHICS FOR USE IN THE 2007 OFFICE SYSTEM
http://msdn.microsoft.com/en-us/magazine/cc163470.aspx
********************
Here are some helpful links to smartart related pages that I’ve collected:
2010 SmartArt Diagram Improvements
http://blogs.technet.com/b/office2010/archive/2010/05/06/smartart-diagram-improvements.aspx
Keyboard shortcuts for SmartArt graphics – Office 2013
http://office.microsoft.com/en-us/word-help/keyboard-shortcuts-for-smartart-graphics-HA102749365.aspx
WHICH SMARTART GRAPHIC SHOULD I USE?
http://blogs.office.com/b/microsoft-word/archive/2011/08/10/which-smartart-graphic-should-i-use.aspx
ANIMATE YOUR SMARTART GRAPHIC
http://office.microsoft.com/en-us/powerpoint-help/animate-your-smartart-graphic-HA010354867.aspx
USING SMARTART FOR SIMPLE FLOWCHARTS
http://www.indezine.com/products/powerpoint/learn/flowcharts/using-smartart-simple-flowcharts.html
************
“Advanced” SmartArt
MIND MAP EXAMPLE USING SMARTART
http://school-maths.com/microsoft_math/Word%202010%20for%20mathematics%20teachers%20-%20Gerrit%20Stols.pdf