If you are familiar with using desktop publishing software, you already know that it is very useful to create text boxes and have your text flow automatically from one text box to the next. Why would you do this? Well, suppose you have a newsletter! You could employ the use of text boxes to start your first article on the first page of your newsletter and have it continue on the next page. Really, there are many uses for text boxes. Text boxes are a graphical element in Word 2013 and you can use them as a decorative element in your document, as an information box, etc.
Follow the steps below to learn how:
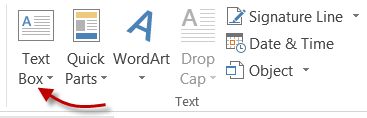
- On the Insert tab of your Ribbon, in the Text group, select Text Box.
- Once you do that, a context menu will appear and you can select any one of the text boxes that you like from the choices contained therein.
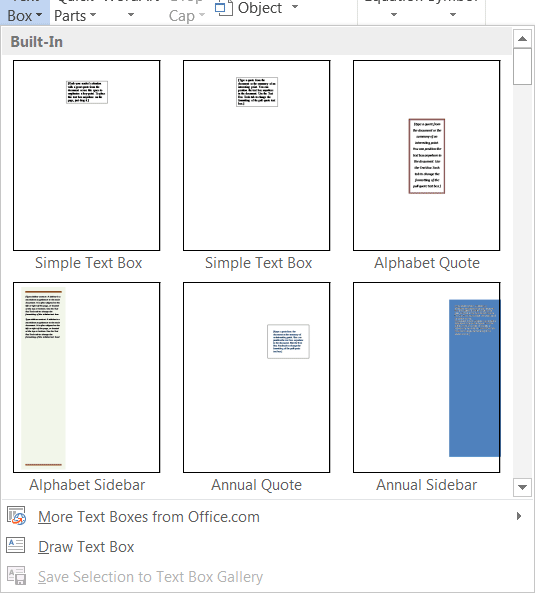
- Once you have selected a pre-formatted text box, it is splashed onto your page in your Word document.
- You will notice that there is text in the box you have selected.

- To add your own text to your text box, simply click in the box and begin keying in your own text.
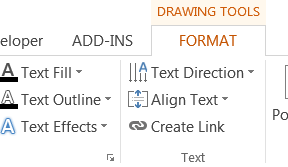
- If you look up, you will notice that the Drawing Tools Format tab appears whenever a text box is ready for editing on your screen. This tab contains of text box formatting and style commands. A lot of them are similar if not identical, to the formatting commands you use on images and graphics in Word 2013.
- You can also create your own text boxes by selecting the Draw Text Box command from the Text Box menu. Just drag your mouse to create your text box in the location of your choice.
- You simply click in your text box to begin keying in your text, as above.
- You can format the text in your text box as you normally would with any other text in your Word document.
- You can turn your text sideways inside your text box, using the Text Direction icon.
- Another method of inserting a text box into your document is to insert a shape into your document, clicking it and selecting Add Text.
So, now that you know several different methods of creating your text box, let’s discuss linking them so that your text flows smoothly from page to page.
Follow the steps below to learn how:
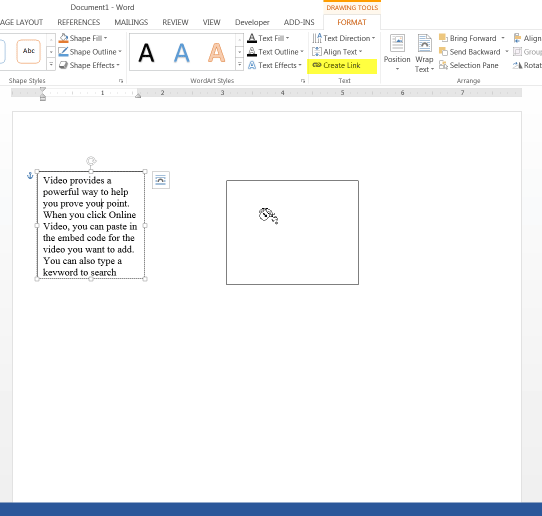
- Once you have created your first text box, click in it and key in =rand(). Once you do that click Enter and your text box will be filled with random text.
- So now, go ahead and create a second text box.
- Click in your original text box and then click on Create Link on the Drawing Tools menu.
- You will notice that a cup appears on your screen. Once you move it to your second text box you will see that it is filled and when click in that second text box, text from your original box will flow into your second one.
Knowledge is power! And now that you know how to do this, I am sure the knowledge will come in handy somewhere along the line!
…but how do you add comments to text boxes, if you cannot convert them to frames? Is this just not possible in Word 2013?